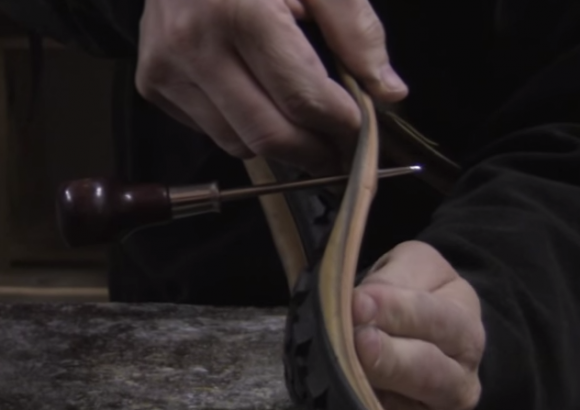
Today I'm going to show you how to take a mountain bike tire like this and turn it into a gnarly tire like this. You only need a few simple tools and a bunch of wood screws and you'll be ready to go. Okay, so the first step is to get the tire off the rim. We'll let the air out of the valve. The first simple tool you will need is a handy dandy tired lever. You could use a screwdriver but the problem with using a screwdriver is that you may puncture a tube while removing a tire. I'm gonna get this tire tool between the rim and bead and pull towards myself. Once you get once side off turn the tire around. You should be able to push and realease the tube and tire from the rim. Now we need to take the tube out of the tire.
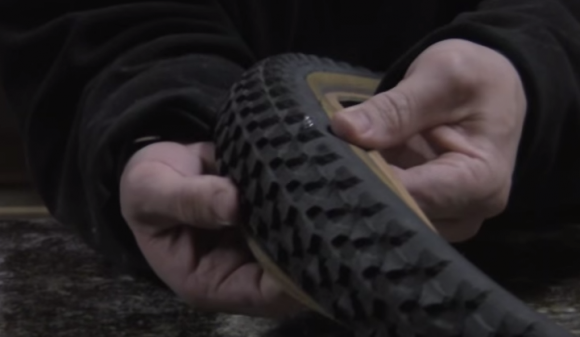
These are the types of screws that you can use for your studs. These are pan head screws, a type of wood screw. They're really pointy on the one ends and a phillips screw head on the other end. To do the front tire you'll need about 104, if you want to put a lot on. To get the screw started into the tire, we're going to use this punch all. It's a very sharp ended tool that we can drive through the tire to make a pilot hole. I counted the knobs on the outside edges of this tire, and there's eighty knobs that go all the way around, so if we do every other knob we'll need 40 screws for each side. Then I'll put every other one on the center sides right here, and leave the centerlines without any screws. The idea for leaving the center without any screws is that if you do have to ride on rough surface like a road or concrete, those screws would wear right down to nothing anyway, so the only ones that will be preserved are the ones here towards the side. All in all, I'm going to need 160 screws for this job.
I'm going to start by punching a hole with the all through the first side know and I can feel when it's coming through, I put my finger on the other side. I can just feel it move my finger to the side. Give a little support and push it through. Pull it back out and when I turn it over, I can see a little telltale mark. Some websites recommend that you use a drill to drill a hole in there. It might be easier to get the hole in there, but the drill will tear the fabric of the tire and actually ruin the integrity of the tire. I think the punch all is a better option.
Use Punch to Create Hole for Screw
Next, grab one wood screw, phillips screw driver, find my mark. I'm only going to screw it down until I can visually see the head of the screw meet the tire. If I spin past that, it will strip the rubber, and the screw can have a tendency to back out. We're 1 and 160th of the way done.
Correctly Placed Screw
Alright an hour later, we have all the screws in and now it's time to address the inside of the tire. We're going to need to protect the tube to from those heads by backing it with some type of material. What works really well is to just use another inner tube and slice it and use it as a backing and I'll show you how that is done. I blew it up just so I can see a line on the inside surface of the tire, because what I'm going to do is take my scissors and start a hole right on that line and cut all along the inside ridge of this tube.
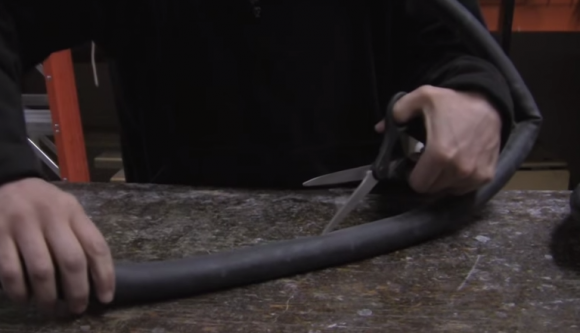
Cut Tube Along Line for Backing
After you've gone all around the tire, you need to remove the stem. Try to remove as little as possible and I'm going to cut the tire right where the stem is. Now this will be the the backing. Now I'm going to put the backing inside of the tire. Right now I just push it in there. The tube, when we blow it up with air will hold this in place, just get it close for now. The liner is in place and as you can see the two ends are really pretty close together. I've done tires where the gap was quite a bit larger and so one thing you can do is to get a hold of another old peace of tire and you can just make another strip to put behind it to make sure that gap is covered, but this'll easily cover all the screw heads on the inside.
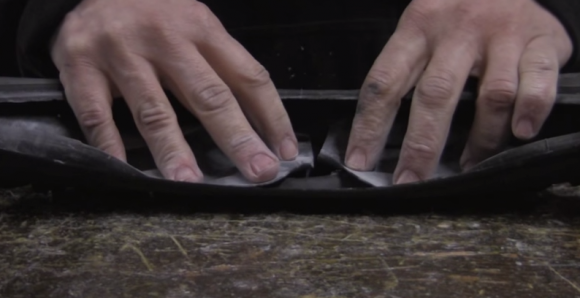
There Should Be Little or No Space Left for Backing
Alright, I just put just put enough air in the tube so that it has some form. Makes it a lot easier to get it back inside the tire. Now I'm going to double check to make sure that the liner is in position all the way around. Okay everything looks good and now it's time to put it back on. Most the tires to put on we just need the tire tool. Okay there it is ready for air. Okay one tire down one more to go. The back tire doesn't need as many screws. Mainly the back tire just needs screws toward the center, so that you have traction while you're powering your bike.