Cool Bike from the East Coast, Independent Fabrications Pursuit
Submitted by Joe on Tue, 10/19/2010 - 01:24Blog Tags:
 I always though nothing cool came from the east coast. Mostly because Washington DC and New Jersey are located there.
I always though nothing cool came from the east coast. Mostly because Washington DC and New Jersey are located there.

Cannondale OnBike Final Design
This is an early episode where Jim goes through parts of the bicycle. Jim starts with the front wheel, rim, tire, tube, spokes and hub, then moves on to the fork and brake and brake calipers.
Next he checks out the handlebars, brake levers, and bar tape. On to the stem, and headset which transitions into the frame, which consists of the headtube, top tube, down tube, seat tube, chain stay and seat stay.
Which brings us to the seatpost and saddle. Moving on to the drivetrain made up of the crank, chain, cassette, rear derailleur and front derailleur. What allows the crank to turn is the bottom bracket and that's pretty much what we're working with. See you on the road, bitches!
Joe's much less suave, and much more annoying rendition of "Part's of a Bicycle":

A collaborative effort between Independent Fabrication, Boston's Bodega and Portsmouth's Bailey Works.
This is a bicycle manufactured by Calfee. The awesome thing about this bike is that it's made of bamboo.
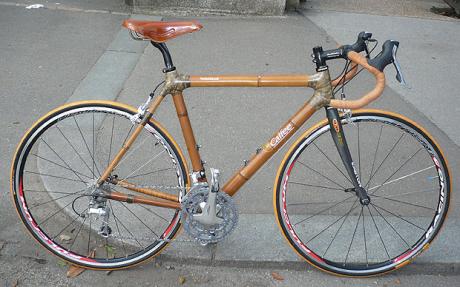
Calfee Bamboo Bike
Hola muchachos! Here is the bike of the week and holy shit is it badass. Custom build by Icarus Frames. Who needs a seat tube! Like whoa. Love the internal cabeling too.

Local bike mechanic from Citizen Chain in San Francisco, Sasha, goes through the tools he carries with him when he rides.
These are the essential tools he carries with him when he rides.
Tutorial on how to remove a freewheel from a bicycle wheel.
First remove the skewer from the wheel. Then identify the correct tool to remove the freewheel. Once you have the correct freewheel tool, place it over the axle and slide it into place on the freewheel. Then take the skewer you just removed and place it back onto the hub, tightening it down until there is a little pressure on the freewheel tool to hold it into place on the freewheel body.
Next grab a big wrench and place it on the tool and turn the freewheel tool counterclockwise.
If the freewheel is really tight, find a bench vise and place the freewheel tool into the vise. Once tightened into the vise, take a firm grip on the wheel, leaving the tire and tube on will help do this, and turn the entire wheel counterclockwise. This will apply and even pressure around the entire hub, and usually removes even the most stubborn freewheels, but unfortunately not stubborn wives or girlfriends. Finish up with a sip of beer.
When removing a freewheel the trick is to hold the freewheel tool firmly in place so it doesn't move when you are wrenching on it. To do this you can use the skewer to hold the freewheel tool in place while you use a large wrench or vise to grasp the free wheel. Always turn the freewheel counter clockwise to remove it.
Tutorial on how to install bike pedals. Pedals will usually have left or right hand markings on them, either on the body of the pedal or on the end of the spindles.
Starting with right pedal, first make sure you grease the spindle and clean the inside of the crank arm threads. As you install it pedal backward and hold the pedals straight, and make sure the threads engage straight. The pedal should thread on smoothly, if it is not, stop immediately and try again. You do not want to cross thread the pedal. Once it snug, give it one more oomf. And don't say um so much.
The biggest thing to remember about installing pedals is that the left pedal is lefty tighty instead of the usual righty tighty we are trained to remember. Once you get the pedal started you can just hold the wrench onto it and rotate the pedals backward to make it quick.