How to Overhaul Your Wheel Hub's Bearings

Company: 

Watching these YouTube videos, I am pleasantly surprised when someone can make a bike tutorial funny. Why I was pissing myself laughing at this particular video had to do probably with the deadpan tone of the narrator’s voice, in a Canadian accent, making little puns. It was pretty endearing.

How often you overhaul bike hubs depends, as always, on how you ride. If you’re off-roading it, you’ll probably want to do that once a year. Roadies will probably need to be doing it every other year. In both cases, if you go underwater (riding through huge puddles/lakes/swimming pool), get an overhaul as soon as you can. Things will rust and your ride will be crap.

You will need:

Cone wrench

Regular wrench

A magnet

Screwdriver

Grease (preferably not of the vegetable-based variety)

Degreaser

It is recommendable that you put in new bearings, seeing as that you’re already in there anyway. They are cheap and it’s better to err on the side of caution than not.

Remember: there are usually 9 in the rear hub and 10 to 11 in the front ON EACH SIDE OF THE TIRE. So there are normally 18 in the rear hub and 20 to 22 in the front hub. If you’re not sure about the size, take one into to a reputable shop and have them check for you.
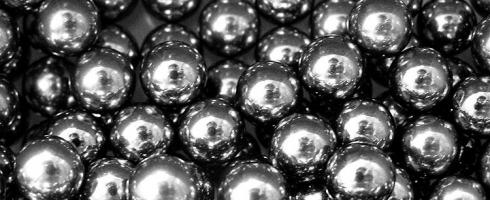
Bike Ball Bearings

With your wrenches, loosen the locknut or ring so that you can remove the spacers and the cone. Remember the order in which they came out. Remove the axle.

Make sure you carefully take out the bearings. Have a rag underneath to catch them, in case they fall out or roll.

Degrease everything so that you can carefully check for pitting.
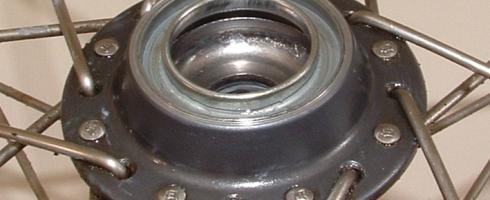
Pitted Bearing Race

When you’ve got everything clean and kosher, liberally apply grease, put in the ball bearings, the axle, cone, spacers and lockring. Make sure you even out the spacing on the axle so that when you actually put your tire on the bike, the skewer actually has somewhere to hold on to. 

How To Fix a Mountain Bike Rear Derailleur

How To Adjust a Mountain Bike Rear Derailleur

Whether you mountain bike down edgy rock gardens or slog out singletrack switch backs, glitchy gears can aggravate. Since, they are also dangerous, it is important to adjust the rear derailleur of your mountain bike right away.


Tools you will need:

Phillips screwdriver

5 millimeter allen key

Needle nose pliers.

Cable tension tool (not essential, but handy)


There are 3 screws on the rear derailleur body used for adjustment.

The H screw-one of a pair at the rear of the derailleur body.

The L screw-in a pair with the H screw at the rear of the derailleur
body.

The B Screw- usually underneath the parallelogram body.


Rear derailleur’s parts


Begin by opening the cable clamp using the 5 millimeter allen key relieving
the rear derailleur of all tension.

    This should allow the rear derailleur to hang directly below the frame.
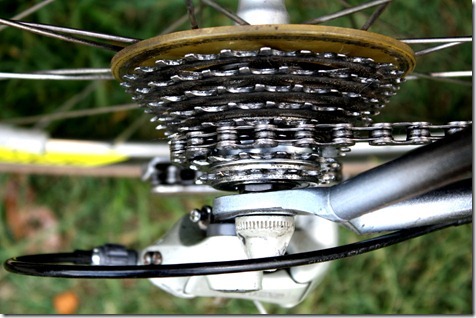
    The top pulley wheel, known as the jockey wheel, should be right below the outside cog in line with the drive side rear triangle of the bike. If pulley is not in line, try turning the H screw counterclockwise to align it with the chain. Turn the cranks moving the chain to check chain flow and alignment.

    Once pulleys are aligned with frame and outside most rear cog, try the
    lowest gear or innermost cog.
    Since it is still without any cable tension, the derailleur cage must be manually moved.


    Testing the high and low adjustments.

    Manually turn the cranks to ensure that it doesn't jump or move into the wheel
    or off of the largest gear. Make sure the barrel adjustment on the shifter is fully screwed in against the derailleur body. That way you as much screw to adjust as you tune.


    Tighten the cable clamp on the derailleur.

    You can pull the cable taut with your fingers or you use the cable tension tool-- but you can literally just use your hand. Then turn the clamp bolt tight without over-tightening.

    Make sure you have enough cable to throw the derailleur cage to the next
    several gears.
    Manually push your derailleur cage to see if you you have enough to travel to go through all the gears. Then, cut your cable approximately 1 inch past the clamp bolt. Putting a nipple on your cable end will prevent fraying.

    Fine tuning shifts.

    Click the shifter once to see how much the derailleur moves and how much
    move cable it uses.
    Circle the petals around and then click the indexed shifter one gear. If the chain doesn't move over properly then turn the internal barrel adjuster a quarter turn at a time until it does.

    Try that up each gear and then and then try back down again for all of
    them.
    If it is going too far then you need to reduce the cable tension at the
    barrel adjuster.
    You might hear a slight noise coming from the chain after you adjust. That is probably coming from the front derailleur. To check out a repair tutorial, click on the front derailleur on the bicycle diagram on the front page.

    How to Overhaul Your Bottom Bracket

    Company: 

    One of the ways you can keep your bike riding smoothly is by giving it a good cleaning, both inside and out. Overhauling a bottom bracket will most likely not be in your weekly cleaning regimen and depending on how you ride, you might not even have to really look at it too much. But it is a good thing to know how to do when the time comes.

    For this task, you will need several things:

    1. Crank puller
    2. 17 mm open end wrench
    3. Adjustable wrench
    4. Bottom bracket wrench
    5. Pin Spanner
    6. Hooked lockring wrench
    7. 36 mm wrench
    8. Solvent 
    9. Grease

    Keep rags on hand so that you can keep your hands and your bike clean. Small trays or containers are also handy when you take out the parts, and especially the ball bearings, so that you won’t lose them. And buying ball bearings can be a pain in the ass.

    When you’ve got the lock ring off, make sure to check for wear on your spindle and on your ball bearings.

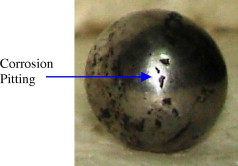
    Here's a pitted ball bearing:

    Pitted Ball Bearing

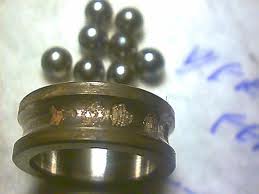
    And here's a pitted ball bearing race. If you see this, replace immediately.

    Pitted Ball Bearing Race

    How to Install a Bottom Bracket

    Company: 

    I like being thorough and bike mechanics requires a lot of attention to detail. If you don’t get it right the first time, your ride suffers. And the level of competence, time and patience can result in either a good ride or an accident.

    This tutorial is about how to install a bottom bracket, which is the point on the frame around which your pedals revolve. 

    There are different types of bottom brackets.

    You’ve got the cup-and-cone.

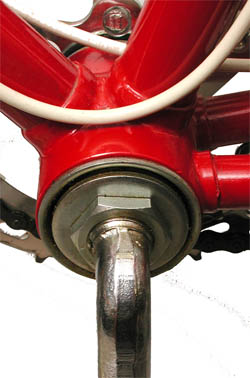
    Cup-and-Cone Bottom Bracket

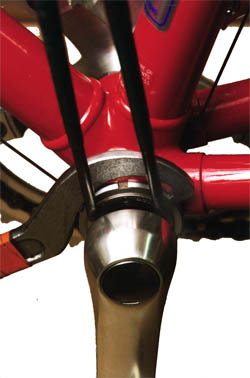
    You’ve got the cartridge. That tool above the crank arm is what will be used to remove the bracket.

    Cartridge Bottom Bracket

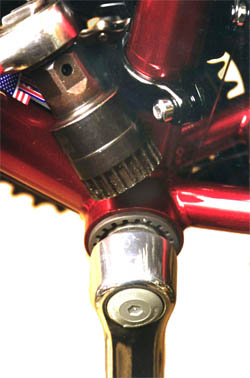
    And the one-piece crank bottom bracket. 

    One-Piece Crank Bottom Bracket

    Now, I’ve taken apart my bike and thought, “hey, that doesn’t look anything like that photo in my repair book!”, then get thoroughly annoyed and eat donuts out of frustration. To avoid that, I’ve included three different videos for your viewing pleasure. You may think it is going a little overboard but bear with me.

    The first is a GXP bottom bracket installation. GXP translates to “external bottom bracket” and eliminates the wear and tear of side-loaded bearings. Make sure you know which side is left and which side is right. 

    The second is a mid bottom bracket installation for a bmx bike. The mechanic gives a very clear explanation for the bearings, sizes and the actual fit. 

    The third is a personal favorite because even though this video isn’t of the best quality, it shows how you can create your own tools without damaging your frame. Now, word to the wise: this isn't the most recommended method but if worst comes to worst, this will get you out in a pinch. Plus it has 14 year-old-teenage-boy humor. 

    How to Bleed Hayes Hydraulic Brakes

    Company: 

    First things first: the Hayes system uses DOT 3 or DOT 4 mechanical brake fluid. DO NOT USE MINERAL OIL FOR THESE BRAKES!!!!!!!

    Second, the bleed starts from the caliper up to the brake lever.

    Third, wear gloves.

    You can get a bleed kit for this system so to prep your bike, you’re going to want to remove the caliper from the frame, remove the pads from the caliper and with the end of a 10mm box end wrench, push the pistons back into the caliper. Don’t push too far as you may break the post in the center of the piston.

    You will need a bleed bottle to hang on the side you’ll be working on. In the video, they use a bottle and some zip ties to hang it on the handlebars.

    On the caliper side, open the bleed port and attach your bottle filled with DOT fluid by using a box end wrench.

    One important thing to note is that the reservoir on the handlebars (particularly in the Stroker and the El Camino models) are already at the highest point on the bike so there will be no need to rotate the reservoirs upwards. Wrap a rag around the area where the reservoir so that it catches any excess DOT fluid. If this gets on your frame, you may be looking at some considerable damage to your paint job or even worse, to your components.

    You may want to remove both tires for this procedure.  

    Remove the bleed cap from the caliper and attach your bottle with the proper DOT fluid to the bleed port. You can secure it with a box end wrench. When all your bottles (and rag) are in place, open the bleed port by a quarter turn. With your bottle filled with new DOT fluid, squeeze liquid steadily into the system. And then release. Do that several times to make sure that you eliminate all the possible air bubbles trapped inside the caliper. Once you’ve done that, you can now give the bottle a good squeeze and get the fluid running through to the catch container.

    Watch the tube of the catch container and be on the look-out for bubbles and the color of the fluid. Once it goes clear, you’ll know that you’ve pumped the system clean.

    When that happens, you can close up the bleed port in the caliper and remove the bottle. Check to see if the pistons are still in their place with the box end wrench and go close the cap. If there is any excess fluid about, clean it off with alcohol and a clean rag.

    Re-install your brake pads and make sure you don't get DOT fluid on them. 

    Mount your wheel and give your lever a good couple of squeezes. Get the fluid pumping through the system. You’re done!

    This Fucking Guy. Washington state Rep Ed Orcutt Believes Bikes Release More CO2 than Cars

    Up in Washington state there lives a man, by the name of Ed Orcutt.  By some miraculous chain of events he holds public office, and yet he believes a bicyclist burns just as much CO2 as someone I'm an Assholedriving a car.  This story brings together everything that is wrong with transportation policy in America.  The story was first broke by the Seattle bike blog.  Ed made the clam in an email exchange with a local bike shop owner, who opposed a new bike tax in Washington's transportation budget.
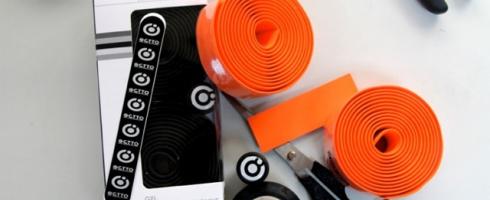
    Wrapping Handlebar Tape on a Bike

    Riding with ill-placed handlebar tape sucks. To make sure you don't have unsightly gaps and do it properly, you need a couple of things:

    1. Handlebar tape
    2. Scissors
    3. Finishing tape (electrical tape works well)
    4. Handlebar end caps (they usually come with your tape)

    Handlebar Wrapping Tape, Scissors, Finishing Tape and End Caps

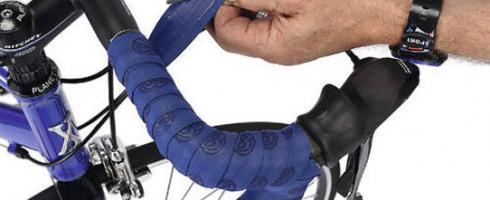
    Make sure you start the wrap from the bottom of the handlebar and work your way up. Leave a little overlap off the edge of the bar when you start so that you can tuck it in with the caps after you finish. As you work your way up, overlap in the ballpark of 1/4 of an inch. Overlap too much and you won't have enough tape when you get to the end. Overlap too little and you'll have huge gaps showing. 

    The tricky part is the brake lever. Roll up the brake lever hood and figure-X it. Work the tape over the top and then under, making sure you keep the tape taut so that you don't get a gap beneath. 

    When you finish, cut the tape at a diagonal so that your tape finishes flush against the end and use the electrical tape to have a nice smooth look to your handiwork. 

    Top 10 Bike Light Projects on Kickstarter

    Bike: 

    Kickstarter Bike Light Project FundingWhen you’re shopping for accessories, it’s good to keep your options open. Kickstarter’s motto is “Fund & Follow Creativity” and the projects on their site speak for themselves, among which are that necessary staple of every biker, the bike light. What you learn when you go through all these videos, however, are two things:

    Carbon Belt Drive Bikes: What Are They, Who Makes Them and My Top 6 List

    Bike: 

    As bikers, we all want to be spoiled for choice. The Triathlete wouldn’t dare ride their carbon fiber cheese slicer to the corner shop nor would the Downhiller even dream of busting out the double-suspension 29er for a coffee run.

    Solution? Why not give a carbon belt drive bike a spin for your commuter money?

    Specialized Roll 8 Rare with a Carbon Belt Drive

    How To Adjust a Rear Derailleur for Your Road or Mountain Bike

    Company: 
    Bike Category: 

    How To Adjust a Rear Derailleur on Your Mountain or Road Bike

    While today's indexed shifting can make shifting nearly effortless, when problems arise it can be annoying or even dangerous. A sticky, grinding or a jumping chain means it is time to inspect and adjust your rear derailleur. This job is best done after chain has been cleaned and lubricated.

    UnBolt Derailleur

    Adjusting a rear derailleur is a relatively easy step by step process that only requires a standard screwdriver.

    Rear derailleurs guide the chain from gear to gear. Rear derailleur adjustment is dependent on just three things:

    1. Derailleur alignment –this is the derailleur's alignment relative to the frame and drive train. The rear should hang parallel to the plane of the bike. This can be noted from behind the bike.
    2. Cable tension - this is controlled by barrel adjusters on the shifters on mountain bikes, derailleur body on all bikes, and in the case of road bikes at the down tube cable attachments.
    3. Stop or limit screws - two screws on the derailleur body limit how far the derailleur can swing to the outside (H) and to the inside (L); both keep chain from shifting off the cassette. This is where you will use a screw driver to adjust.

    Steps to fix a miss-shifting derailleur:

    1. First, inspect cable and housing to make sure they are not rusted, split, or cracked. If the cable does not move freely then watch video on How to Change Rear Derailleur Cable. Next, inspect chain for stiff links or bends by running chain backwards to see if it jumps. If jumpy, sticky or skipping, then you can try flexing back and forth to free. If links remain sticky, then check out another video on chains for instructions on how to fix.
    2. Next, If cable and chain are good, check derailleur cage alignment visually from behind the bike. It should be parallel to rear plane frame. If parallel, then you are ready to set H stop screw. If not dial in with H screw until aligned.

    Setting H adjustment screw:

    1. Shift derailleur to highest gear or most outboard.
    2. Look at pulley cage if it is too far outboard turn screw.
    3. If too far in turn (H) one turn counter clockwise.
    4. If not then check cable tension with barrel.
    5. Try shifting to next cog up if it makes the shift quietly, then skip ahead to setting ( L) screw.
    6. If not, then turn barrel adj to align with second cog.
    7. If good but noisy then fine tune tension with barrel adjuster to fine tune.
    8. Repeat


    Setting low gear stop (L)screw:
    Setting the upper travel limit for lowest gear is particularly important as improper adjustment can result in a bent derailleur cage, spoke damage, and a sudden stop on an uphill grade. Sometimes, all of the aforementioned can occur which can be dangerous and expensive. To set:

    1. Move chain to lowest gear (largest cog near the spokes) and then check cage to see if it is directly under with cog.
    2. Find L stop screw and turn until it just moves and then back off 1/16 of a turn

    Once you have done that, then shift up and down the gears while pedaling with your hand noting where any fine tuning is still necessary. Fine tuning can be accomplished through barrel adjusters on the shifters, derailleur body and on the downtube mounted barrel adjusters for road bicycles.