Patching a bike’s tire inner tube is much easier and faster than it sounds.
Step 1: Remove the flat tube from the tire
Remove the flat inner tube from the tire.
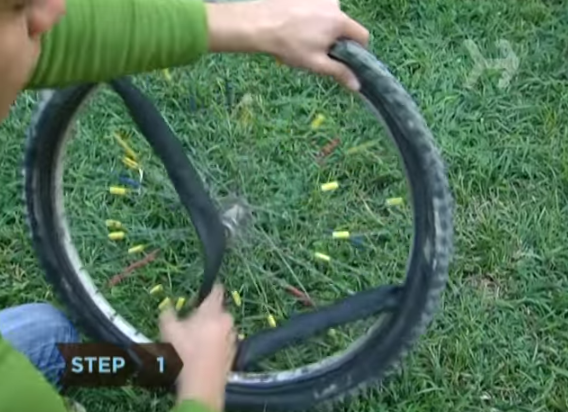
Remove Punctured Tube
Step 2: Attach tube to a pump
Attach the inner tube to a bike pump.
Step 3: Pump up the tube
Pump up the tire until it’s full of air.
Step 4: Listen for the escaping air
Listen for the hiss of air escaping from the tube. Bring it close to your ear to help.
Tip
Using a bowl of water, run the air-filled tube through the water. Look for a stream of bubbles emanating from the tube. That’s where your hole is.
Step 5: Let air out of tube
Cover the hole with a finger, detach the pump, and let all the air out of the tube by pressing down on the valve stem.
Step 6: Lightly sand the area around the leak
With your sandpaper, lightly sand an area around the leak larger than your patch.
Step 7: Wipe the leak area clean
Wipe clean with your hand or optional towel.
Step 8: Cover the sanded area with glue
Cover the sanded area with glue.
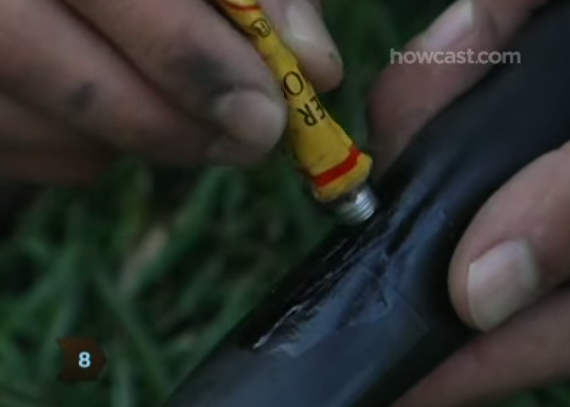
Cover Punctured Area with Adhesive
Step 9: Let the glue dry
Let glue dry for 5 minutes.
Step 10: Put the patch over the leak
Separate the patch from its backing and place directly onto the tube, pressing it firmly into the glue.
Tip
A good rule of thumb is to replace a tube after you’ve patched it three times.
Step 11: Remove the cellophane cover
Remove any cellophane cover over the patch and you’re ready to go.

Remove Cellophane from Installed Patch
Did You Know?
Bike patches are typically more durable than the tube itself.