Bike Crankset
Crankset Fixes, Reviews & Guides

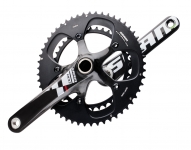
Crankset Review: SRAM Red Carbon Exogram
Counter to logic, Sram did the seemingly impossible. They made a lighter crankset by increasing its size and made it not only lighter, but also stiffer by removing material.
...
Type: Review
Shimano Dura-Ace Double Crankset Review
Shimano Dura-Ace 7800 Double Crankset:
Shimano Dura Ace Crankset
This is the new version of Shimano’s dura-ace race crankset. The dura-ace crankset is...
Type: Review
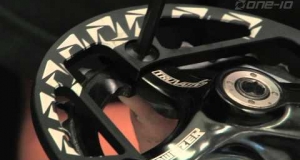
Install a Bashguard to Increase Ground Clearance
A bashguard is a plastic or aluminum ring that replaces the largest chainring. Its purpose is to increase ground clearance and help the bike slide over logs and rocks. It also protects the...
Type: Repair Tutorial
Review: Shimano SLX M665 Crankset
Shimano SLX M665 Double Crankset Review:
Shimano SLX M665 Crankset with Double and Triple Set-ups
Shimano’s cross-country and all-mountain bike crank set...
Type: Review

Review: SRAM Force CX1 (1x11 group)
A quick look at SRAM's new Force CX1 1x11 group:
1x11 groups, with 1 chain ring in the front and an 11-speed cassette in the back have gained wide popularity in all styles of mountain...
Company: SRAM
Type: Review
Review of SRAM Force 22 Group Set Components
Sram Force 22 Review:
Force is right below Sram’s top-end Red group set. Any Sram branded 22 is their 11-speed version. Currently they have Sram Red, Force, and Rival in 11-speed...
Company: SRAM
Type: Review

Remove 'Cotter Pin' Cranks from a Vintage Bike
This video will show you how to remove ‘cotter pin’ cranks.
Cotter pin cranks are generally older cranks and are found on older bikes.
The seat clamp in the video is used to hold the...
Type: Repair Tutorial

FSA's Top of the Line K-Force Light Crankset
FSA Cranksets are sought by both professional and amateur riders because of their light weight, high stiffness, and great power transfer.
FSA K-Force Light Carbon...
Company: FSA
Type: Review
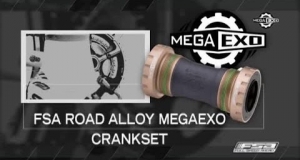
Install and Maintain FSA MegaExo Crankset
FSA Road Alloy MegaExo Crankset installation:
You will need the following tools: FSA MegaExo BB Cup Tool, torque wrench, FSA MegaExo Socket Tool, grease, and a 4mm & 5mm allen key....
Company: FSA
Type: Repair Tutorial
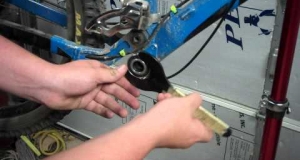
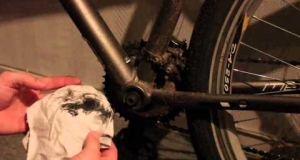
How to Stop External Bottom Bracket Creaks and Remove Cranks
Taking off crank and eliminating creaks:
This video will deal with external bottom bracket styles. You will need a chain breaker, bottom bracket puller, 8mm allen, 4-5-6 mm allen, a...
Type: Repair Tutorial
Mounting of CeramicSpeed with BB30 Bottom Brackets and Tool
CeramicSpeed bearings are hand made in Denmark from the finest quality components and special CeramicSpeed balls. Each part is designed to have the lowest friction possible and the longest...
Company: CeramicSpeed Park
Type: Repair Tutorial
Installing Press Fit Ceramic Bearings in BB95 Bottom Bracket
Installation of Press-Fit bottom bracket ceramic bearings on a 2011 Gary Fisher Superfly 100 Elite. Company: Park
Type: Repair Tutorial
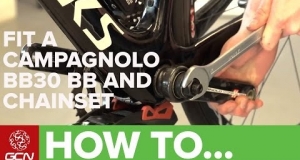
Install Campagnolo Over Torque (BB30) Bottom Bracket and Cranks
In this video, we're going to show you how to fit a Campagnolo over torque bottom bracket and change set. The over torque bottom bracket is a standard BB 30 press fit. To do this job, you'll need...
Company: Park Campagnolo
Type: Repair Tutorial
Fix Bike Crank Bolt Issues
For the most part bolts that creek or are loose are a pretty easy fix, either tighten them, lube them, or replace them. That's partly true with bicycle bolts as well but when dealing with the...
Company: Truvativ
Type: Repair Tutorial
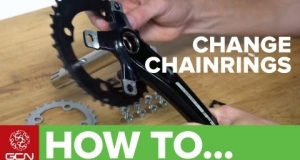
Replace a Road or Mountain Bike Chainring
Why would you want to replace your chainrings? Well, it might be that you’re upgrading them, changing the size, or you might want to experiment with some Osymetric or Rotor rings on the road. If...
Company: Park Campagnolo Shimano
Type: Repair Tutorial
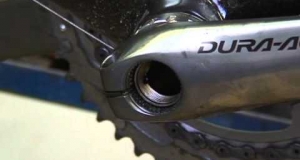
DIY Hollowtech II Crank Installation
The crank is the powerhouse that keeps your bicycle moving and from time to time the unit needs to be replaced or you might just want an upgrade. One such improvement can be made to your cycling...
Company: Continental Shimano Dura Ace
Type: Repair Tutorial

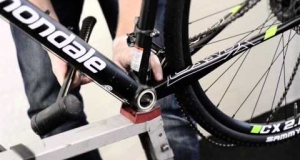
How to Replace an SRAM Crank and Bottom Bracket
I'm Mike from tree fort bikes. Today we're gonna show you how to remove and install a SRAM crank and external bottom bracket.
To do this work we're going to need a few tools, a 16 notch...
Type: Repair Tutorial
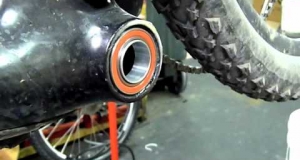
How to Replace a Shimano Threaded Bottom Bracket
There are too common types of bottom brackets on modern bikes.
One is the press bit the other one is the threaded which is exactly what we've got on this bike. Here in this video we can...
Type: Repair Tutorial
Shimano Component Groups for Mountain Bikes: A Comprehensive Overview
Just in case you mtb-ers thought I forgot about you, think again.
Here’s a look at all the component groups for mountain bikes that Shimano has out, starting from the bottom up.
...
Type: Blog entry
Shimano Components Groups for Road Bikes: A Comprehensive Overview
Shimano is a major components company. That said, there are TONS (and I seriously mean TONS) of different options that you can choose from when you buy a component group from this maker.
...
Type: Blog entry
The crankset is the guts of the drivetrain. It consists of the pedals, crank arms, chainrings, and the bottom bracket working in concert transferring power from the rider's legs to the cassette and eventually the rear wheel.
The crank arms connect the bottom bracket axle with the pedals. They are manufactured from many materials, such as: aluminum alloy, titanium, carbon fiber, and some steel alloys. The Shimano "Hollowtech" crank arms are made by casting around a hard metal that when removed leave a hollow space, saving on weight.
Crank arms can vary in length, which affects the amount of torque a rider can apply to the drivetrain (in one gear). However, bicycles are built to have many gears and the length of the crank arms is only customized to fit the length of the rider's legs.
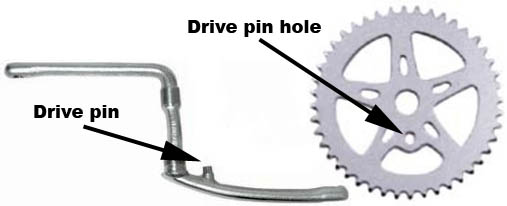
There are numerous interfaces which crank arms attach to the bottom bracket. In the old days, one piece cranksets were used. The crankset is threaded through the bottom bracket, and the pedals are attached when it's in the frame. This design is powered by a pin on the crankset sitting in a pinhole on the chainring. One-piece cranksets are hard on the bottom bracket because of the loads being applied differently as it rotates and rolls in-frame.
Most cranksets now are multi-piece, consisting of 2 or 3 pieces, depending if the spindle is independent, or attached to one of the cranks. These disperse the load applied on the spindle by the rider more evenly during use, and results in less maintenance.
Cranksets can be built for many purposes of riding, so there is a lot of diversity in the market. Big-name manufacturers such as Campagnolo, Shimano, SRAM, and FSA seem to have a crankset for every budget.

On the lower end, cranksets can be just a little more than $50. The only bottom bracket interface we could find for this price were square-tapered.
Middle of the road cranksets are around $150 on Amazon.com. Here you can start to find cranks made by the manufacturers we all know and love. The metal alloys can be trusted to be durable, and they come in a variety of interfaces.

The most expensive cranksets to be found from companies like SRAM, Campagnolo, and Shimano on Amazon are around a jaw-dropping $3,300. These are for the cycling junkies and competitive animals that make up the world-class circuits we can only watch on tv or dream about in our sleep. Obviously these interfaces are all Octalink or ISIS drive. What makes a crankset worth that kind of money? Generally, higher-end cranksets are much lighter weight than the cheaper ones. They are comprised of advanced alloys and carbon fiber designs.
Replacing a crankset is actually a really easy process, and aside from differences in the interfaces, the same with all multi-piece cranks.
To remove:
Square taper cranks will have a hex bolt of some kind pinching the cranks together between the bottom bracket. Unscrew the bolts and the cranks can slide off the spindle. Remember that the bottom bracket system is a tight squeeze, so if the spindle has a hard time coming out, a rubber mallet can be very convincing.


Octalink and ISIS drive crank interfaces require a special tool called a crank puller(kinda like a freewheel remover) to fit in the interface grooves and the threads in the spindle. A nut on the crank puller threads in until it's snug. As the handle is then rotated, it drives a pin through the shaft of the crank puller, separating the crank arm from the spindle. Be very careful that all threads are snug, and not cross-threaded. With a crank puller tool, any Octalink or ISIS drive crankset can be unscrewed and removed.

To install:
Remember to put the chain on the bottom bracket shell before installing the crankset. Obviously the crank arms need to be 180 degrees opposite of one another. On the intricate Octalink or ISIS drive interfaces, improper installation can damage either the crank arms or the spindle.
When the cranks are aligned and fit into their respective interfaces, the bolts should be tightened to around 305-391 inch pounds (according to ParkTool.com)
Crank length is something often customized by the rider, and has a significant affect on the performance and comfort of the rider. Most standard crank arms can range in size from 165-180mm, but other specialized cranks exist. Riders have different sized legs, and differences in their muscle flexibility. In order to keep an easy cadence with the correct amount of travel each stroke, each rider needs a different setup. Saddle height can account for leg length, but the stroke is determined by the length of the crank arms. Some riders can use extremely low handlebars and bounce their quads on their torso as they ride. Others aren't so flexible but might have stronger muscles in different areas, so a shorter stroke is preferred for them. Another factor is if a rider has a longer foot, they can naturally extend more. If the length is too long, you run the risk of bottoming out the crank arms in the corners, so take care.
Experts have different opinions on how to calculate proper crank length. One formula sounds off:
Crank length in mm = inseam measurement (in inches) x 5.48

Inseam measurement is a fancy word for the length between the ground and the crotch of the rider.
A common theory is that a longer crank will give the rider more torque on the bottom bracket, providing a more powerful stroke. The Martin study shows that between 145mm and 170mm, there is no statistically significant difference in the amount of power a rider can provide. Even if proven, bicycles have multiple gears designed to spread the power band of the rider through a wide range of speeds.
Another theory is that crank arms should be 9.5% of the rider's height:
| Rider's height | Crank length |
| 6'0" (1828mm) | 177.5mm |
| 5'11" (1803mm) | 175mm |
| 5'10" (1778mm) | 172.5mm |
| 5'9" (1753mm) | 170mm |
| 5'7" (1702mm) | 165mm |
| 5'5" (1651mm) | 160mm |