The crank is the powerhouse that keeps your bicycle moving and from time to time the unit needs to be replaced or you might just want an upgrade. One such improvement can be made to your cycling prowess by installing the new Hollowtech II cranks from Shimano. These DIY tips will lead you to complete the process perfectly and effortlessly.

Hollowtech cranks
The drive side is installed first when putting on any new cranks. Start on the right hand side of the bike and put the spindle all the way through the opening in the frame. Once the right side is completely in you switch to the other side of the bike and attach the left hand piece. A small bolt goes in on the left hand side and is tightened with a 5mm Allen wrench. Don't tighten the bolt completely just yet though.
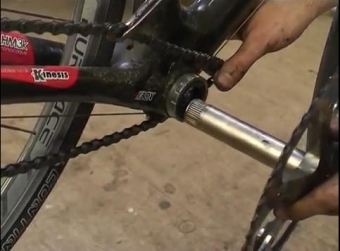
The spindle side is inserted first
Bearings are installed next with a preload tool that's often used when installing a headset. The cap fits on the bearing and can be hand tightened as much as possible. Once the bearings are in place you can go back and tighten the bolts with the 5mm tool. The bolt doesn't need to be insanely tight but once you are comfortable with them the Hollowtech cranks are installed and you're ready for the road.
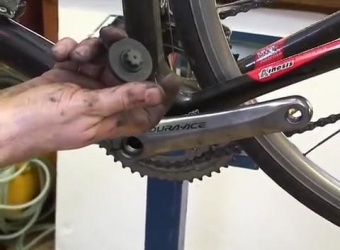
The preload tool is needed for bearing installation