Today we're going to walk through the basic steps to get you set up with the Fox RP 23 rear shock. The following few steps are essential so that you can get the best performance from the rear suspension on your new bike.
The first step is to set up your rear suspension with the correct amount of sag. You'll need to measure the length of the shaft so that you'll know the total stroke length of the shock. Make sure that the pro pedal lever is in the open position, away from the air valve.
Open Postion on Lever
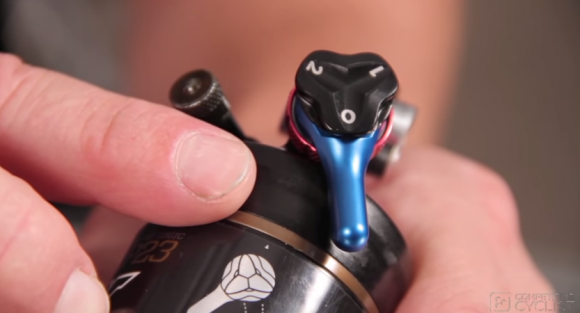
There are a few differences between the old RP 23 and this newer RP 23 with adaptive logic pro pedal. The key element for the setup is that you realize that the black dial needs to be adjusted so that the 0 lines up with the blue lever and that the blue lever is flipped away from the air valve. This way, the rear shock is as lightly damp as possible and the rear suspension can sag accurately while you fine tune your air adjustments.
To start, push the rubber o-ring against the lip of the air can seal and with riding gear on, mount the bike and settle into a normal riding position with your hands on the bars. It's not necessary to bounce up and down to get your sag position and then try to dismount as smoothly as possible without bouncing. The o ring will have recorded your sag position and you can measure it from the o-ring to the lip of the air seal. This measurement should be about 25 to 30 percent of the total stroke length. Of course this depends a bit on the suspension design and personal preferences. You can add or remove air with a shock pump and follow the steps again until you get your sag setting within that 25 to 30 percent range.

Measure Movement of O Ring to Find Sag
Once you get your sag adjusted, you can adjust the rebound damping. Look for the red knob underneath the pro pedal lever. It adjusts the rate at which the shock returns to full length after compression. Turn it clockwise for slow rebound or counterclockwise for faster rebound. The rebound adjustment should be set to personal feel and riding style, but a good rule of thumb is to have the rebound as fast as possible without your suspension kicking back. Try riding off a curb as you fine-tune the rebound. Your rear suspension should absorb the drop easily without feeling bouncy afterwards.
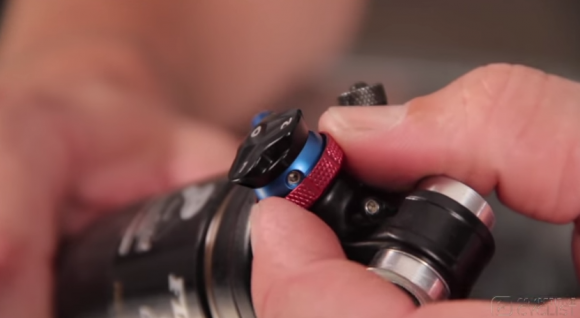
Adjust Rebound Damping with Knob
The pro pedal lever can be switched on the fly to reduce suspension movement. With adaptive logic pro pedal, the firm setting is called climb mode and it's a bit firmer than the number three setting on the older RP 23 shock. Use this when you attack a steep climb or on fast sections of trail when you must hammer down. The numbers on the black dial only affect the shock's performance when the lever is flipped away from the air valve. In this position, you have three available settings. As we said before, 0 is opened with no low-speed compression damping and is best for descending so you have the most active level of travel for comfort and control. Number one and number two have increasing levels of low-speed compression damping to offer a progressive level of pedal platform if you prefer a slightly stiffer shock. The various settings on the Fox RP 23 can be adjusted to suit personal preference, riding style, and different types of terrain.