Not only are RaceFace Atlas pedals incredibly easy to rebuild, but also really tough and light.
The first step is to use a 3mm allen to remove the spare pin form the end of the axle. Then, remove the end cap from the end of the pedal with a 6mm allen. Now we need to remove a 2.5mm allen from the end of the spindle. We’re going to hold the end of the spindle with an allen wrench, then take a 2.5mm allen and back this out. The remove the spindle.
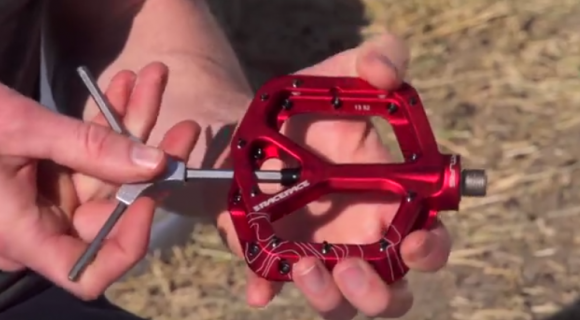
Remove Pedal End Cap with 6mm Allen Wrench
Next, take a flathead screwdriver and remove the seal. Use an 8mm allen wrench to pop out the 3 small bearings outside of the pedal. Now it’s time to remove the large inner bearing. We’re going to use a special tool that is supplied with the pedal rebuild kit to push out the big bearing. Insert the tool with the flat end pointed down underneath the bearing, then take your 8mm allen or a long punch, put it in through the other side, and tap out the bearing with a hammer.
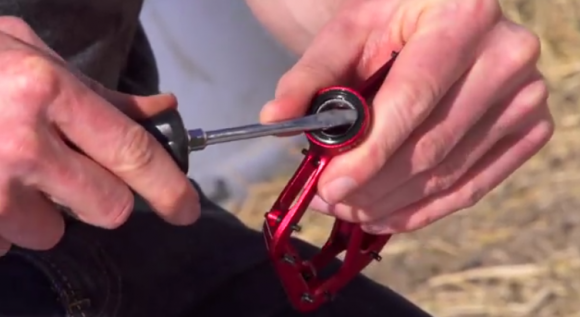
Use a Flathead Screwdriver to Remove Seal and Expose Bearings
Now, the pedal is fully stripped and is ready to have new parts installed.
Grease up the bearing seat. Take your new bearing and drop it in, then take the tools supplied with the kit, put it in the pedal, and use your hammer to tap it into place. Take the seal and put it in over top of the bearing and press it in with your fingers. Make sure it is seated all around into the groove in your pedal so that it stays put. Take the three outboard small bearings and install them into the end of the pedal. Use the same bearing press tool as you used on the other bearing, and use the opposite end to seat those small bearings on the outside of the pedal.

Reinstall Pedal Spindle with 8mm Allen Wrench
Grease up the bearing interfaces on the spindle, and install it into the pedal body. Use your 8mm allen to hold the spindle in place and take your small 2.5mm allen bolt and insert it in the end. Then install the 6mm end cap, and lastly, install the spare pin.