Bike chain
chain Fixes, Reviews & Guides
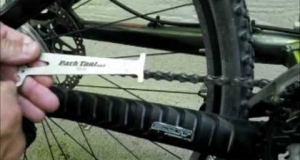
How to Check If Your Bike Chain is Worn Out
Chain wear can definitely affect your ride for the worst and can cause an accident. They wear out as a result of the rivets being pulled on by the outer plates. It’s what they call a chain...
Type: Repair Tutorial

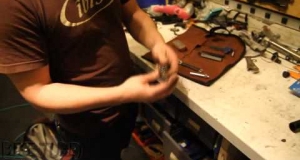
How to Install a Shimano Chain
Chains are where you can get a lot of grit and just plain dirtiness accumulating so it’s something you should clean and maintain on a regular basis. If you need to install a chain, remember to get...
Type: Repair Tutorial

Carbon Belt Drive Bikes: What Are They, Who Makes Them and My Top 6 List
As bikers, we all want to be spoiled for choice. The Triathlete wouldn’t dare ride their carbon fiber cheese slicer to the corner shop nor would the Downhiller even dream of busting out the double...
Type: Blog entry
Bike Tools to Bring When You Ride
Local bike mechanic from Citizen Chain in San Francisco, Sasha, goes through the tools he carries with him when he rides.
These...
Type: Repair Tutorial
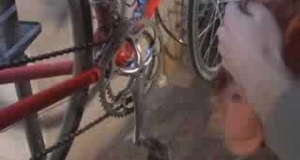
How to Clean & Lube your Bicycle's Drivetrain
A man and his rag: In this video we give you a quick overview of how keep your bike in superb running condition by keeping your drivetrain (i.e. cassette, chain, chain rings, dearailleur) clean....
Company: Park
Type: Repair Tutorial
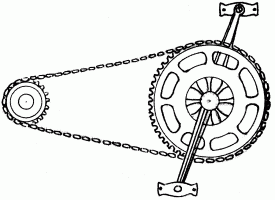
The chain is a component of the drive train that transfers power from the chainring (directly powered by the rider) to the cassette/rear tire. A roller chain works by having shared links on the ends of evenly spaced cylinders. It's driven by a toothed sprocket to transfer power.
There is usually a high level of tension and lots of wear on the chain from excess debris caught during use, which shortens the life of this component. The chain is intended to be cleaned and lubricated often to reduce friction and improve efficiency.
Replacing a bike chain is very easy.
Maintenance is making sure the chain is cleaned and lubricated as often as possible. It will always wear during use, but the life of the chain can be increased dramatically with a little lube.
If the current chain hasn't already broken, it will need to be with a chain cutting tool. The new chain should be cut to the same number of links as the previous one. Now's a great time to take note of how much that old chain has stretched!

The chain stretches over time by the links cutting into the rollers simply during use. Changing gears on some bikes isn't such a smooth transition, which speeds up wear. The links biting into the rollers cumulatively results in the chain stretching out a couple of millimeters. If your chain checker doesn't fit, it's time to replace the chain.

Wear isn't limited to the chain. The sprocket teeth (front and rear) wear down as well, and not having sharp teeth to grab the chain can lead to chain slippage or even missing a shift. If you happen notice a flaw in the chain, it could be from a bent link. The failing link can be found just by slowly pedaling backwards and listening to the chain pass through the rear derailleur.

With the new chain measured and cut to length, it's time to feed it through the drive train.

Route the chain through the rear derailleur and onto the largest rear cog, but let it hang around the bottom bracket to give some slack to make the connection.
Chains are joined in 3 ways:
- Special pin - Newer chains will have a reusable pin for removing and installing the chain for cleaning
- Master link - unique link that is snapped on
- Any pin - Chain ends are connected by putting a regular barrel roller through two links to complete.
When the chain is joined, make sure the joining link is bending properly as all the others. You can now feed it onto the chainring in the front, and the bike is ready to go!
The chains on bicycles are manufactured for 1/2" pitch. Pitch is defined as the distance between the same point on two teeth of a sprocket, so essentially it's the distance between the rollers in the chain.

Width of the chain varies from 11/128", 3/32", 1/8", 5/32", and 3/16". Different bikes use different widths of chain. For example, BMX and other common single-sprocket bikes use 1/8" chain, but racing and touring bikes use chains of 3/32 and wider.
It's important to find the right size of chain. Too wide, and it rubs against derailleurs and other cogs, too narrow and it gets lost in between gears on the sprocket.

The length of a chain should be determined by your bike's standards. It can be cut to the correct number of links by using a chain cutting tool. In general, the chain on multi-speed bikes must be long enough to shift onto the largest chain ring and the largest gear at the same time, but also not too long so that the slack cannot be pulled out when on the smallest gears. On single-cog bikes, the chain is simply the distance between the front chain ring and the rear sprocket.