Bike hubs
hubs Fixes, Reviews & Guides
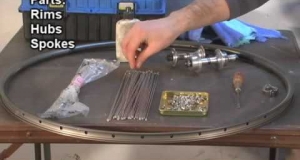
Part 2: Bicycle Wheel Build 36 Spoke
1. Find the extra hole for the valve stem. This will act as a guide and help you keep track of where you are along the rim. It is also important to look through the holes on the...
Type: Repair Tutorial
Part 1: How to Build a Wheel, Basics of Wheelbuilding (36 Spoke Wheel)
In this series we give you the basics of building a 36 spoke wheel. We begin with lacing the wheel, then show you the process of truing the wheel. So get everything together and make some time...
Type: Repair Tutorial
The hub is the component found at the center of the wheel. Internally, it contains the axle and the bearings necessary to facilitate free rotation. On the outer hub shell are flanges to which the spokes of the wheel attach. The cassette connects to and spins the hub via the freewheel, essentially a ratcheting mechanism that allows the drive train to propel the wheel and to coast when needed.

The freewheel part of the hub has two main designs:
- The cassette slides onto a cartridge attached to the side of the hub containing the freewheel.
- Interchangeable freewheels simply thread on to the hub. The cassette then threads onto the freewheel.

Some terms to remember:
- Axle - Firmly holds the wheel in the frame dropouts. It can secure the wheel by using a quick-release lever, or a nut and bolt design. Axle dimensions are standardized as much as possible in order to not interfere with alignment of brake systems to the wheels.
- Bearings - Tolerates the wheel to move freely around the axle. The bearings contain steel or ceramic spheres that allow smooth rotation.
- Flanges - hold the spokes and their tension, giving structural support to the rim and the whole wheel.
On the lower end, you can find many useable hubs on Amazon.com for just under $50. If this seems inexpensive, that's because it is. The hubs worth writing home about come in at around $100 along with the recognizable brand names. Competitive standard hubs for both mountain bikes and road cycles can run up to around $800. Any replacement part is available for the hub, so do some shopping before buying a brand new one.

There exists special "Rohloff Speedhubs" that have internal planetary gears (wired to a shifter) allowing a wide range of gear ratios to help performance. These are scarce because of their added weight, complexity, and effort due to the time required to "break them in." Speedhubs can become damaged by debris getting into the transmission, making them more frightening for mountain bikers. The limited number of speedhubs can range from $300 to over $1,500 online. Look out for developments into speedhub designs in the future.

Hub adjustments or overhauls can be difficult business. It is recommended if you are inexperienced in hub maintenance to start on the front hub. Without the complexities of drive train components as with the rear hub, front hubs are much simpler.
Some tools you need are:
- Cone wrenches
- Lockring removal tool (for rear)
- Bench vise
- Open-end or adjustable wrenches
- Small magnet
- Grease
- Wire ties
- Solvent
- Rags
Start by removing the wheel from the frame dropouts. On the rear hub, remove the cogs, and record the number of threads visible. It will be important later that the axle isn't exposed beyond the frame dropouts.

Secure the wheel in the vise. This may sound trivial, but it's always important to see what you're working on, and you save a lot of time when the wheel doesn't roll all over the workbench.


On the rear hub, remove the cogs and freewheel assembly now.
Using the cone wrench in unison with the adjustable wrench loosen the locknut counter-clockwise until it comes off. Tie all washers and locknuts in the same order which they come off from the hub. Locknuts are different on each side of the hub, so keep everything separate and organized. This saves time during reassembly.

Unscrew the cone of the hub (counter-clockwise). This will let loose the bearings being held into place. Count all bearings on each side, and remove with a small magnet.

With the bearings extracted, you can inspect all components for flaws or signs of wear.

Inspect the cups and cones for bumps and roughness, and the ball bearings and races for pits. Replace anything that isn't shiny and smooth like a new baby's bottom. Bearings are replaceable, cups are not. If the cup is damaged, a new hub will be required. Sorry bro.
The easiest way to inspect the axle is to roll it around on the bench. If it rolls flat, you're good.
Installation: You'll need a lot of grease.
Start with the axle, including the threads.

Grease the hub shell cups and cones. After the ball bearings are pressed into place, cover them with grease too.
NOTE: According to Park Tool, common number of ball bearings is 9, 1/4" balls in the rear and 10, 3/16" balls in the front hub on each side.
The easy thing to remember here is to reinstall everything in the same exact order as was removed.

Install the right side first, the bearings, the cone, and the locknut fully,
Install the axle through the right side, and assemble the left side. The bearings, the cone, but leave the locknut loose at this time.
Tighten the cone down fully. Now back it off ever so slightly. This sets the bearings in place, but gives the hub an important amount of play that is eventually taken out when the wheel is installed.
Tighten the left locknut (clockwise).

For the rear, reinstall the freewheel, and then cogs.

At this point, you need to note that the axle is within the dropouts completely. When the nut is tightened on the axle, it's in everybody's best interest that it stays there. It needs to pinch into the frame, and if it's hanging too far out, it might not reach. This could mean the hub width is different or if you have a new axle, it needs to be grinded down a couple millimeters.
When you get the wheel installed in the frame properly, you should feel the new bearings spinning smooth as butter.

- Weight: The hub is located as close to the center of rotation on a bicycle as possible. This means that the weight of the hub isn't as significant as the weight of other wheel components located further from the center of rotation (like spokes and nipples). On mountain bikes with suspension, the weight of the hub contributes to unsprung mass, as it is between the springs and the ground. On road bicycles, decreasing hub weight can affect steering characteristics. Lighter hubs mean less weight you need carry pedal down the road, plain and simple.

- Flange: Refers to the force applied on the hubs by the spokes. Spokes set to a greater tension will result in a firmer wheel. It's not quite rocket science, but tight-angled, dense spoke patterns don't create as much stress on a hub than those with spokes more spread out. When the hub is being torn in more polar directions, it brings greater upon the flanges, sometimes to the point of cracking and breaking.
Some manufacturers produce hubs with extra thick flanges, and their holes drilled closer to the axle. This extra material handles better the additional stress of radial lacing. Other manufacturers design their hubs to use with straight pull spokes, which apply loads differently.

- Other considerations: Before selecting a hub, consider compatibility with your rim. Some hubs are not available in very low or very high spoke counts. Pay close attention to the number of spokes on both the hub and rim to make certain they match.
- Width: Most front hubs are 100mm wide. Rear hubs range from 120mm to 160mm. Common sizes are 130mm for road and 135mm for mountain bikes.