Review: Shimano WH-R501 Wheelset

Company: 

Thanks to trickle down technology from Shimano's pricier wheels and slightly revised hub design, the WH-R501 is a great value for the budget conscious rider looking for excellent quality without adding too much weight.

Shimano WH-R501 Wheelset

Semi-aero rim profile offers aerodynamics without catching cross winds.

Alloy hub shell with steel oversize axle. Loose ball bearing hub design borrowed from top-of-the-line models for smooth performance and easy service.

Alloy hub shell with steel oversize axle

New seal design for improved all-weather performance 20 spokes laced radially front and 24 spokes laced 3 cross rear.

Traditional straight gauge (2.0) black stainless steel spokes with silver alloy nipples.

Quick-release skewers and rim strips included.

Shimano/SRAM 8/9/10 speed compatible 700c (15-622mm ISO).

1884 grams/wheelset (weighed without included skewers).

Review: Vittoria Open Corsa CX III Clincher Tire

Company: 

Vittoria's fastest clincher. The Open Corsa CX pairs a traditional construction with innovative technology.

Vittoria Open Corsa CX III Clincher Tire

The incredible Corespun 320 TPI casing delivers a light and supple "open tubular" ride quality, along with comfortable performance at high pressures. But where this updated model really stands out is its new IsoGrip rubber. This high-performance road compound is specially reserved for Vittoria's Corsa Evo line—they call it the Formula 1 of cycling. It's been meticulously designed to meet the demands of the pro peloton, blending reliable all-conditions traction with unmatched speed.

Vittoria's light PRB 2.0 belt has also been placed beneath the tread for even better puncture resistance without slowing the tire down.

The Open Corsa CX III is available in various colors, 700c x 23mm (23-622 ISO). Folding bead. Recommended pressure: 115-145 PSI. Actual weight: 216 grams.

Essential Items for a Basic Repair Kit

What to have in your repair kit:

This is for a basic repair kit- the essentials.

First, you should definitely have a pump. In the video is a morph pump, which can morph out and become a floor pump.

Second, you should have some extra tubes that fit the size of the wheels and tires used on your bike. If not tubes, at least have a patch kit, though you may find yourself with holes to big to be patched at times.

Having a little bit of cash in your repair kit that is separate from your pocket cash is always a good idea. You can use it for patching your tire or for buying something essential you may have forgotten.

Make sure to have a couple tire levers, usually 2 or 3. It can be a good idea to have three just in case one breaks while you are working with it. You will need at least two, typically, to get your tire off.

Tire Levers

Having a pair of gloves will come in handy. If you need to do repairs while you are on your way to somewhere nice and you don’t want to have your hands dirty, gloves will prevent that. Grease can be a pain to get off your hands without proper soap.

It’s really important to have a multi-tool that will have your allen keys, screwdrivers, and a chain tool in case your chain breaks.

Multi-Tool

Having a extra toe strap can come in handy. You can use it to cinch down things if something fell off of your bike. Obviously it can be used as an extra toe strap as well.

Toe Strap

A rag to wipe off hands and chain.

This is a really basic tool kit but is great to carry around riding in the city or a place where help and a bike store aren’t incredibly far away.

Installing Campagnolo Ergopower Integrated Brake/Gear Levers

Company: 

Installing Integrated Brake/Gear Levers:

To begin, peel back the brake hood. Slide a lever on to the handlebar into position and tighten with a 5mm allen wrench. Positioning should look similar to in the video.

Once Lever is in Position Tighten with a 5 mm hex

Thread the gear shift cable into the mechanism. In the video is a Campagnolo Ergopower 10 speed. Cut housing to length with quality cutters. Measure twice, cut once. Add ferrules where needed. Thread the rear derailleur cable through its housing and back through the first stop on the frame. You can position the cable on the bars and secure it with electrical tape. Now, thread the cable through the cable guide on the bottom bracket. Install your pre-cut housing between the stop on the chain stay and the rear derailleur, and thread the gear cable. Secure the cable to the rear derailleur.

Thread Cables Through Appropriate Paths and Housing

Now, following a similar procedure, lets thread a brake cable. Thread on your brake cable housing and secure it with tape. The rear brake cable usually runs along the top tube between stops to a second short cable housing. Push it through the cable clamp, but don’t tighten it just yet. When you install your brakes, add a little grease to the threads.

To install front derailleur cables, thread through the first stop on the frame and lead it back down under the bottom bracket. Thread through the cable guide and pull it up behind the seat tube. Pull it up over the pivot arm of the front derailleur and tighten it down.

Make Sure to Feed Cable Through Guide Under Bottom Bracket Shell

Now you are ready to do fine adjustments and tape your bars. Once that is done, roll the brake hood back into place. Make sure the hood doesn’t interfere with the free running of the mechanism.

Finally, clip and crimp your cables.

How to Overhaul Cup and Cone Hub Bearings on Bike Wheels

Overhauling and Adjusting Cup and Cone Hubs:

Many wheels run on sealed bearing hubs these days, but there are many good cup and cone hubs worth maintaining.

A cone wrench and a crescent wrench are really all you need to get started. Hold the cone in place and break the locknut free. Particularly if you are working on a rear wheel, you want to count the number of threads beyond the locknut. With the rear wheel, you will need to remove the cassette or freewheel. Remove the locknut and spacers, and remember their order. Now you can use your hands to spin off the cone and withdraw the axle. Clean and carefully examine the cones.

A Crescent Wrench and A Cone Wrench are Needed to Access the Hub

Now, turn your attention to the hub itself. Remove bearings from both sides of the hub. A magnetized tool can make this a lot easier. With degreaser, clean inside the hub shell. Buff the cup thoroughly, then examine it with a ballpoint pen for any pitting.

Remove Bearings From the Hub

If all is well, fill the cup with fresh grease and replace the bearings. Typically a rear hub will have nine 1/4” bearings and a front hub will have ten 3/16” bearings. Put some more grease over the bearings. Now, carefully slide the axle back in. Re-install the cones by threading with your hands. Make sure your threads are equally spaced here, so adjust them until they are. Then, replace spacers and locknuts.

Use Plenty of Grease When Reinstalling the Hub

The last part can take several attempts since you want neither binding nor play with the bearings. Work the cone and the locknut in concert until everything runs smoothly. Patience is key. When everything runs freely in the frame, you are ready to roll.

How to Put Hand Grips on Bike Handlebars

Here’s how to put a new hand grip on a bicycle.

To remove the old grip, you can just cut up the middle with scissors and pull it off. If you are trying to take it off and save it, then that’s much more work.

The secret ingredient for this is rubbing alcohol. If you put rubbing alcohol inside of the grip before slipping it on, then that will lubricate it and make it slip on easily. Then it will quickly evaporate, leaving the rubber to stick on to the handlebar. Other quick evaporating substances will work well for this too, such as nail polish remover, hairspray, or hand sanitizer.

Put Quick Evaporating Liquid On The Bar and In The Grip

Make sure the handlebar is cleaned and dry. Then place a little bit of alcohol on the handlebar itself and little bit inside the grip. Then just slide it on and put it into the position that is most desired.

Push The Grip On And Into Desired Position

If there are brake levers on the bike, loosen and move them over first, then install the grip and move the brake lever back to the desired position.

Give it about a half hour to dry or quicker out in the sun, and you are ready to ride.

Overview of Topeak Alien III Multi-tool

This video is an overview of the Topeak Alien III Tool, which is also featured in our blog post “The Bike Tube Presents: 2014 Holiday Cyclist Gift Guide” at http://thebiketube.com/blog/bike-tube-presents-2014-holiday-cyclist-gift-guide.

The legendary Alien III is one of most comprehensive cycling tools ever available. It features a stainless steel body for better strength and slimmer profile. 

Alien III Multi-tool with 25 tools

25 hardened steel tools fold into a compact body for a wide range of road and trail side repairs. Alien technology allows the tool to separate for more versatility when making repairs.

The Multi-tool separates for easier usage

Its fold out chain tool and chain hook make installing or repairing a chain much easier. The chain tool is compatible with all single and multi-speed bicycle chains, including the newest hollow pin chains. 

Fold out chain tool and chain hook make chain repair much easier

Here is a list of what you will find on the Topeak Alien III tool:

Tools 25 total
Allen Wrenches 2-L/2.5/3/4/5/6/8/10 mm
Torx® Wrench T25
Box Wrenches 8/9/10 mm
Spoke Wrenches 14 g/15 g/Mavic/Shimano compatible
Chain Tool Cast CrMo Steel
Chain Hook Stainless Steel Wire
Tire Levers One Hard Anodized*
*The metal tire lever is designed for durability and for emergency use only
Screw Drivers #2 Phillips & Flat Head
Knife Stainless Steel
Bottle Opener Hardened Steel
Disc Brake Spacer Engineering Grade Plastic
Compartments For Two Chain Pins
Tool Material CrMo Steel
Body Pressed Stainless Frame/ Engineering Grade Plastic
Bag Material HD Nylon
Size (L x W x H) 8 x 4.5 x 4.5 cm
3.1” x 1.8” x 1.8”
Weight 272 g / 9.57 oz
Art.no. TT2354

Continental Grand Prix 4000 S II 700c Road Tire Review

Company: 

With the Continental Grand Prix 4000 S II, the last compromise really has been eliminated—Conti's magic Black Chili performance tires are now available with bold, bright sidewall color options, so those looking for a little coordination no longer have to choose between the best performing tire and a sweet-looking ride.

Continental Grand Prix 4000 S II 700c Road Tire

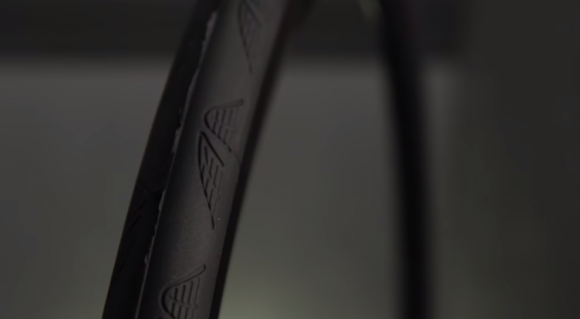
Despite its style upgrade, the Grand Prix 4000 S II is actually grippier, more durable, and faster than its predecessor. That's because Continental is able to improve their exclusive Black Chili just a little bit every year, thanks to their continued dedication to research and development.

What is Black Chili? It's a unique rubber compound with an ultra-dense construction and high silica content, allowing it to deliver outstanding grip and blazing fast speeds. This cutting-edge formula is also optimized for reliability and longevity, making it a great choice when both performance and durability are top priorities. Just like the name suggests, it's only available in black. Luckily, tje new colorful sidewall doesn't interfere with the tire's primary contact patch, so you get all of the benefits and none of the sacrifice.

Black Chili Rubber Compound Tire Skin

The GP 4000 S II also features Conti's patented Vectran puncture protection breaker. Vectran was originally developed by NASA in the construction of space shuttles and suits, and Continental has brought its otherworldly lightweight protection to bike tires, making these lightweight tires impressively flat-resistant.

All in all, the GP 4000 S II is Continental's most advanced racing clincher yet, with a truly unique blend of speed, durability, and, now, aesthetics. Thanks to the high-tech materials and years of testing and development, the GP 4000 S II delivers low rolling resistance and superb handling with exceptional puncture protection and higher mileage performance than a typical race tire.

The Grand Prix 4000 S features three fabric plies for a total of 330 TPI, and has a Kevlar folding bead and a max inflation pressure of 120 PSI. Black 700c x 23mm weighs 205 grams; color versions weigh 215 grams. The 4000 S II is available in 700c (622 ISO) and various widths.

DIY- Make Your Own Headset Cup Remover Tool

This video will show you how to make a DIY bicycle headset cup remover tool.

To do this at home, you will need a hacksaw, something to secure the tube such as a seat clamp or vise, a file, and pliers.

Start with an old or crappy seat post, however any tube of metal should work provided the diameter is not too big to fit into the bicycle. Thick walled aluminum works great because it is a relatively soft metal and has a low risk of damaging anything. Try to avoid using steel. One size tool will work for both 1” and 1 1/8” steering tubes.

The first this to do is remove the clamp end of the post. A hacksaw will do the trick and it will be easiest if the seat post is secured. Try to make the top as flat and straight as possible.

There is a slight angle at the end of the other seat post end. This will also need to be removed so the remover tool can properly grab onto the headset cups. You can file it down with a file. Now, this end will need to be divided into thirds. Mark where you will do this with a magic marker. It doesn’t need to be exact. Then divide it into sixths. Extend each magic marker line down the side about 2-3 inches. Once you have your guidelines drawn, go ahead and cut around them with the hacksaw. The cuts should be more or less equally spaced.

Mark on seat tube where to cut

When you are finished making the cuts, get a set of pliers and pull each prong up. You can bend and re-bend until they are more or less sticking all out at the same angle.

Make 6 cuts about 2-3 inches

Fold cuts out with pliers

To use the tool insert it skinny end first with the prongs at the bottom. Pull it all the way through until you hear it pop. Once it pops, push it back down so it rests on the headset cup. Then tap the skinny end with a mallet until the headset cup falls out, then turn over and repeat with the other side.


How to Correctly Lock Your Bicycle

Company: 

You’ve finally invested in a bike, now you need to know how to keep it safe.

The first recommendation for keeping your bike safe is to get rid of any quick release levers on your bike. Quick release levers on your wheels and seat post make reviving them easy. And that makes stealing them easy. By replacing any quick release levers with allen bolts or 15mm nuts, you are immediately making them more difficult to steal. However, this doesn’t mean they are completely safe.

Avoid Having Quick Release Levers On Your Bike

If you have a daily commuter that is locked up a lot, you might want to consider some daily camp for your ride. A bike that is fresh and clean attracts would be thieves. Try adding some creative touches to your frame, such as stickers of your favorite brands to cover up logos. This can make the bike look used even if it is brand new.

Lock Should Pass Through Solid Object, Frame and Wheel

Don’t ever leave your bike unlocked. To lock your bike using a u-lock, it is best to attach the lock through your rear wheel and around part of the frame. Make sure to lock it to a solid object that can’t be broken or moved. If you are using a chain lock too, loop this through the front wheel and around part of the frame. No lock is ever 100% safe. If someone has enough time and determination, they can cut through just about anything, but if you use these tips your can reduce your chance of just becoming another statistic.