Overview of Different Types of Panniers and Racks

This video will discuss some of the different kinds of panniers and racks to help you decide what is right for you when it’s time to go out a buy.

Racks: panniers are normally mounted on a rack on the rear of the bike. When looking for a rack you are looking for something that is good quality. Start by making sure the welding of the rack is good. Also, make sure it comes with good quality fittings, such as nylon locknuts. This will ensure that things don’t vibrate lose over time. Check what the rack is made out of. Preferably oversized aluminum or good quality steel. Think about what you plan on carrying. The more valuable and heavier your stuff is, the better quality it should be.

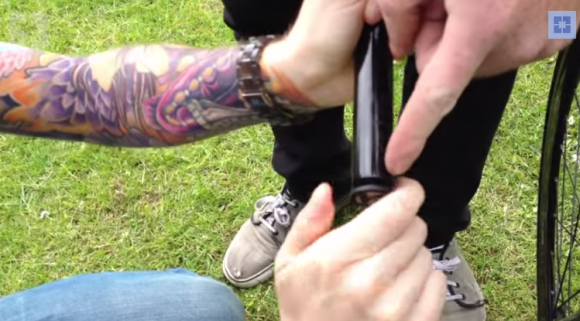
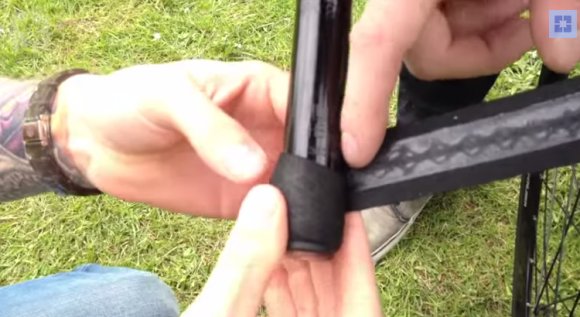
Pannier Bags: there are two common styles of rear bags. The double style, which is two separate bags. There are great because of their versatility. If you don’t have to carry a ton of stuff, you can take just one bag. The other common style is the one piece design. These can be good for people who are doing more touring over a longer period of time. The more material over the top of the rack itself creates greater weight distribution, which will allow you to worry less about the bags falling apart over time.

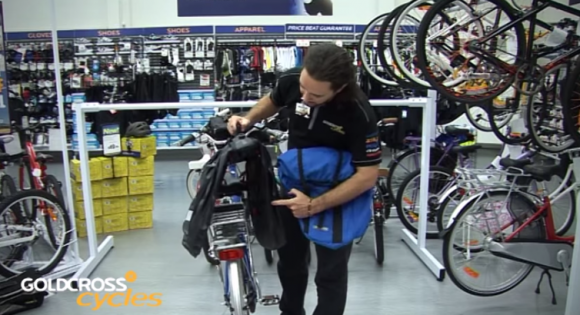
Examples of Two Types of Rear Panniers

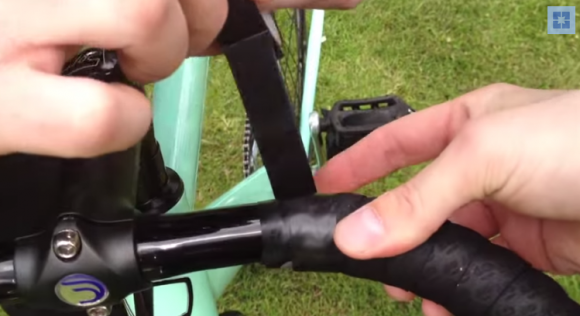
Front mounted pannier bags: these are often referred to as handlebar bags. They are good for short trips or when you don’t have a lot to carry. They are typically easy to put on and take off the bike, and are more manageable to carry around on your person.

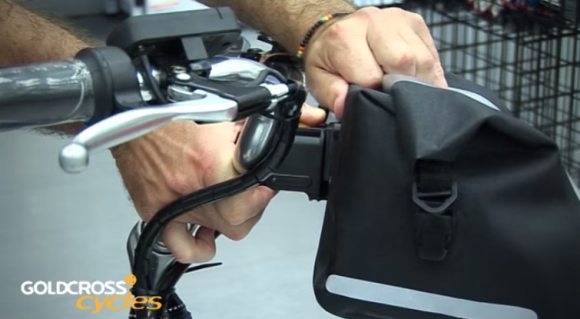
Front Mounted Pannier Bag

Rack top bag: this bag sits on top of the rear rack itself. Again, this bag is convenient because of its smaller size. It is a bit larger than typical front mounted bags, but not as large as full pannier bags.

Top 5 Road Bike Accessories

Company: 

5 of the most innovative road bike accessories to come out in the next year:

1. Garmin Vector S: the Garmin vector system are pedals that capture data. The vector S is a cheaper version of the vector system and only captures data from one pedal. Owners however will be able to upgrade to the left/right system eventually.

Garmin Vector System Pedals

2. Laser Wasp Air IS: this helmet helps create a perfect tuck position for ideal aerodynamics. The helmet sports a cut off fin. There is also an inclination sensor that alerts riders when they have strayed from the optimal head position.

Laser Wasp Air IS Helmet

3. SRM Power Control 8: expensive but undoubtedly pro, this bike computer has added gps and wifi. It looks set to be the top choice for racing teams. It has a fully customizable, high contrast screen, increased battery life, and an anodized aluminum casing. The wifi capabilities now stretch to SRM iOS app allowing for intense analysis of data. All of this technology weighs in at 90 grams.

4. PRO Saddle Fit: shimano finishing kit offshoot pro has designed a kit to find the ideal saddle based on physiology and riding style. A box is used to measure your sit bone width, which can then be put in to PRO’s 7 step system to find your perfect saddle. Select your discipline, input some basic data, choose your saddle look, and you will be presented with what Shimano thinks is the right saddle for you. If you don’t have a fully equipped PRO dealer close by, you can take measurements yourself and input into the PRO Saddle Selector on pro-bikegear.com.

Example of PRO Saddle Fit Kit

5. Lightweight Concept Wheel: german innovators Lightweight have come out with a smart wheel that will give real time feedback of tire pressure and braking surface temperatures. This wheel, however, is still a concept and not in production.

Top 5 Road Cycling Shoes

Company: 

Cycling shoes are designed for comfort and performance, but for the discerning rider fashion is just as important.

Here are 5 favorites:

1. Shimano R321: Shimano has been designing cycling footwear for decades. Their latest offering, the R321, draws all of their expertise into a single package. It has a super stiff carbon sole and is incredibly light at 489 grams for the pair. It has a new clean look buckle with the ratchet attaching to the strap instead of the shoe, which also improves aerodynamics. Needless to say, the R321 doesn’t come cheap, but the R171 is a similar and cheaper alternative.

Shimano R321

2. Giro Prolight SLX II: the pro light sox has been around for awhile. In 2015, Giro has made improvements to both form and function, issuing fancy buckle all-wire attention systems in favor of 3 simple velcro closures. They way less than 200 grams per shoe. The easton EC90 carbon sole makes the stiffness of the shoe. There are replaceable heel pads, titanium hardware, and a natural fit footbed. It also comes in 3 colors.

Giro Prolight SLX II

3. Mavic Cosmic Ultimate: these are a modern take on a classic Mavic shoe. The most obvious change is the boa style closure system, which augments the velcro straps. These create a cleaner look and enable easier adjustments on the fly. 230 grams per shoe.

Mavic Cosmic Ultimate

4. Cube Road Pro: cube are new to the shoe game, but impressive nonetheless. Cube has come up with the road pro as a more affordable shoe. They are still light at just over 300 grams per shoe. The sole is stiff nylon.

Cube Road Pro

5. Lake CX 402: the upper portion of the shoe is made of kangaroo leather on top of a carbon sole. They are both tested in comfort and performance. They also come in a multitude of sizing options and are fully custom moldable.

Lake CX 402

How to Find Gear Ratio on a Fixed Gear Bike

How to guide on gear ratios:

The chain ring is the name for the ring the chain sits on in the front of the drivetrain or by the pedals. Every chainring has teeth on it, though the number of teeth on a given chain ring changes.

On the back of the drivetrain where the chain sits by the wheel, you have what is called a rear cog or sprocket. These will also have teeth on them.

The more teeth on the chainring, the higher gearing you have. Think of it this way: the more teeth your have on the chainring, the harder it will be to pedal the bike. The less teeth on the chainring, the easier.

Find the number of teeth on your chainring

On the rear cog or sprocket, the opposite logic applies. The more teeth on the rear cog, the easier it will be to pedal. The less teeth on the rear cog, the harder it will be.

Find the number of teeth on your rear cog/sprocket

On the bike in this video, the rear cog has 16 teeth and the chainring has 42 teeth.

In this case, 16t:42t will be your gear ratio.

Putting Handlebar Tape on Drop Bars

For this you will need some bar tape, electrical tape or the tape that it comes with, and the bar ends.

Start off by putting your bar end in so it is straight, but don’t put it all the way in. Leave a little bit of a gap. When beginning to put the bar tape on, leave a little bit of excess hanging over the end of the handlebar. This way, once you wrap the bar tape around you can fold it in and secure it by pushing the bar end in all the way to secure the excess tape. Make sure no excess is hanging out.

Leave a small gap between bar end and handlebar to begin

Now, you should be ready to start rolling the tape around the handlebars. You’ll notice the underside of the handlebar tape has a sticky surface. When wrapping, you want to align the middle of the bar tape with the end of the sticky tape. Do your best to create even gaps with the tape while wrapping and to make sure you pull it tight while wrapping.

Sticky surface on underside of handlebar tape

If you have brakes on your drop bars. You can use a small bit of the bar tape to put over the top of the brake to help evenly wrap around. However, on a fixed gear, like in the video, there are no brakes and this isn’t needed.

Secure handlebar tape with electrical tape

Once you reach the end of wrapping the handlebar, use the tape that comes with it or electrical tape to secure the end of the handlebar tape to the handlebars. Don’t hesitate to add more than is given to ensure that it is secured.

How to Remove Paint from Bicycle Frame

How to remove paint from your bike frame:

There are a few things you’ll need when removing paint from your frame: paint remover, paintbrush, some steel wool and/or some sandpaper.

The first thing you want to do is get a rag and maybe some water. Wipe down the frame and make sure the surface area is nice and clean.

Once the bike is clean, fill a small container with the paint remover. Use the brush to spread the paint remover over the frame. You don’t need to make sure it soaks in or anything, but just layer it on top. Do one coat of this all over the frame. Then leave the paint remover on the bike for 5-10 minutes and paint should begin to peel off a tiny bit. After about 10 minutes, apply another coat of paint remover and wait for about 40 minutes.

Apply Paint Remover to Frame with a Brush

Once the 40 minutes is up, use a tool that will allow you to scrape the paint off of the bike. A number of tools will be suitable for this. When you have gotten down to the bare metal, use sandpaper and steel wool to get any little leftover paint off of the bike. Sanding will definitely take awhile so be prepared.

After 2 Coats of Paint Remover and Waiting, Your Frame Will Look Like This

That’s how to remove paint from a frame!

Quickest and Easiest Way to Remove Broken Spokes from a Bike Wheel

Company: 

How to remove spokes from a wheel (this should apply to all bicycle wheels and not exclusively fixed gear):

This video will show you the quickest and easiest way to remove spokes. For this, you won’t need a spoke key or wrench, just a pair of pliers.

Clip the Spokes with a Plier

Clearly this is a way to remove old spokes very easily when you are looking to get them off your wheel fast. You will still need to remove the tire and tire tube, and will potentially have to remove the cassette front he wheel as well if you plan on installing new spokes on the drive side of the wheel.

How to Inspect, Remove, and Install a Cassette

How to remove and install your cassette:

For this job you will need the appropriate cassette lock ring removal tool, an adjustable crescent wrench, and a chain whip.

Equipment check: start by giving the cassette a spin. It should spin freely. Next, wiggle the cassette. It should have a little bit of play but not a lot. Now do the same thing with the axel. This should have no play at all. A lot of play can mean bigger issues. In this case, bring your bike to a bike shop.

Use a chainwhip and cassette lockring removal tool

Cassette removal: start by placing the chain whip on the cassette. This stops the cassette from spinning when you go to loosen the lockring. Now insert the cassette lockring removal tool into the lockring. If it doesn’t fit, it is most likely the wrong fit. Put the crescent wrench on the lockring tool opposite of the chain whip. Once you loosen it, feel free to use your hands to finish the job. Once the lockring is removed, the cassette should pull right off.

Look for the small slit on free hub

Look for small slit on cassettes when installing

Cassette installation: wipe down the free hub body and apply a light covering of lube to prevent future corrosion. When installing the cassette, look for the small spline on the free hub body. Line that up with the small notch on your cogs, and they will slide right on. Almost all cassettes will have a stamp with a tooth count. That should always face outward. After you get the cassette back on the free hub body, apply a small amount of grease onto the threads of your lockring and hand tighten it onto the cassette using the tool. Then give it a final tighten with the crescent wrench. Tighten until it stops clicking.

How to Check and Adjust a Front Derailleur

How to adjust a front derailleur:

Before you adjust your front derailleur, make sure that the rear one is working properly. For this job, all you will need is a 5mm allen wrench, a phillips head screwdriver, chain lube, and a shop rag.

Equipment check: look over cable and housing. If it is frayed or broken then you need to replace it. Make sure your shifter is working by detaching the cable and shifting through all the gears. Check your derailleur to see if the cage is bent. The outside of the cage should run in a straight line. Check for overall wear on the derailleur by giving it a little wiggle. If it has a lot of play, then the springs and pivots are most likely worn and the whole derailleur should be replaced.

The outside of the front derailleur cage should run in a straight line with the chain

Placement & alignment: make sure the derailleur is in the right location by looking at it from the side view. It should be 1-2mm above the biggest chainring when it is shifted out there. Next, make sure that the cage is aligned with the chainring. Look down from the top to see that it runs parallel with the chainrings. Changing the placement or alignment is done by loosening the front derailleur clamp bolt and moving it by hand to the desired location.

The front derailleur should sit 1-2mm above the largest chainring

Low limit adjustment: this keeps your chain from falling off to the inside. Start by shifting the rear derailleur into the lowest gear. Now use the low limit screw to move the derailleur just until it touches the chain, then back it off 1 mm. Once this is done you are ready to reset the cable and cable tension.

Cable tension: start by closing any barrel adjusters and clicking the shifter into the lowest gear. The derailleur should have an obvious notch in it to show where the derailleur should be clamped. Pull the cable tight with your fingers and clamp it to the derailleur. Remove any slack by opening the barrel adjuster.

Adjust front derailleur cable tension with allen wrench

High limit adjustment: used to make sure your chain doesn’t shift off of the biggest ring. Turn the high limit screw just until the derailleur touches the chain, then backlit off a mm. Now put a little chain lube on the pivot points and try out your shifting.