How to remove and install your cassette:
For this job you will need the appropriate cassette lock ring removal tool, an adjustable crescent wrench, and a chain whip.
Equipment check: start by giving the cassette a spin. It should spin freely. Next, wiggle the cassette. It should have a little bit of play but not a lot. Now do the same thing with the axel. This should have no play at all. A lot of play can mean bigger issues. In this case, bring your bike to a bike shop.
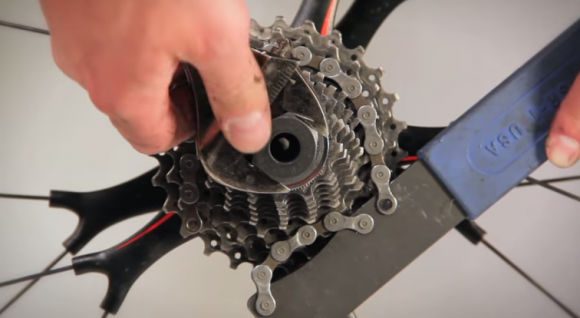
Use a chainwhip and cassette lockring removal tool
Cassette removal: start by placing the chain whip on the cassette. This stops the cassette from spinning when you go to loosen the lockring. Now insert the cassette lockring removal tool into the lockring. If it doesn’t fit, it is most likely the wrong fit. Put the crescent wrench on the lockring tool opposite of the chain whip. Once you loosen it, feel free to use your hands to finish the job. Once the lockring is removed, the cassette should pull right off.
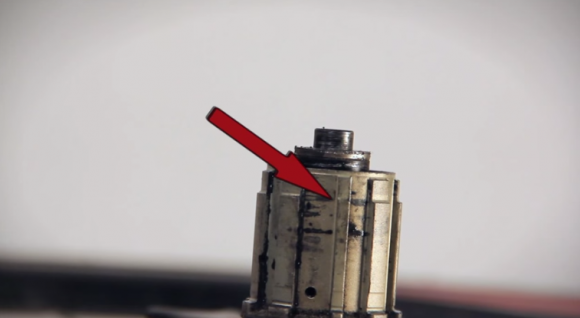
Look for the small slit on free hub
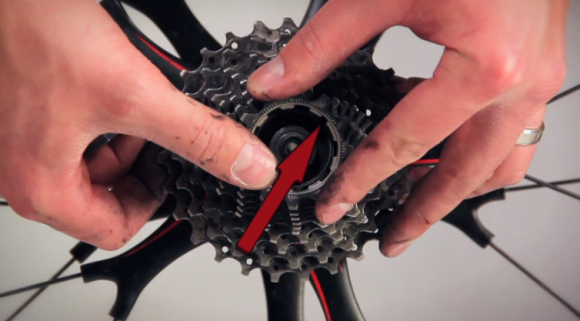
Look for small slit on cassettes when installing
Cassette installation: wipe down the free hub body and apply a light covering of lube to prevent future corrosion. When installing the cassette, look for the small spline on the free hub body. Line that up with the small notch on your cogs, and they will slide right on. Almost all cassettes will have a stamp with a tooth count. That should always face outward. After you get the cassette back on the free hub body, apply a small amount of grease onto the threads of your lockring and hand tighten it onto the cassette using the tool. Then give it a final tighten with the crescent wrench. Tighten until it stops clicking.