Review of SRAM Force 22 Group Set Components

Company: 

Sram Force 22 Review:

Force is right below Sram’s top-end Red group set. Any Sram branded 22 is their 11-speed version. Currently they have Sram Red, Force, and Rival in 11-speed compatibility.

Performance: shifting compared to the old 10-speed force is a lot faster and way more crisp. The shift levers take less power and action to get it up or down the gears with the double tap levers. The ergonomics and shape of levers have changed as well. The levers are a little bit longer, so it will throw your hands out a little bit farther.

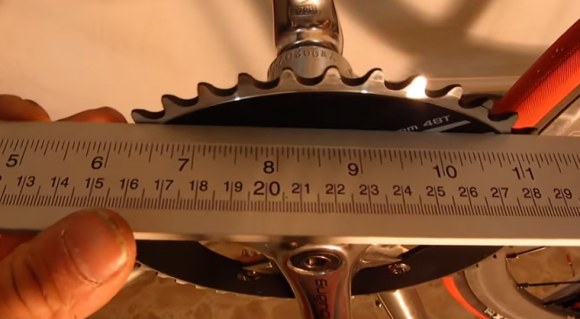
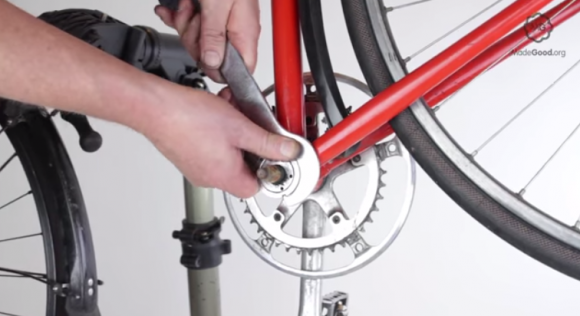
The brakes are one category that hasn’t changed much from the old Force brakes. They are basically last generation’s Red calipers, so they are a little bit lighter. The Force crankset is stiff and use the new style Sram Red rings, which are a little bit heavier than last years, but are stiffer and improve shift quality.
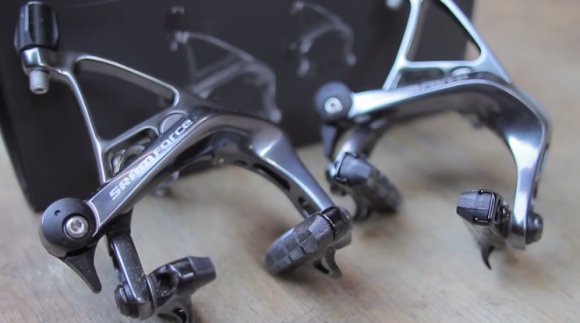
SRAM Force Brakes

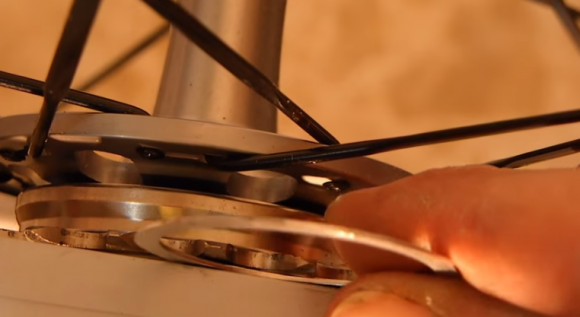
The front derailleur has yah adjustments. This basically means that the derailleur actually pivots so you never have any cross chain rub on the front derailleur. The rear derailleur also has the new option of having wi-fly, which means you can go up to a 32-tooth cassette in the back.

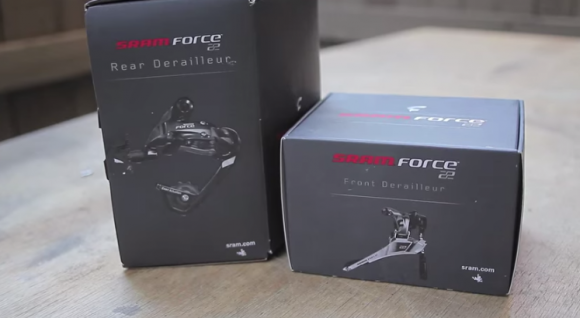
SRAM Force Derailleurs

Cosmetics: Sram always delivers a fresh and clean look with their group sets. UD carbon across the board as far as any carbon materials that are used. It also has simple, light graphics that don’t call attention to themselves.

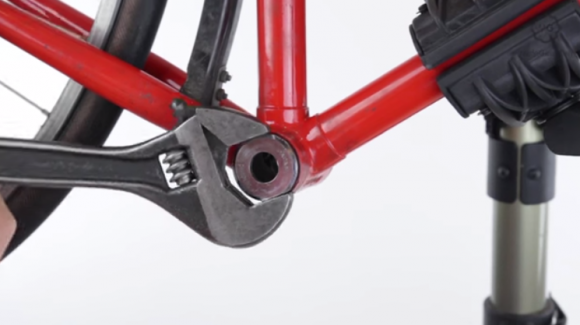
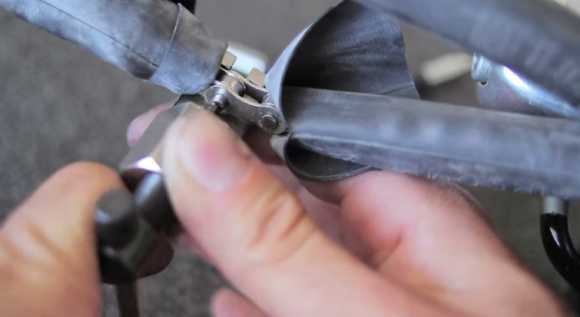
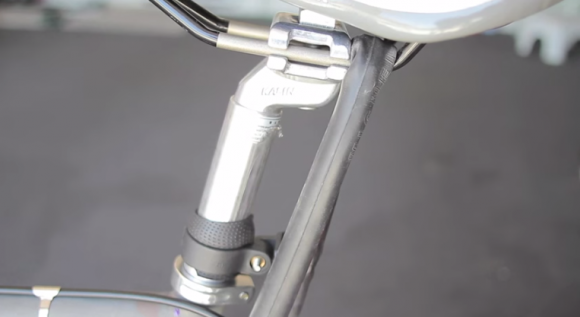
Installation: Sram Force 22 is like installing any other group set on your bike. If any advice, it would be to make sure you take your time with the front derailleur. It has a very different way to set it up initially.

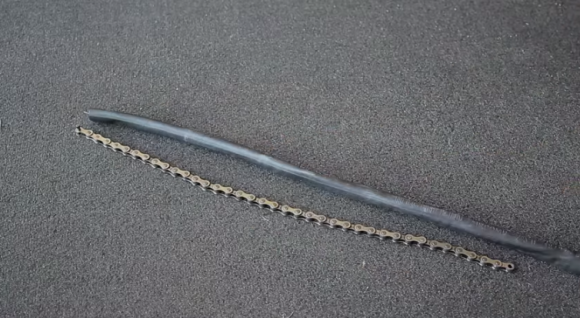
Compatibility: Let’s say you have a 10 speed bike and want to upgrade it to an 11-speed. You will need a wheel set that accommodates that. If you want to save money, you don’t actually have to change your crankset or brakes, even though Sram may hint at it. The only things you really would need to change are the shifters, both derailleurs, a cassette, and a chain.

Price: the full group set can run upwards of close to a $1000, but you can upgrade in pieces and only buy certain aspects which can save you some money.

Overall, these are great for someone interested in a performance group set that is lightweight and won’t cause you to break the bank like Sram Red would.

Check Fixed Gear or Single Speed Chainline

When getting a new freewheel or changing some aspect of the drivetrain on your single speed or fixed gear, it is important to check the chain line on the bike to ensure straightness.

Start by removing the chain on your bike. It’s not necessary to completely remove it, but you will want it off of the cog and the chainring. Once the chain is off grab a straight edge of some kind. In the video, a large caliper is used. Lay this flat against the chain ring, making sure not to accidentally lay it on the chainring bolts.

Lay a straight edge flat against chain ring

Use this straight edge to gauge the amount of space between it and the cog. In the video, you can see there is about a 1mm separation, indicating the chain line isn’t as straight as can be. If the chain line indicates you need to make an adjustment, then you will need to remove the freewheel, which requires a freewheel removal tool and adjustable wrench. Once the freewheel is off, use spacers to adjust the freewheel accordingly. Using these spacers as a way to measure how off the chain line is initially will help you know how many to put on when adjusting. Reinstall the freewheel with the spacers, then check the chain line again. Hopefully, you are good to go.

Shims or spacers are a great way to measure distance between straight edge and freewheel

Remove 'Cotter Pin' Cranks from a Vintage Bike

This video will show you how to remove ‘cotter pin’ cranks.

Cotter pin cranks are generally older cranks and are found on older bikes.

The seat clamp in the video is used to hold the crank stationary while hammering occurs. The chainring side of the crank will always be a bit more difficult to remove on cotter pin cranks because the chain rings get in the way. This can be solved by using a long piece of metal that extends past the chainring to hammer on or just be persistent.

All you will really need to remove the crank is an adjustable wrench and a hammer. This is a little hex nut on one side of the cotter pin. Remove this hex nut first using the adjustable wrench.

Tap threaded side of cotter pin with hammer

The cotter pin will come out of the cranks from the side opposite the threads, so to remove the pin you will hammer the threaded side. Give it a couple hard whacks. If you are hoping to restore the cranks or use them again be more careful during this step since the cotter pin can bend if it is hit too hard. They do not really make cotter pin cranks anymore, so if the cotter pin is bent you will have to replace with more modern cranks. Hammer on the edge of the cotter pin as square as possible. Once you hammer the cotter pin down it should slide out the other side without much more than a wiggle. However, if really stuck, using a screwdriver or something that will fit in the whole and tapping it out with the hammer will work as well.

Pull cotter pin out from top

Essentials to Carry When Out On a Ride

This video is about all the bike riding essentials you need to carry with you when you go out riding. A lot of riders don’t normally think of these things when buying a bike, but they can be essential from preventing you from getting stranded while out on a ride.

Here are some essentials:

Tube- you should always have at least one on you at all times. The size will be determined by the size of the tires you are running on your bike.

Tire Tube

Tire Levers- a set (Pedro’s can be seen in video) will be needed to remove the tire from the rim. This will almost always require more than a single tire lever.

Tire Levers

Pump- there are different styles of pumps you can carry. A frame pump or a Co2 pump. Co2 pumps are smaller and will help the tire go to a higher PSI, however they require Co2 cartridges.

Bicycle Pump

Presta Valve Adapter- this will come in handy if you have presta valves and need to use a standard pump, such as what you may find at a gas station.

Presta to Schrader Valve Adapter

Tire Boot- this will become necessary if you develop a big enough gash in your tire that replacing the tube is not a solution by itself.

Tire Boot

Bar Tape or Electrical Tape- these can come in handy for a variety of things including making a DIY tire boot.

A Multi-Tool- carrying this will allow you to adjust or tighten anything that comes loose while you are riding. Look for a multi-tool that has a large gambit of tools so you never have to worry about having to have the right tool to fix something when you are on the go.

Multi-Tool

To store all of these items, you have a couple of options. 1, throw them in a backpack. 2, put them in a saddlebag and hang the below your saddle. 3, store the items inside of a cheap water bottle.

Install An External Cup Headset Without A Press

How to install an external cup bike headset without a press:

To do this project at home you will need bike grease, a piece of wood or something similar, and a hammer. The reason for using a piece of wood is because it’s not going to damage your headset or your frame.

Ideally you would take this to a bike shop, but if you do choose to do it at home, be extra careful because you can damage your headset and possibly even your frame.

First step is to lube your headset and lube the inside of your bike with the grease. Then, carefully align the headset in the frame. Feel free to align the logo according to your preference.

Carefully Align Lubed Headset Into Frame

Next, take your piece of wood and put it on top of your headset. For the first few taps on the headset make sure to go very slow, being sure that the headset is going in evenly. This is the most critical part so don’t rush it. Constantly walk around each side of the bike to make sure it is going in evenly.

Slowly Tap the Headset Into the Frame, Making Sure It Goes In Evenly

Once you get your headset seated, you will see a lot of your bike grease shoot out of the sides. Wipe the grease off and make sure the headset is fully flush with the frame. Don’t be afraid to give it a couple extra taps just to be safe. Now, all you have to do is repeat the same process on the other side.

How to Rotafix (tighten/loosen) a Fixed Gear Cog without Chain Whip

How to Rotafix:

Rotafix is a technique for tightening or loosening a cog without a chain whip.

Why Roafix? Because standard chain whips do not fit 1/8” cogs, and you get the mechanical advantage of the entire wheel for tightening.

When performing a rotafix, wrap a rag around the bottom bracket shell to protect the paint on your frame from being damaged by the chain.

Protect Frame by Putting Rag Under Chain

The aim is to wrap the chain so it jams. Then, when you turn the wheel the chain will hold the cog and tightened or loosened depending on the direction you rotate the wheel.

Wrap the Chain so It Jams

Wrap the chain under the cog to tighten it and over the cog if you want to loosen it. The cog should have text on one side and it should face outwards. When installing the lockring, grease the threads. Tighten the lockring. It is left hand threaded.

DIY: How to Make Your Own Bike Lock

How to make a DIY bicycle lock:

a similar lock will cost about 100 dollars from a bike store. The benefit of buying in store is the warranty that generally comes with the lock. If you send in a cut lock, you will be reimbursed with the price of the bike.

This is a cheap alternative to the store bought lock that will look just as beefy and can be done on a budget. All you will need is one or more popped tubes, a padlock, electrical tape, and a length of chain that can be bought from a local hardware store. When selecting a chain size, pick something in the middle. You don’t want something too bulky and heavy or too light and fragile. The length will determined by your body size. Take the chain, wrap it around your body diagonally across your chest to determine the length needed. This is if you will be wearing the chain when you ride.

Wrap the chain with tire tubes

Take your tube, cut the valve stem off, and cut the tube down the middle and wrap your chain in it. You can do as many layers as you like or have tubes for. The more layers the more comfortable the chain will be. Take your electrical tape and wrap the ends of the tube. Add the lock on the end and you have your DIY lock.

Connect the two chain ends with a padlock

Steps for Removing an Adjustable Bottom Bracket

Remove an adjustable bottom bracket:

start by first removing the cranks. A lockring on the outside of the left hand side cup is an indication that the cup and cone bottom bracket is serviceable. Turn this counter clockwise to unlock the cup. This is easiest with a lockring spanner that fits the notches on the ring exactly. You can also use a universal tool with one tooth or tap it around with a hammer and an old screwdriver. Remove the lockring.

Start the process with a lockring spanner

Once you have removed the lockring, you can remove the cup. If it has hexagonal flats, turn it with a spanner. If the cup and cone bottom bracket has holes, use a peg spanner. Turn the left hand cup counter clockwise. The left hand cup is the adjustable cup.

Remove the left cup and collect the ball bearings from the left side. They may be loose or in a clip. Pull out the axel and note which was it fits. It may not be symmetrical. Once side may be longer than the other. Remove the ball bearings from the other side.

Remove the fixed cup with an adjustable wrench

On most bikes the fixed cup, the one on the right, is screwed in on a clockwise thread. The exceptions are some old italian or french bikes. The fixed cup may have two shallow flats or be hexagonal.

How to Put Decals on a Bike Frame

How to apply decals only your bike:

For this you will need the decals, wax and grease remover, rag, and painter’s tape to prevent you from damaging the paint on your bike or ripping any off.

It is important to take your time with this. Since you are doing it yourself, take your time making sure the decals are aligned properly on the bike. Start by prepping your surface. Spray down the area where you will be applying the decal first with the grease remover and wipe it down with a clean rag or towel. Using a microfiber rag is ideal because it doesn’t leave any lint behind.

Next, take time to figure out the proper alignment for your stickers. Again, be patient with this. Once you have figure it out, take the painters tape and loosely mock up where you want to place the first decal. Then triple check that the decal is aligned with the frame and isn’t crooked.

Mock the location of the decal with painter's tape

Mock the location of the decal with painter's tape

Pull back the backing off the decal, and leave it off the adhesive tape on the front. Slowly apply the decal from one corner, wiping all the way over. Once you do this, you must be committed to where the decal is placed on the tube.

Align the placement of the second decal by taping a line from the first

Use your tape as a guide to find the proper alignment on the other side. Tape across the tube on the front and back of the decal to get the position on the other side. However, this won’t help you find the height. To deterring the correct height you will need to use some sort of point of reference on the frame.

DIY How to Make a Bike Seat Lock

This is a DIY video on how to make a saddle chain lock.

This will help prevent anyone from taking your seat when your bike is locked up, and it is easy to make with a couple of spare parts.

All you need is an old chain, a popped tube, electrical tape, and a chain tool.

First thing you want to do is set your saddle height properly. Next, take your spare chain and run it through your saddle rails and the seat stay of your frame.

Measure how long chain should be by wrapping it around frame and seat rails

Put the chain together to see where you are going to break it. After you break the chain, lay it out next to a piece of tube. Cut the tube about an inch and a half longer than your chain, and cut a little slit into the topside of the tube.

Length of tube should be about an inch and a half longer than chain

Slide the chain into the inner tube, and wrap it through your seat and seat stay. Drop the seat just a couple of mm and connect the chain back together.

Reconnect chain with chain tool to secure it on seat

Fold the piece of the inner tube over and then wrap the section up with electrical tape.

DIY Seat Lock

There you go!