How to apply decals only your bike:
For this you will need the decals, wax and grease remover, rag, and painter’s tape to prevent you from damaging the paint on your bike or ripping any off.
It is important to take your time with this. Since you are doing it yourself, take your time making sure the decals are aligned properly on the bike. Start by prepping your surface. Spray down the area where you will be applying the decal first with the grease remover and wipe it down with a clean rag or towel. Using a microfiber rag is ideal because it doesn’t leave any lint behind.
Next, take time to figure out the proper alignment for your stickers. Again, be patient with this. Once you have figure it out, take the painters tape and loosely mock up where you want to place the first decal. Then triple check that the decal is aligned with the frame and isn’t crooked.

Mock the location of the decal with painter's tape
Pull back the backing off the decal, and leave it off the adhesive tape on the front. Slowly apply the decal from one corner, wiping all the way over. Once you do this, you must be committed to where the decal is placed on the tube.
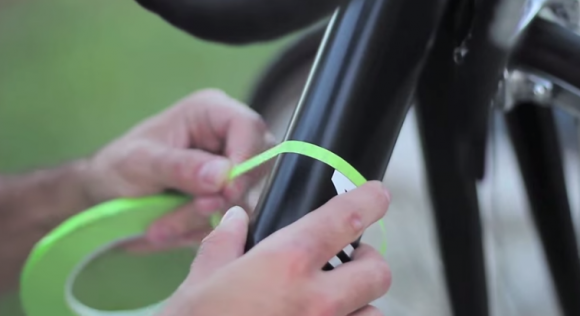
Align the placement of the second decal by taping a line from the first
Use your tape as a guide to find the proper alignment on the other side. Tape across the tube on the front and back of the decal to get the position on the other side. However, this won’t help you find the height. To deterring the correct height you will need to use some sort of point of reference on the frame.