Tropical Alleycat Kick Ass Bike Babe of the Week
Submitted by matt on Thu, 01/29/2015 - 10:25Blog Tags:
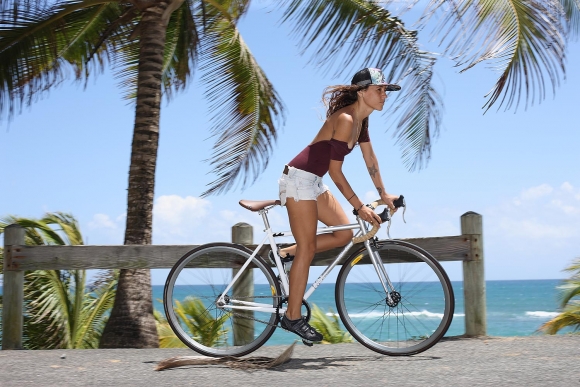
Crys Amador
Crys Amador
Pros and Cons of Different Bottom Bracket Standards:
Let’s look at the challenges that the english bottom bracket faced, since it is this design most new bottom brackets hope to improve upon. It was not uncommon to have to chase threads of an english bottom bracket shell and then face the shell to remove any excess paint, to ensure that the faces were square.
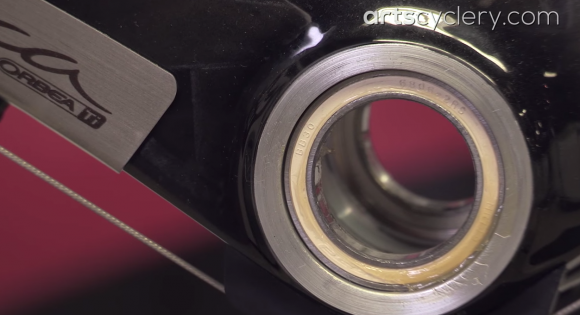
BB30 Bottom Bracket
BB30 has largely gone away. This standard, used bearings that were directly pressed into the frame and rested against a clip fitted not internal grooves in the bottom bracket shell. The clips were weak and they creaked.
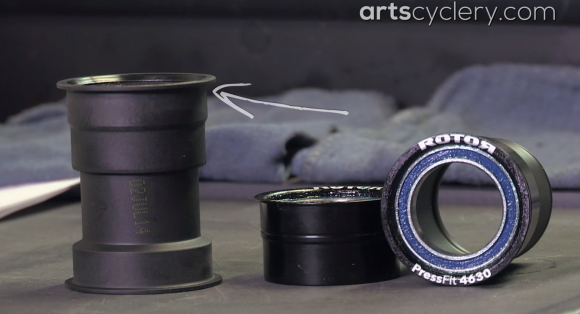
PF30 Bottom Bracket
PF30 is an improvement on BB30, that uses a flange cup for the bearing to sit in. That cup is then pressed into the frame. The cup helps to keep the bearing in place while preventing unwanted movement. The downside is that the aluminum cranks spindle sits right on the steel inner bearing race, which causes spindle wear and leads to creaking.
Bright is very similar to PF30 and uses the same bearings and cups, they are just spaced further apart. It never really caught on in the industry and suffers several of the same issued PF30 does.
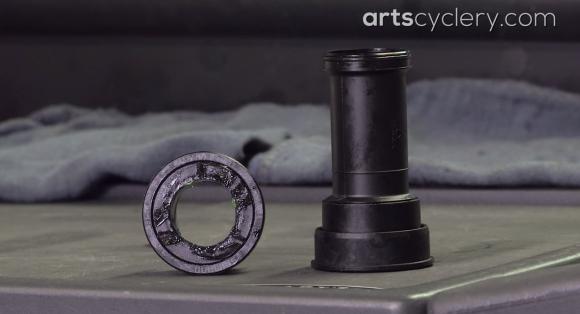
BB86 and BB92 Bottom Bracket Style
BB86 and BB92 are the smaller diameter and wider spaced preset standard. These tend to work better than PF30 though they tend to function in the same way.
The real solution to bottom brackets is the industry maintaining tighter tolerances.
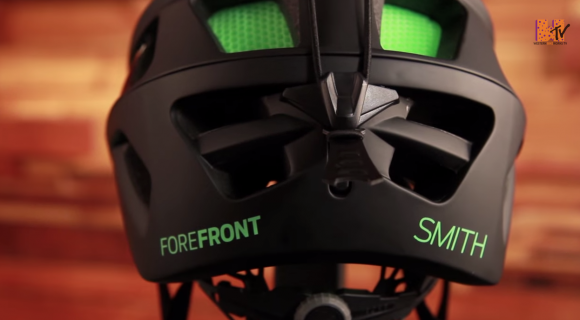
Smith Forefront Helmet
Smith draws from their success in snowsport helmets to bring an innovative design to the mountain bike world by introducing their Forefront all-mountain helmet. Through extensive research and engineering, Smith has developed a process to thermally weld together thousands of precision-manufactured Koroyd® co-polymore tubes to form their Aerocore™ honeycomb shell. This novel design shaves weight, allows for optimum breathability, and increases impact absorption by 30% over international EPS standards.

Koroyd forms Aerocore Shell
The Aerocore™ design feels fantastic by design, but you’re further cushioned by plush X-Static performance lining. A personalized and secure fit is provided by the VaporFit retention system that allows 5 cm of adjustability along with the option to move the entire system forward / back or up / down at the attachment points. Airevac ventilation allows for maximum airflow for cooling and to keep your goggles from fogging up, and an included elastic goggle retention strap keeps them right where you want them.
Up top, a built-in light / POV-camera mounting point allows for easy integration, and an adjustable / removable visor blocks out direct sunlight.
To improve the performance and life span of a cassette it is important to clean it manually. After removing the cassette from the hub, flip it over, and remove the screw holding the stack together. It is often labeled with a small letter. Using a hex key, loosen counter clockwise and remove the screw. Now the largest sprocket can be removed. In between each sprocket is a plastic spacer. Carefully disassemble all the sprockets and spacers.

Screw Holding Sprocket Stack
Clean all the pieces to remove dirt and grease. The sprocket will be shiny once all the grease is removed.
To assemble the cassette first locate the small hole on the bottom of the sprocket. Insert the screw through the hole so the head of the screw is on the same side as the letter. Lay the sprocket down on the table. When adding the spacers, locate the alignment hole and slide it over the screw. For the sprockets, it is critical that all the teeth line up properly. There are 3 holes on each sprocket. Only one of them has a marking next to it. It will always be the hole closest to the alignment groove. With the marking facing downward slide the sprocket on to the stack. Assemble the rest of the spacers and sprockets in the same way.
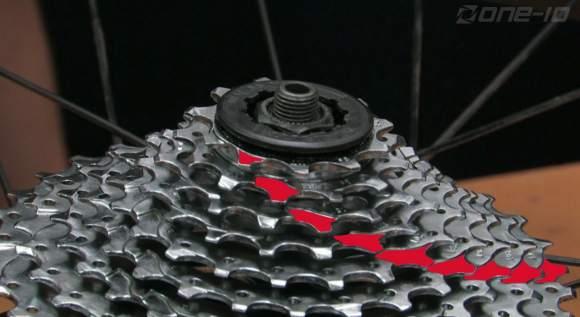
Correctly Aligned Cassette Teeth
Once all the sprockets have been assembled, flip over the stack and tighten the screw with a hex key. Be careful not to over tighten and stir the threads.
Saddle position is very important. Having it in the right position will reduce fatigue, soreness, and reduce the chance of injury on your ride.
Saddle position comes down to three different adjustments: angle, height, and for/aft positioning.
Adjusting the saddle angle is simple. You will need an allen key to undo the one or two bolt design. Adjust the saddle so it is as close to flat as possible.
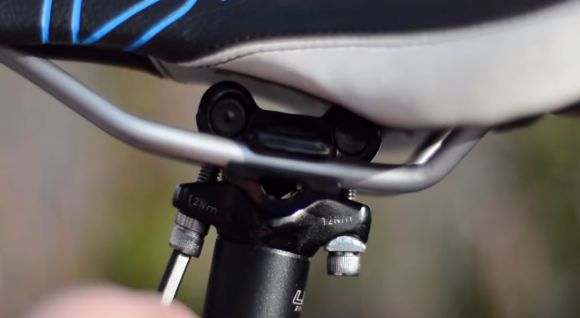
Start with Saddle in Flat Position
In adjusting the height of your seat, you will want to ride with the saddle at the actual length of your leg. To do this, you will want to put your heels on the pedal. You can then raise the saddle to the highest point until your hip begin to rock while pedaling backwards.

Height for Saddle is Full length of Leg with Heel on Pedal
In order to adjust the for/aft position of the saddle, you will need a plumb line. This can be made by tying a small weight to a string. Using the same bolt you used to adjust the angle of the saddle, you can use to slide the saddle forward and back on its rails. While your pedals are level, hold the string at the end of the femur and behind the knee cap on your leg. Line up the plumb line so it falls straight down through the axle of the pedal.
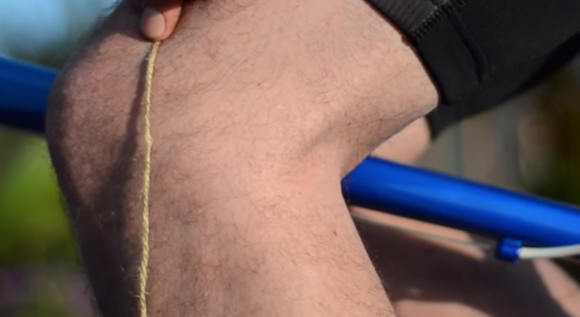
Use Plumb Line to Measure for/aft position
After making these three basic adjustments you should have a good basis for starting.
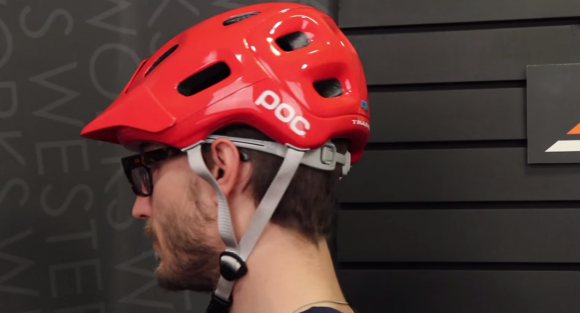
An award winning trail and enduro lid made by Swedish company POC...What is the Trabec Mountain Helmet?
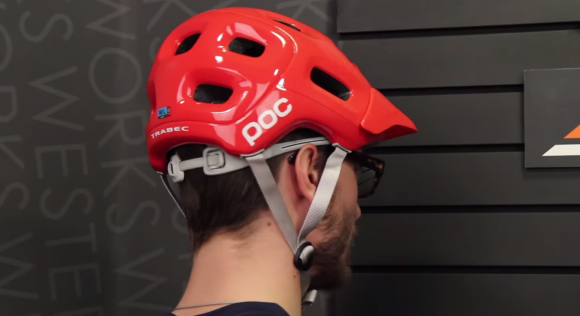
POC Trabec Mountain Helmet
We kid, the Trabec helmet is not named after the long time host of Jeopardy, but instead because its structure resembles that of the honeycomb matrix of trabecular bone. The outer PC shell keeps seams down and places them in areas of least exposure for solid protection and the inner EPS foam core provides great shock absorption in case of an impact and is strengthened by aramid filaments.
16 Aerodynamic Helmet Vents
Since falling is basically part and parcel to mountain biking, and when it happens impacts can come at any angle, POC also designed the Trabec to give extra coverage for the back of the head and the temples. The adjustable visor is great for keeping sun and rain out of your eyes, not to mention branches and the like, and 16 aerodynamic vents help bring cool air in while sending hot air out. An Odor fighting polygiene treatment is just one more reason why this helmet is an award winner.
Versatility and comfort go featherweight.

Giro Aeon Helmet Front View
The new Aeon Helmet has quickly become a favorite of the pro peloton with a unique design that borrows heavily from the Ionos and Prolight models. Giro's newest creation manages to combine the best features of each for incredible ventilation, easy fit adjustment and an impressive 222 gram weight.

Giro Aeon Helmet Side View
Unlike the ProLight model, Giro has managed to incorporate the Roc Loc 5 system for separate vertical positioning and fit adjustments, with an ergonomically-tuned adjustment dial that won't pinch skin or pull hair. Technologies like over-sized WindTunnel air ports and the Thermoformed SL Roll Cage provide superior protection and comfort while keeping weight to a minimum.

Giro Aeon Helmet Rear View
The Aeon is built using the SuperFit engineering process to guarantee a glove-like fit for riders of many different shapes and sizes. Featherweight webbing a Slimline buckle further ergonomics and weight reduction.
X-Static inner padding with Silver microfibers works to regulate temperatures as you ride. The pads also feature an anti-microbial treatment to resist odors, something your riding buddies will appreciate too.
The Giro Aeon features 24 vents and weighs 222 grams in a size Medium.
Sizes:
Small (20" - 21.75"/51cm - 55cm)
Medium (21.75" - 23.25"/55cm - 59cm)
Large (23.25" - 24.75"/59cm - 63cm)
Shimano Dura-Ace 7900 10 Speed Rear Cassette:
The Dura-Ace line offers a great combination of durability and lightweight performance. It is available in 8 different sizes from 11-21 up to 12-27.
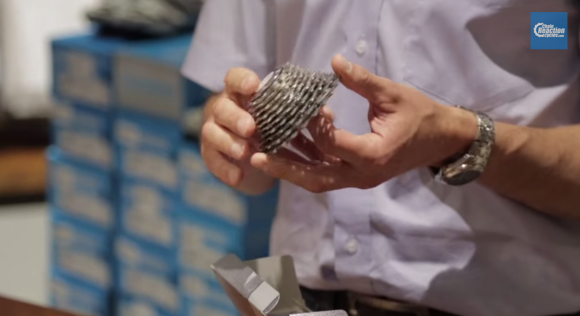
10 Speed Cassette with Aluminum and Titanium Sprockets
The largest three cogs on the cassette are supported by a separate cole forged aluminum alloy carrier as are the next two sprockets. This engineering increases stiffness and reduces weight, as does the fact that the four largest cogs, are made from titanium.
The whole cassette weighs in at just 185 grams, perfect for all you weight watchers out there. Shifting performance is smooth it leaves you wondering if you changed gears at all.
Shimano Dura-Ace 7900 10 Speed Rear Derailleur:
This product from Shimano’s Dura-Ace line is aimed at rider putting in serious miles or doing a ton of racing.
The rear derailleur features a lightweight carbon cage and wide length design. The result of that is quick and accurate shifting and unmatched drivetrain efficiency.
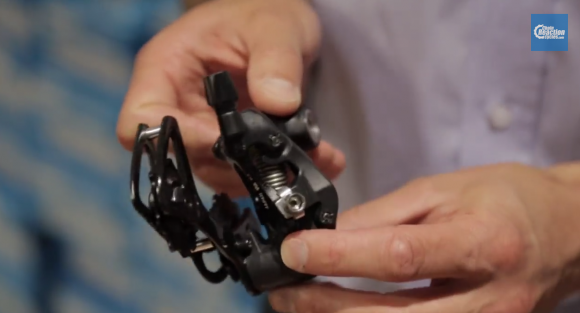
Shimano Dura-Ace 7900 10 Speed Rear Derailleur Weighs 166 grams
The derailleur has the hard wearing dura-ace finish and graphics for long lasting good looks. It weighs just 166 grams, therefore suitable for weight conscious racers. Shimano has built this unit around an aluminum body to make it light while also being strong and durable.
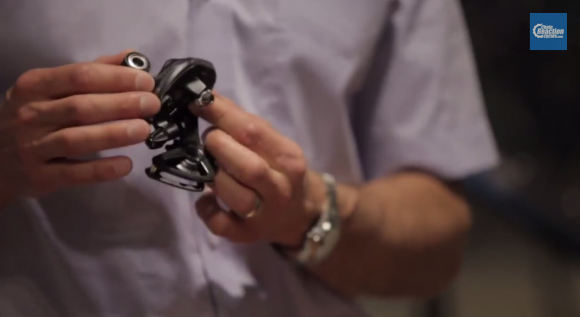
Rear Derailleur with Carbon Pulley Plates
There are full carbon inner and outer pulley plates, which enhance rigidity and reduce weight. Seemed pulley bearings reduce friction and create silky smooth movement.
Mavic Crossmax ST 29er Review:
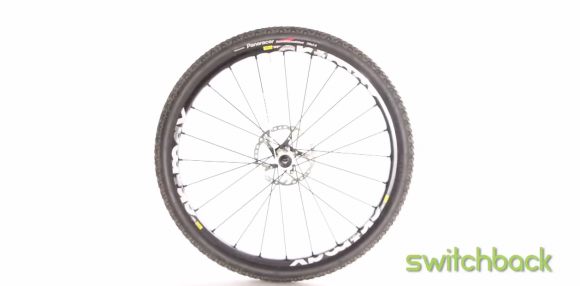
Mavic Crossmax ST 29 inch Wheel
This is designed for the rider that wants to push limits on the downhill, but isn’t ready to give up on pushing the pace during the climb up.
The Crossmax ST keeps weight down with some standout Mavic technology. ISM (Inter Spoke Milling) reduces the rotating mass of the 19mm alloy rim, and zycro aluminum spokes provide additional stiffness with very low weight. The weight for a set is just of 1700 grams. Combined with the quick engagement of the IST 4 hub and ISO spoke lacing, the wheels are designed for almost instant acceleration.

Inter Spoke Milling Helps Reduce Wheels' Rotating Mass
To create this acceleration, Mavic uses their welding and drilling process with alloy in the rims. There is so little rotating mass and so much stiffness that they instantly respond to power. They also withstand a lot of punishment on any terrain. All of this stiffness is vertical as well as lateral. It is recommended to ride tubeless. All this durability comes in such a quick package that any trail rider looking for reliability in the back country should put the Crossmax on their list.