How To Fix a Frayed Bike Brake Cable

Company: 

fix frayed brake cables

frayed cables don't bring a lot to the table

As we've shown in our other tutorials, cutting and replacing the brake cable system on your bike isn't that hard of a process. That being said, one thing we always preach is 'repair before replace' and if your brake cables simply happened to be frayed on the end, they can be fixed easily. It is important to tend to the frayed cables early though because if they aren't repaired the problem can escalate where a full replacement is necessary.

The Twist & Cap Method

The frayed ends of a brake cable can be sharp, eventually fray more, and simply just look tacky. The thing is they still work just fine so it's best to tighten up this blemish. Take the frayed wires and twist them like you'd do with a bread tie. Once the wires are as tight as can be as close to the end take a wire cutters and snip a bit off the end to make a flush cut. Next take a wire cap and put it on the end of the once-frayed cables. Use a pliers to smash the ends of the cap so it doesn't move and you've restored order to your brake cables in a matter of seconds.

fix frayed bike brake cable

Now tell your pet squirrel to quit gnawing on them

Fix Bike Crank Bolt Issues

Company: 

For the most part bolts that creek or are loose are a pretty easy fix, either tighten them, lube them, or replace them. That's partly true with bicycle bolts as well but when dealing with the crank bolt the hardware can be unique and you need to take a timid approach to the fix. Here's how to alleviate some of the common issues that could be causing your bolts to rattle or underperform in the crank area.

Loos crank bolt repair

A loose crank bolt is both an audio and visual distraction

Take the Bolt Out and Remove the Crank

Using most likely an 8mm hex head Allen wrench, unscrew the bolt that is protruding into the crank. Even with the bolt loose the crank shouldn't budge much because it's still sitting on the thread but you'll probably find out that it will. It's best to take the crank off at this time as well to really get to the root of the wobble problem. While everything is off it's a good time to clean both the crank and the thread it goes on to. These areas are prime for picking up road and trail grime and even a good power washing doesn't always get inside of the assembly.

Fixing a loose crank bolt

It's best to unscrew the bolt to see the root rattle cause instead of just trying to tighten it to tighten it

Fix the Loose Bolt

While it would be easy to just buy a replacement bolt if it's loose, many times the actual problem area is within the threads that it screws in to. These splines can become worn down, merged together, split, or a number of things that could prevent a nice tight fit. You don't want to use a Loctite fastener because you need to be able to unscrew the bolt relatively easy but something that actually works very well is nail polish. Simply spread the polish in it's liquid form generously on the thread and then screw in the bolt. The two components make a nice seal and should prevent the annoying rattle.

fix a rattling crank bolt

Once you get the bolt removed you'll get a better idea of what's causing the rattle

DIY Straighten a Bicycle Fork

Company: 

A bent bicycle fork can happen in a number of ways - a bad wreck, a big bump, being backed over in the garage, etc. What's weird about these instances is that the bike can be bent in a split-second but as riders we often trudge on after the fact with our crooked forks. A bent fork is not only an unsightly attraction, it also makes pedaling harder and wears down tires, brakes, and other equipment unevenly. While a fork replacement is an option, another approach might be to try and bend the unit back into place first. Here's how to salvage that fork, or at least attempt to:

** It should be noted that the best method of approach is to replace the fork altogether. One that is bent has metal that is compromised and is more vulnerable in the future. That being said if the bend is minimal or you want to make a last ditch effort to restore a bike that's been in storage for years then follow these tips **

Fixing bent forks

It won't take long to see what part of the bike absorbed the brunt of the crash

Borrow a Fork Straightener

One of the reasons to get in good graces with your local bike shop is because they'll likely let you borrow rare tools for a day without charging you too crazy for them. For many people it's not worth the money to buy a truing stand and similar tools you might only use once a year if that. One such tool is a fork straightener. Back in the 1960's when most bikes were made of steel, fork straighteners were a regular part of a repair shops arsenal. There's a good chance that your local will still have one around today, or at least know somebody in town who does.

Use the Straightener

The fork straightener is weird - it's both self-explanatory yet kind of difficult to use at the same time. Flip the bike upside down and set the grooves into a fork opening with the other end at the bottom of the bike frame. The straightener works much like a car jack in that it moves just a little bit at each hydraulic pump. Click the handle until the forks bend slightly past their original point because they will bounce back. Flip the ratchet switch in reverse so that the tension is relieved and remove the fork.

Straighten out bike forks

The fork straightener will take a minute to get accustomed to but is easy to operate after a bit.

Remember that you're now driving a bike with forks that aren't as sturdy as they used to be so avoid going out of your way to hit a curb or jump, otherwise you should regain 100% ride-ability.

DIY Fix a Loose Headset

Company: 

There's a lot of moving parts on a bike that we often take for granted. Most riders don't think twice about our seat until it starts swiveling or our pedals until they get stuck. Along those same lines is the bike headset, which serves a definite purpose but is also prone to coming loose, squeaking, and causing a general nuisance while we ride. While a headset replacement is not too far out of the realm of a simple DIY fix, in some instances the unit simply needs to be tightened back up instead of changed out. Here's how to do it.

Fix a loose headset

The shaky headset should be pretty obvious

Equip Yourself

You'll generally be able to tell if a headset is loose just because it shakes when you apply both brakes and try and shimmy it. The shake can be subtle or it can be a huge distraction but for safety purposes it should be tightened back up. The tools you'll need are a pair of 32 mm cone wrenches. The headset has two large nuts that work against each other and the first step in tightening is to actually loosen the headset.

Tigtening a loose headset

The special cone wrenches are needed to work against each other

Tighten the Headset

Once the shaky headset is loosened up, you can straighten it out and first tighten the bottom nut. The bottom nut works with ball bearings at the bottom of the stem in a cohesive unit. You don't want to simply tighten both the nuts because it will just crush the ball bearings. Once the bottom nut is tightened, keep it in place with one of the wrenches and then tighten the top nut down to it. When the nut is secure spray the area with some lube and you're ready to ride stress-free.

It may sound like a detailed process but once you get the set of cone wrenches out and the nut loose tightening the headset will be a pretty easy fix, and you save money of buying a replacement.

Several Methods for How to Install a Rear Rack onto Bicycle

Let's install a rack on the back of your bike. It's surprisingly easy to do this, but first let's start by pre assembling our rack and making sure that the struts that attach the rack to the top part of your bike are already in place. Make sure that the struts aren't too tight. It should be relatively easy to slide them in and out. If you have bolts on the top of your frame like these, remove them using an allen key so that you're able to install the rack. Next let's install the rack on the rear dropouts of your bike. Start by placing the bolt through the eyelet on the rack and then align it with the hole on the rear dropout. Loosely tighten the bolt into the dropout with your allen key. Do the same thing on the other side.

Tighten Rack Bolt in Dropout

Tighten Rack Bolt into Dropout

Make sure that the rack can still be positioned loosely. Make sure that the rack is level and bend the struts into position so that they line up with the holes on the top of the frame. Do that on both sides. Then use the bolts and flip them through this strut, and then hand tighten them into the mount on the top of your bike frame. Loosely tighten that bolt using an allen key and then do the same thing on the other side. Once you're sure everything's in position correctly, it's time to tighten all the nuts and bolts down to ensure that they don't loosen up while you're riding. So make sure that you've got them well tightened down.

attach struts

Attach Struts to Frame Bolt Holes

That's how to install a rack on a bike that is easy to install a rack on, but of course not all bikes accommodate racks as easily as this one did. Your bike might be a small bike frame that doesn't have room on the top to mount the rack. I'll show you a way to accommodate that, and your bike may not even have mounts on the top of the frame to accommodate a rack as well. For those kind bikes we have adapters as well.

Another way to attach your rack to the top of your frame is to use a brake bridge adapter like this. A brake bridge adapter attaches through the bolt that holds your brake onto the bridge of your frame. You're going to have to remove the brake bolt and insert the brake bolt through the adapter and attach it to the top of your rack. The problem with a brake bridge adapter is that it only relies on a single point of attachment to your bike frame, and of course two points are better than one.

Brake Bridge Adapter

On a small bike like this one, you're going to need a seat post adapter in order to accommodate the rack so that it remains level. Make sure that you're only using these kind of adapters on seat posts that are made of metal. Carbon fiber will not accommodate this type adapter.

seat post adapter

Seat Post Adapter

If your frame doesn't have mounting holes for the rack at the top of the frame like this one, you can use these clamp adapters attached to the tubes on your frame. Now that you've installed the rack on your bike, you're ready to load up that rack with bags and gear and head out for a great ride.

clamp adapters

Clamp Adapters

DIY How to Make Your Own Mountain Bike Tire with Studs for Winter Ice and Snow

Today I'm going to show you how to take a mountain bike tire like this and turn it into a gnarly tire like this. You only need a few simple tools and a bunch of wood screws and you'll be ready to go. Okay, so the first step is to get the tire off the rim. We'll let the air out of the valve. The first simple tool you will need is a handy dandy tired lever. You could use a screwdriver but the problem with using a screwdriver is that you may puncture a tube while removing a tire. I'm gonna get this tire tool between the rim and bead and pull towards myself. Once you get once side off turn the tire around. You should be able to push and realease the tube and tire from the rim. Now we need to take the tube out of the tire.

These are the types of screws that you can use for your studs. These are pan head screws, a type of wood screw. They're really pointy on the one ends and a phillips screw head on the other end. To do the front tire you'll need about 104, if you want to put a lot on. To get the screw started into the tire, we're going to use this punch all. It's a very sharp ended tool that we can drive through the tire to make a pilot hole. I counted the knobs on the outside edges of this tire, and there's eighty knobs that go all the way around, so if we do every other knob we'll need 40 screws for each side. Then I'll put every other one on the center sides right here, and leave the centerlines without any screws. The idea for leaving the center without any screws is that if you do have to ride on rough surface like a road or concrete, those screws would wear right down to nothing anyway, so the only ones that will be preserved are the ones here towards the side. All in all, I'm going to need 160 screws for this job.

I'm going to start by punching a hole with the all through the first side know and I can feel when it's coming through, I put my finger on the other side. I can just feel it move my finger to the side. Give a little support and push it through. Pull it back out and when I turn it over, I can see a little telltale mark. Some websites recommend that you use a drill to drill a hole in there. It might be easier to get the hole in there, but the drill will tear the fabric of the tire and actually ruin the integrity of the tire. I think the punch all is a better option. 

Use Punch to Create Hole

Use Punch to Create Hole for Screw

Next, grab one wood screw, phillips screw driver, find my mark. I'm only going to screw it down until I can visually see the head of the screw meet the tire. If I spin past that, it will strip the rubber, and the screw can have a tendency to back out. We're 1 and 160th of the way done.

Correctly Placed Screw

Alright an hour later, we have all the screws in and now it's time to address the inside of the tire. We're going to need to protect the tube to from those heads by backing it with some type of material. What works really well is to just use another inner tube and slice it and use it as a backing and I'll show you how that is done. I blew it up just so I can see a line on the inside surface of the tire, because what I'm going to do is take my scissors and start a hole right on that line and cut all along the inside ridge of this tube.

Cut Tube Along Line for Backing

After you've gone all around the tire, you need to remove the stem. Try to remove as little as possible and I'm going to cut the tire right where the stem is. Now this will be the the backing. Now I'm going to put the backing inside of the tire. Right now I just push it in there. The tube, when we blow it up with air will hold this in place, just get it close for now. The liner is in place and as you can see the two ends are really pretty close together. I've done tires where the gap was quite a bit larger and so one thing you can do is to get a hold of another old peace of tire and you can just make another strip to put behind it to make sure that gap is covered, but this'll easily cover all the screw heads on the inside.

There Should Be Little or No Space Left

There Should Be Little or No Space Left for Backing

Alright, I just put just put enough air in the tube so that it has some form. Makes it a lot easier to get it back inside the tire.  Now I'm going to double check to make sure that the liner is in position all the way around. Okay everything looks good and now it's time to put it back on. Most the tires to put on we just need the tire tool. Okay there it is ready for air. Okay one tire down one more to go. The back tire doesn't need as many screws. Mainly the back tire just needs screws toward the center, so that you have traction while you're powering your bike. 

Install Stan's NoTubes Tubeless Conversion Kit on a Non-Tubeless Wheel

Here you're going to see how to install a Stan's tubeless kit into a non-Stan's mountain wheel. The tools you're going to need: a drill with 3/8 inch bit, the proper kit (refer to our website at notubes.com for the proper kit for your wheel), tire lever, a file or de-burring tool, preferred tire, floor pump or compressor, and soapy water or spray bottle with soapy water in it. More often than not, you may leave the existing tape inside the wheel. Should you need to re-tape the wheel, please refer to our how-to tape mountain wheel segment.

Drill a 3/8 inch hole only in the inner rim wall. Do not drill all the way through. This will allow proper fit of the rim strip at the valve to the rim. Please note that enlarging the whole does not prevent use of tubes in the future. You can still use tubes.

drill inner rim wall

Drill Inner Rim Wall

Place the rim strip valve into the rim valve hole and hand tighten. Install the rim strip around the rim. Make sure the strip has been evenly distributed inside the rim so that it does not interfere with the bead of the rim when you do you install your tire. If this is a problem with you, you can drop your ring strip into soapy water, which allows for a little bit easier install. Some beads are tighter than others.

Follow these steps to assist for easy install. Place your wheel inside the tire. Tire beads should be on the outside of each rim wall. Install one side of the tire bead. Make sure you install the valve stem last. This ensures more room, easier installation on tight beaded tires. If you need a tire lever at the end you may use it. Use it gently so not to tear the yellow tape or damage the tire bead. Repeat the other side the same way you did the first side and don't forget you can use a tire lever if need be, and you want to take your bottle of soapy water and spray around both beads of the tire and between the bead of the rims. This will allow the tire to inflate at much lower pressures and easily snap into place. With the bead already fully installed on the wheel, take the core remover tool and extract the valve core from the valve. Take the Stan's injector, install it onto the valve, apply the to 2-4 ounces of sealant and you're going to inject it into the tire. Place the valve core onto the valve with the Stan's core remover tool.

Extract valve core

Extract Valve Core

Option two is pretty simple as well. Before you install the bead of the tire, you want to shake the sealant very well and you want to poor one-and-a-half to two cups of sealant depending on the size of the tire, if the tire is new, or if it just needs replenishing. Once that is done, install the bead completely. Before you inflate again, apply soapy water with a spray bottle or brush and make sure you get it on both sides of the tire for easy inflation. Refer to our rims for inflation. Do not over inflate. You want to make sure you shake the wheel to get the sealant all around the tire. Your coating the tire for any air leaks which could be possible depending on whatever tire you use. Make sure bead is concentric. You want to set the wheel aside horizontally for 10 to 15 minutes allow the sealant to coat and seal any air leaks on the tire sidewall.

Fill with sealant

Fill with Sealant

Install and Mount Wired Cycling Computer

We're going to go over how to install a basic wired bicycle computer. All you'll need is a third hand cable tightener and a pair of cutters. This particular computer users rubber bands to secure the sensor and the computer head. Many computers use zip ties or a ratcheting mechanism, but they're all pretty much the same principals involved in installing the computer. I'll start off from the fork, going up the fork to the handlebar. I always mount my computer sensor in the front of the fork, that way your normal tire rotation if your spokes do come in contact with the sensor, it will force your sensor out instead of bringing it into the spokes, potentially breaking a spoke or breaking your computer sensor. So with the wire going up, install the sensor. Now the key to having clean lines with the computer wire is keeping everything close and attached to the fork. You'll take your zip tie and attach it around your fork and the computer wire all the way up near the fork crown, and be sure you don't actually get a spoke in your zip tie and keep the head of your zip tie towards the back of the fork. Take your third hand tightener, sinch it, and trim it with your cutters.

Trim zip tie with cutter

Trim Zip Tie with Cutter

Now we will jump from the fork blade to the front brake cable housing, leave a little bit of slack so you don't run the risk of pulling that wire to tight. Now we'll take our head mounting unit and wire, and just wrap that wire tightly around the front brake housing.

wrap wire around brake housing

Wrap Wire Around Brake Housing

Now at the top you want to have enough room to where there's still some slack in the wire before it hits the handlebar. Take another zip tie, tighten it around the wire and your cable housing, again with the third hand tighteners,  and your diagonal cutters. Now we'll take our second rubber band and put it around the handlebars, and secure your head mounting unit, and attach your head.

computer head

Secure Computer Head with Rubber Bands

Now with the magnet, just attach it there to the spokes, and you want the magnet to line up with your sensor. Depending on the computer, the sensor needs to be between 1 and 5 millimeters away from the magnet. Look at your computer, move the magnet back and forth across the sensor to see if your computer comes on. If it doesn't come on, you just need to rotate that sensor back a little bit til your at the proper distance without having the magnets hit the sensor. Follow the instruction booklet that came with your computer to program to the correct tire size, time, and day. If you you program the incorrect tire size, the readings on the computer can be miscalculated.

How to Cut, Trim, & Lubricate Brake and Shift Housing and Cables

Company: 

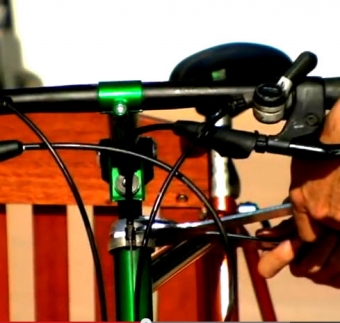
Your brake and shift cables connect you to your brakes and derailleurs, and are what you use to tell you brakes and derailleurs what you want them to do. Most cables are open to contamination especially in wet conditions. Cables that are rusty, dirty, or clogged with the wrong lubricant can disrupt the connection between you and your brakes and derailleurs, and can make even the best braking and shifting systems work inconsistently or not at all. In this video we demonstrate in three easy steps how to cut, trim, and lubricate your cables to ensure precise reliable braking and shifting that will remain consistent through any condition. Depending on what you're trying to do, you'll need brake housing, brake wire, and metal end caps, also known as ferrules, to put on the ends of the housing, as well as shift housing, shift wire, and metal or plastic ferrules, depending on the diameter of your shift housing. You will also need a good set of shear cutters, a tool with a sharp point, in this case a sharpened spoke, and Finish Line Extreme Fluoro- fully fluorinated, low viscosity, lightweight grease.

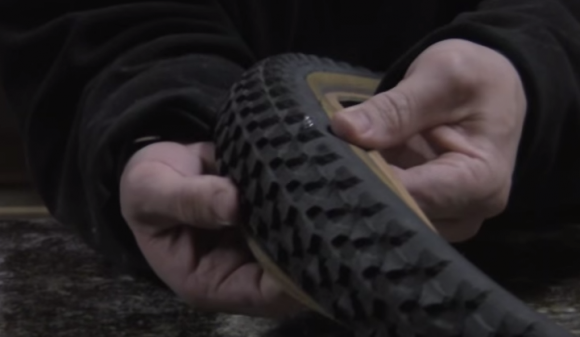
Step One: knowing your cables. Braking shift cables differ from one another in a couple of ways. They both comprise two parts in outer covering called housing and an inner wire that's inserted into the housing. Brake housing consists of a long, coiled strip of wire that's protected from moisture by a plastic outter sleave. Most modern brake housing also contains a plastic inner liner to reduce friction between the housing and the inner wire. In the past, before index shifting provided us with the clicks we all know, brake housing was used for both brakes and shifters. By contrast, shift housing is designed for stiffness in response to the demands of index shifting systems that won't shift precisely with flexible brake housing. Stiffness is the result of long strands of wire that run parallel to the length of the housing, instead of being coiled into a spiral. Like brake housing, shift housing is protected by a plastic sleeve and often contains an inner liner. However, you should never use shift housing on your brakes, because it can burst under the high loads of braking.

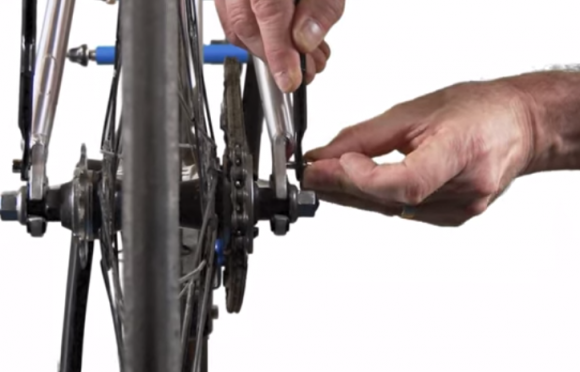
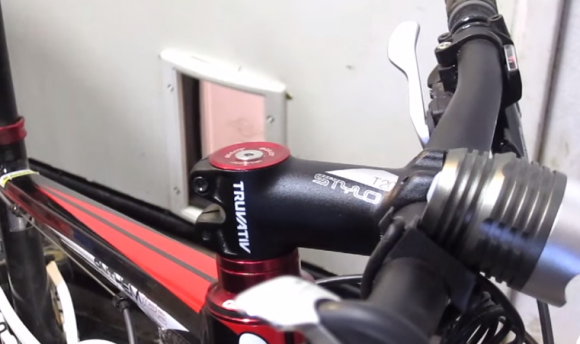
Next up is the inner wire. Here again we see a difference between brake and shift cables. In fact, brake inner wire actually comes in two varieties: one for road bike brake levers and one for mountain bike brake levers. The two differ in respect to the small metal head that's found at one end of the wire. Some cable manufacturers actually sell wire that has a road head at one end and a mountain head at the other, allowing you to clip off the head you don't need. Installing the inner wire into your brake levers is perhaps the easiest step in installing cable. In the case of road wire, when you pull on your brake lever and look inside, you'll see a small part with a specially machined hole in it. Simply insert the end of the wire without the head through that whole and continue pulling the wire through the lever, either from the back in the case of levers like this Shimano STI lever, or out the top in the case of some older levers. Once you pull the wire all the way through, use your fingers to seat the head of the wire into that specially machined hole and let go of the lever to close it. Don't worry if the head doesn't stay seated, you will have plenty of opportunity to make sure it is seated before you finish installing the cable.

Installing the inner wire into a mountain bike brake lever is very similar, maybe even easier. Mountain bike brake levers have a opening for the head of the wire on the outside of the body, usually on the underside of the lever. The body also has a slot in it as does the knurled insert that threads into the body and allows you to adjust the cable later and the lock ring that holds that insert in place. To install the inner wire, first line up the slots, then insert the head of the wire into the opening in the lever body. Once you've done that, guide the wire into the slots and last of all, rotate the insert, the lockring, or both so that the slots are no longer lined up. This will keep the wire from falling back out as you complete the installation.

cable head

Mountain Bike vs Road Bike Cable Head

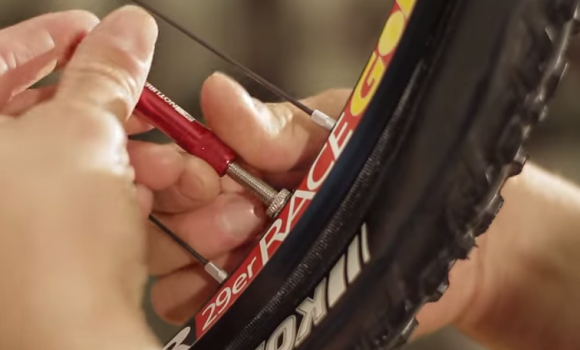
Shift wire is the same for road and mountain bike shifters. Both cases have a small cylindrical head at the end of the wire that fits into a special machine hole in the shifter. On this Shimano STI lever, you insert the end of the wire without the head into the side of the shifter, then pull it out the other side, and seat the head like you did with the brake wire. If the wire won't go in, check to make sure that the shifter has shifted all the way down to the smallest cog, if it's a rear shifter, or the smallest chainring, if it's a front shifter. Insert the wire into a mountain bike shifter the same way. First check to make sure that the shifter is shifted to the lowest position for the smallest cog or the smallest chainring, and then run the wire through, seating the head of the wire into the shifter with your fingers when you're done.

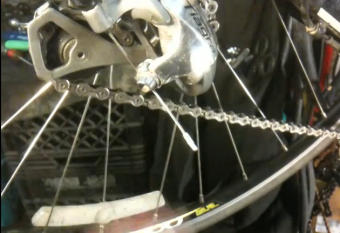
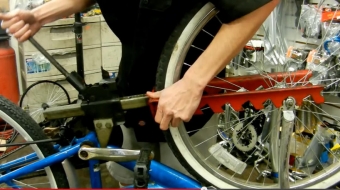
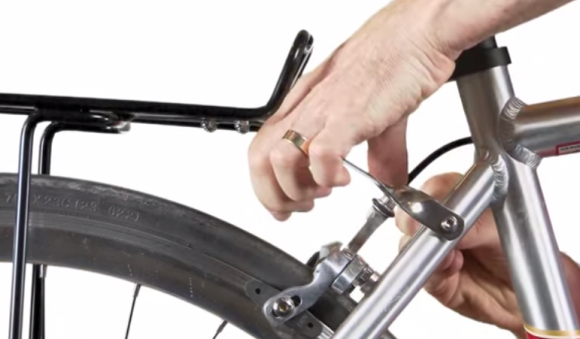
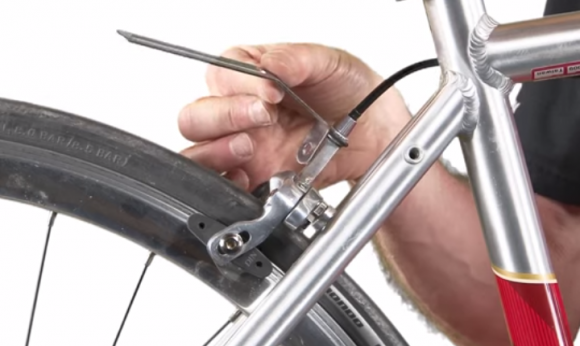
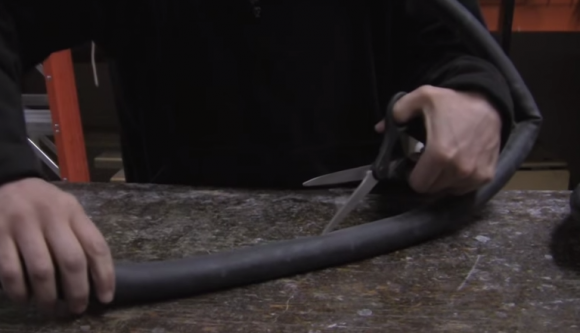
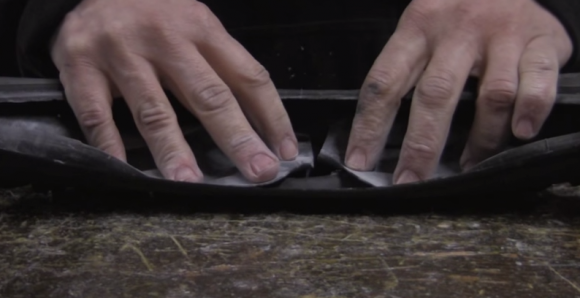
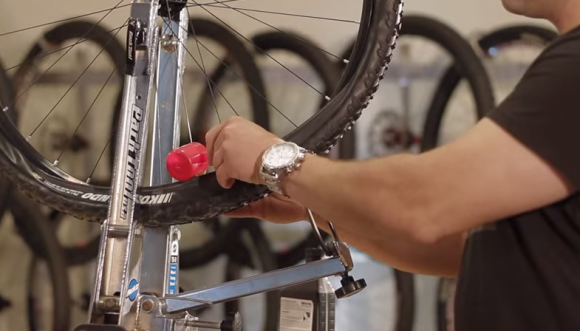
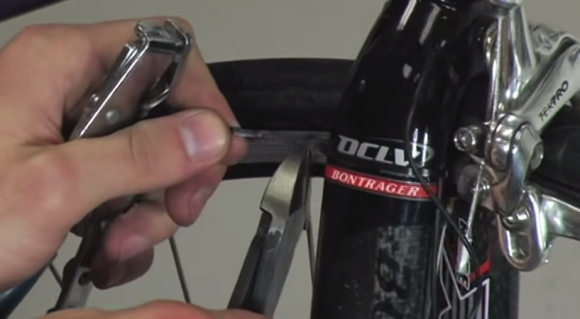
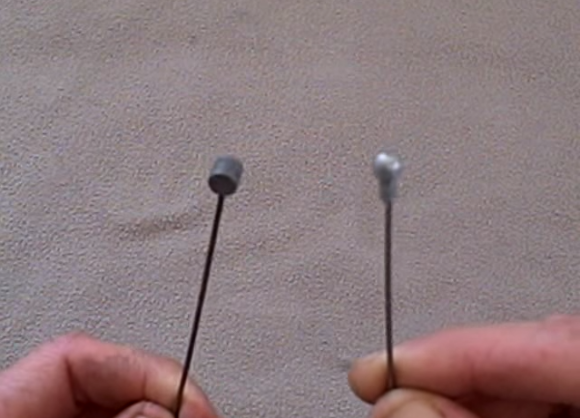
Step 2: cutting the housing. This is where the right set of cutters can make your life a lot easier. Cutting brake housing is actually very easy. Once you correctly sized the housing, place it in between the jaws of the cutter and squeeze. The excess housing will come right off. However, if you look closely, you might notice that the metal coil was cut right in the middle, leaving a spur of metal sticking out of the housing, or that the inner liner was deformed as you made your cut, obstructing the opening of the housing and the path of the inner wire. In this case, you might need to cut the housing again slightly further down where the coil cuts cleanly or even use a rotary tool with a cutting disc, like a dremel, to remove the spur. Once you have a clean-cut, insert the pointed tool into the inner liner and widen the opening so that the inner wire can pass through without obstruction. Shift housing cuts the same way. You'll recall that shift housing is straight, not coiled, so there's no problem with spurs, however cutting flattens the opening a lot more than it does with brake housing, so you need to take more care to widen the opening. Sometimes it even helps to pinch the outer plastic sleeve back into shape.

use tool to cut housing

Cut Housing with Tool

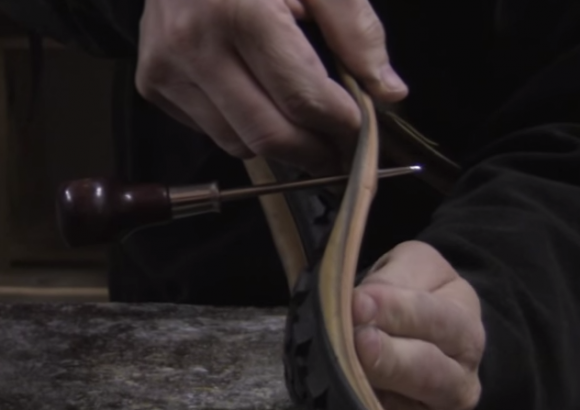
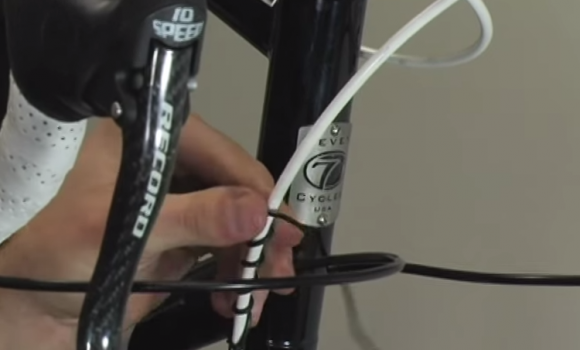
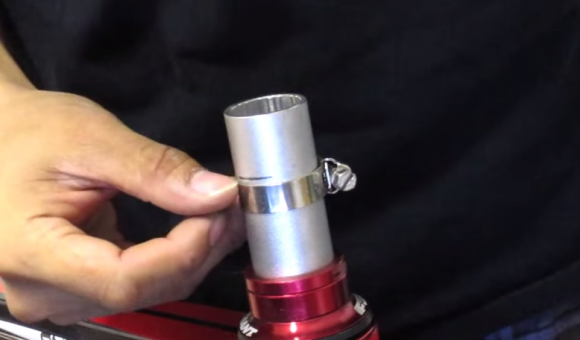
Step 3: lubricating the housing. Some mechanics don't lube cables because they believe that the inner liner of the housing is slick enough and that lube will only cause drag and slow the inner wire down. However, because it's fully fluorinated with a higher lubricity than teflon, Finish Line Extreme Flouro is slicker than the inner liner and its low viscosity guarantees that the wire will move in the housing without any drag. It also provides protection against corrosion for the life of the cable, a large part of why you lubed them in the first place. To apply it simply insert the tip of the syringe into the opening where you'll be inserting the inner wire and squeeze. You don't need much and once you see grease beginning to come out you're done. Then take a metal ferrule and place it over the end of the housing pushing it down so that it's as tight as possible. If you'd like you can place the ferrule between the jaws of your cutter and gently squeeze. This is called crimping, and leaves and indentation that helps hold the ferrule in place. Once you've done that, all that's left to do is insert the inner wire into the housing. As you do so, the wire will distribute the grease along the length of the housing. Shift housing is lubricated the same way as break housing. Take your Finish Line Extreme Flouro, insert the tip of the syringe into the open end of the housing, and squeeze until you see grease begin to come out around the tip. Then, if using five-millimeter shift housing, which is the same diameter as brake housing, take a metal ferrule, place on the end of the housing, and run the inner wire through. Many modern shift systems use four millimeter housing, which is slightly narrower. The only difference here is that once you've lubricated the housing, you place a narrower plastic ferrule plastic on the end. It's usually already crimped. The two sizes are actually interchangeable and many mechanics prefer to use five-millimeter housing for added stiffness.

apply lube into housing

Squeeze Lube into Housing

DIY Cut Bike Steer Tube and Tap Star Nut Down

I'm going to be trimming down my steer tube. I actually just thought this up on how to tap the star nut down without using an actual star nut tool. What I'm going to do is take the stock one off, remove all these spacers, get a spare bolt and top cap, thread this on a little bit, and I'm going to need to trim off about an inch, so maybe a a sixteenth of an inch below where the top of the stem is.

To tap the star nut down, instead of using the actual tool, use a spare top cap and bolt. Thread it down a little bit and just go little by little, and use this as a guide to keep it straight down as you tap it in. Center it with the top cap and just tap the bolt little by little until you get it to where you want it. Check it periodically just to make sure I don't tap it in too far. I got about another half an inch to go, so just tap it in little by little. As you can see the star nut is tapped down right where it needs to be, went perfectly straight in there, with just using a spare top cap and bolt. 

tap down top cap with hammer

Tap Star Nut Down with Top Cap and Hammer

At this point, before I take the stem off and remove the fork, I'm going to make a mark where the top of the stem is on the steer tube. Okay so here's the line where the top of the stem hit. I'm doing that about an 1/8 of an inch below that line. As a guide I'm using a standard hose clamp and I'll be cutting this with a hacksaw. I could also use a pipe cutter.

hose clamp to mark where to cut

Use Hose Clamp to Mark Where to Saw

Here's the finished result, check it out, perfectly straight cut, sanded the edges. Star nut perfectly straight down, doesn't get any better than that. From this point, I'm just going to put the spacers back on and the stem and handlebars, tighten everything back up and we are good to go. Spaces are on there, stem and bars. Put top cap, thread that bad boy in there. Okay here's the finished result, as you can see it looks really clean, took off about an inch off the steer tube. The steer tube is actually stock right now for this bike. 

finished result

Finished Result