How To Paint a Bicycle Frame

While your bike frame performs mainly a functional purpose of holding all the components together and yourself upright, that doesn't mean it can't be stylish at the same time. Whether you're salvaging an old bike frame that rusted away in a storage shed for 9 years or just want to add some new pizazz to your current arrangement painting a bike frame is relatively simple. Follow these tips to make your sparkling new frame the envy of the road, the trail, or the cul-de-sac.

how to paint a bicycle frame

The finished product is going to look pretty sick...but there's work to do first

Prep the Bike For Paint

Before you can repaint your frame in a new color, you need to get rid of the old shade first. The first few things you need to remove the old paint are rubber gloves, a paintbrush, and something called aircraft paint stripper. Dip you paint brush into the stripper and brush it onto the bike frame as if you were painting it. The material chemically reacts with the paint so you'll want to let it set and do its job. Once a good majority of the paint has flaked (it won't get it all) apply water to the frame to stop the reaction. After applying the aircraft stripper, the next stop is to sand down the frame with sandpaper or scotch brite. You need to spend a long time in the sanding process because the smoother the frame the easier it is to apply the new coat. Start with a low number rough grade paper and work your way up to the finer material. Once you've completed sanding, wipe down the frame with a wax and grease remover but don't touch the frame with your fingers because oils will show through on the final coat. Alas, you're ready to paint.

DIY painting a bike frame

The aircraft stripper works pretty good but make sure not to let it sit too long or it'll eat your whole bike.

Applying The Paint

After your sanding and prep work is done, use masking tape to block off the areas of the bike you don't want painted such as the internal opening of a seat post or stem. You'll need primer, 1000 grit sandpaper, the color of paint you want to use, clear coat, rags, scotch brite, and grease remover. You can also use either a sprayer or a rattle can. The first step after prep and marking off is applying the primer. It generally works better to do multiple light coats instead of one heavy one. Cover the entire bike and let it dry accordingly. Next take the 100 grit sandpaper and make sure the frame is smooth before applying one last coat of primer. Next apply the paint just as you did the primer, by taking your time and doing light coats. Let the paint dry and if you have any decals install them now before applying a clear-coat finish. Finally apply 2-3 layers of clear coat and you've got a brand spanking new looking frame in less than a day.

painting a bike frame

Some people lose motivation at the primer stage. You've no doubt got a dude in your neighborhood that drives a 'primer gray' 1985 Mustang

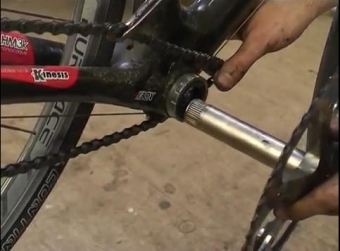
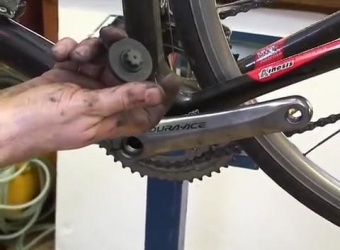
Next put the bike back together and get out and ride!

Replace a Fixed Gear (Fixie) or Track Bike Sprocket

If you ride a track bike or single speed bike you've only got one option when it comes to gearing, but what if you want to gear down or gear up? You have three choices. You can change your chainring, your sprocket, or both. In this video, we're going to take you through how to change your rear sprocket. For this job, you will need a sprocket (lockring) removal tool and the right size spanner wrench. Start by removing your rear wheel. When you've done this put the chain through the rear drop outs, so it doesn't scratch your frame or pick up any dirt or dust from the ground. Place your lock ring removal tool onto the lock ring and loosen it.

use lock ring to loosen sprocket

Use Lock Ring Tool to Loosen Lock Ring

Once it is fairly loose you can probably do the rest by hand. Remove the lock ring from the wheel and then slide the sprockets off. Take your alternative sprocket and put it into place on the wheel. Our lock ring was not symmetrical. One side was recessed. The other was flat. You want to fit the flat side against the sprocket. Put the lock ring on and tighten it by hand at first before using the locking tool.

tighten lock ring with hand

Tighten Lock Ring with Hand

Once you have the lock ring fairly tight, place the wheel on the ground and use your body weight to get it as tight as possible.

use body weight to tighten

Put Wheel on Ground and Tighten with Body Weight

Put the wheel back on the bike and tension the chain. As the sprocket size has changed, your wheel will need to be in a different position for the same chain tension. Once you've done this, tighten your wheel nuts up and you should be good to go. Now that you have your track bike up and running have you ever wondered what it's like at a track event?

How to Set Up and Adjust Cantilever Brakes

Company: 

Hi, I'm Jonathan from Franklinton CycleWorks. Today I'm going show you how to adjust your cantilever brakes. Now, cantilever brakes are also known as cyclocross brakes because they're used on cyclocross bikes, but they're used on a lot of other bikes as well. Now the first thing you want to notice is that there's three points of adjustment on the cantilever brakes. The first one is here, which is where your cable actually anchors.

first adjustment point

First Point of Adjustment, Where Cable Anchors

The second is right here, which adjusts the pad.

second adjustment point

Second Point, Where Brake Pads are Adjusted

The third point of adjustment is either back here or up by the brake levers. Now to adjust your cantilever brakes, you're going to need an allen tool. To begin, you're going to want to notice that your cable runs from the brake lever toward the rear of the bike through this line here and then will anchor to this brake. You're just going to want to feed the cable through and then come to a reasonable tension. You don't actually need the brake pads touching them at this point, but you want them close. Don't worry too much though about getting them exactly on target, we can adjust that later. Then you're going to use your allen tool to anchor the cantilever brake onto the cable.

anchor cable to brake

Anchor Cable to Brake with Allen Tool

Now at this point, you're going to want to give your wheel a spin. Make sure that the brake pads aren't hitting the wheel at this point. If they are, you're going to want to make sure that the wheel is true. If it's not true, it will wobble back and forth and knock into the brake pads. If it is true, and it's still knocking into the brake pads, then it probably means that they're a little too tight. Now we can either go back to step one or we can adjust the brake pads here, or we can use the third option. The third option is the easier of the two, so that's what we're going to do. Now on this bike, the third point of adjustment is near the brake levers. Just a little screw that adjusts how tightly or loosely the cable housing is pulled. As you screw out, the cable housing becomes more tight and actually increases the tension down here at the cable, pulling the brake pads in near the rim. 

third adjustment point

Third Point of Adjustment, Near Brake Levers

At this point, there are just fractions of millimeters separating the brake pads from the rim. This is where you want it to have a nice firm brake- nice strong braking power. If they're the brake pads are too far from the rim, you won't have the stopping power you need. I'm Jonathan from Franklinton CycleWorks and I hope this lesson has been helpful in learning how to adjust your cantilever brakes.

How to Fix a Stuck Shifter (Shimano)

Company: 

Unless you ride a fixie bike or have no need to get out of 2nd gear the odds are you're probably going to need your shifters at some point. Since the shifters get used so often and have so many components directly connected to them there are times when they have a tendency to go bad. One of the biggest problems you'll encounter during a ride is a stuck shifter which could not only leave you in the wrong gear, could impede your bicycle altogether. Follow these tips to fix a stuck shifter and to keep on cruising.

how to fix a bike shifter that is stuck

Over time the shifters will start to break down but they don't need to be instantly replaced, just cleaned.

Figure Out What Is Causing the Stick

Many times gunk, grime, and debris from the road will get lodged into your shifter and prevent it from cycling through the gears as it should. There are two methods to take depending on the type of shifter your bike employs - some allow you to take apart a panel and gain easy access inside but others (most) require you to cut the adjoining cable. Bicycle cables are relatively inexpensive and cutting them might be a more cost-effective option than opening and doing damage to an entire shifter mechanism. Once you've snipped the cable on the stuck shifter, you can drag the entire piece out so that you can open up the cover and gain access to the inside.

fixing a stuck bike shifter

Once you get the cover off the shifter you'll probably easily find the problem. Unfortunately you need that cover off to diagnose.

Once you open up the shifter cover you can engage it to see what the problem actually is. One very common problem is a sluggish and sticky pull that doesn't pop back into place as it should. There is an easy fix to this as you spray some brake cleaner or lubricating liquid into the affected area and work the pull back and forth to get it loose. The fix takes a mere seconds but unfortunately you need to access the interior to solve the problem, making your cables collateral damage in the process.

DIY stuck bike shifter fix

Often the pull that is supposed to bounce back into place is too covered in grime to function properly.

Once you've got access to the interior of the shifter, you might as well re-lubricate it with some White Lightning or any other type of chain fluid just to coat and protect it. Replace the cover and shift the gears into place so that the bike cable can be rethreaded. Be sure to check out our video on how to re-thread the cable for detailed, accurate instructions to get your bike back in proper shifting condition.

Replace a Road or Mountain Bike Chainring

Why would you want to replace your chainrings? Well, it might be that you’re upgrading them, changing the size, or you might want to experiment with some Osymetric or Rotor rings on the road. If you’re a mountain biker, it might be that you’ve hit them and they’re slightly warped. Or for any chainring, it might be that you’ve used them a lot over time and they’re starting to get worn. You can tell that if the teeth are starting to get low, although do bear in mind that a couple of teeth, even when new, are quite low because that aids the shifting from one chainring to the other.

So, in this video we are going to show you how to change the chainrings. For the majority of chain sets, all you need for the job is a 5mm allen key and one of these specialist tools, which you put on the back of the chainring bolts to prevent them from slipping when you’re both loosening and tightening them. Although for some modern chain sets- modern Shimano ones and also some Campagnolo chain sets- they are using these torx bolts, which are a slightly more star-fangled thing, and that reduces the chances of them being rounded off as you loosen and tighten them.

chainring bolt tool

Chainring Bolt Tool

We’re going to start with a fairly standard Shimano mountain bike chain set. With this one we need to start with the inside ring because the teeth of that partly cover the backside of the outer chainring bolts. Undo each bolt, a little at a time, using your 5mm allen key. You can do the last bit by hand, putting the bolts safely to one side. Once you’ve taken the last one off, the chainring should come away from the cranks. Make a note of which way around the chainring was mounted. For this one, we need to use our special tool to prevent the bolt on the other side from moving. Again, undo each outer bolt a little at a time. On this particular crankset, there are also some crank arm tabs which you will need to keep safe. After, all the bolts are removed the chainring will come away from the cranks. Before you replace your chainrings, clean each of the bolts using some degreaser and then apply some fresh anti-seize paste.

tighten chainring bolts

Tighten Chainring Bolts with 5mm Allen Key

To replace your chainrings, start with the outer one. Marry it up to the holes in the crank spider. There is often a small tab on the outer chainrings, which needs to go in line with the crank arm. This prevents the chain falling between the ring and the crank. Then, put one of the chainring bolts in, doing it up by hand. Then do the same with the opposing bolt, and then the remainder. Next, use your chainring bolt tool to hold the back side of it still, and tighten the other side using your allen key.

Repeat this for each of the other bolts and then finally go over them all again to make sure they are tight. Next, we can put the inner ring on. Generally, any writing on the chainring should be facing you as you put it on. This will make sure that you have the ring on the right way around. If you don’t have any writing, try looking at the teeth of the chainring. One side of each tooth should be steep sided, and the other a little more slanted. It should be the steep side that pushes against the links of the chain as you are pedaling forwards. Put the bolts back on and tighten each a little at a time, going around again at the end just to make sure they are all tight.


Chainring with writing

Properly Mounted Chainring with Writing

Here, we’ve got a 2012 Ultegra chain set which uses the torx-style bolts. To remove the chainrings on this, all we need to do is loosen the five bolts. As ever, undo each a little at a time unit you can take them off by hand. Once the last one is out, you will be able to remove both the inner and outer chainrings. Before you replace or renew them, clean the bolts using degreaser and then apply a small amount of anti-seize paste. To put the outer ring on, pull the crank arm through it, and make sure the tab on the chainring is sitting behind the crank itself. Then put the inner ring on, making sure that any writing is facing you as you do it. Start one of the bolts by hand and then do the same with the remaining ones. Then start tightening them properly using your torn tool. Rather than going around the chainring, tighten opposing bolts a little at a time, and once they feel tight, go around them one final time just to make sure. Then you are ready to replace your cranks.

Replace a Bicycle Spoke

Company: 

To replace a spoke you're going to need a spoke wrench of the correct size, a nipple driver or flathead screwdriver, a ruler to measure the correct spoke length, as well as some lube to put inside the spoke nipple. When you need to replace a spoke, using a ruler like this will make it easier to measure the length of the spoke that you require. It has a little hole at this end to put the spoke end into.

Spoke Ruler

Ruler for Measuring Spoke Length

Once you've measured out your new spoke, you're going to slide it into the hub. Once you have the spoke in place, you're going to have to examine the old spoke pattern to figure out how you're going to install your spoke. Once you have it in the right direction, now you need to get the spoke nipple. The spoke nipple goes through a whole on the back of the rim where it came out of. Now that you have the spoke nipple in place, you can take either a spoke driver or flathead screwdriver and start to screw it in.

Tightening Spoke Nipple

Before you tighten it down all the way you want to press down at the hub to pre-bend the spoke.

Press Spoke at Hub

Pressing Down on Spoke at Hub

Before you drive the spoke nipple too far, add a couple drops of a lubricant to it. Now you can take the spoke wrench- you must select the right size- and continue tightening it by turning it clockwise. Now after you've finished tightening your spoke just give it up pluck and pluck some of the other similar spokes beside it, and then you can judge by the sound.

Install a Baby Seat to the Back of Your Bike

Most parents have used the 'baby in the car' trick to go on a long ride and get their little one to sleep. Well with today's high gas prices and if your toddler is being stubborn it could cost you $9 just for your youngster to get some shut eye (still worth it in many parents' eyes). Perhaps a better way to give your kid a ride whether you're trying to get them to sleep or just want them to enjoy the outside is by taking them for a bicycle ride with you because you'll be getting some healthy exercise in the process. It should be noted that for children over a year of age you should use the child trailer that hooks up to the rear derailleur You can install a baby carrier for your bike with these simple steps.

Installing a baby carrier on a bicycle

A baby carrier on your bicycle is a great way to get your infants some fresh air and you some exercise

Installing the Base

The main step you need to do is secure a base for the baby carrier to strap to. It's important that this base is fastened as tightly as possible because no matter how strapped in the carrier is, the whole unit will fall off if the base isn't in place. The base attaches to both the seat and the spoke area so you first want to make sure you purchase a carrier that fits your bike setup, depending on if you have a specialized 2-wheeler. You'll often have to take out a screw or bolt that goes through the seat, put the carrier in place, then replace the bolt through the seat and carrier making sure to tighten it as much as possible. Typically then there are mounts on the rear of the frame where the safety carrier screws in with an Allen wrench. Once again, make certain these are secure.

Installing a baby carrier on a bicycle

These mounts are common on most bikes


Securing the Seat

Your next step is to secure the specially-designed baby bike seat. The unique design of these items lets the little one's feet hang low while they enjoy the cruise. The carrier is tightened to the bike four different ways for ultimate security. Set the seat on the bike base and hand-crank the tighteners located both on the bottom of the seat and to the side. Next securely strap the baby seat to the base on the bike. Finally strap the baby carrier to your seat for an added layer of protection. 

Installing a baby carrier on a bike

Securing the seat tightly is the final step.

Finally, always make sure your baby is tight and secure in their seat both when you set off on your trek and while you're riding as they have a tendency to slip and slide around, especially over bumps. Hopefully you'll institute the enjoyment of cycling into your baby's brain at a young age.


How to Wrap Your Bicycle Handlebars: Part One

Handlebars are often overlooked but are a pretty essential device on any bike this side of a unicycle. For the ultimate in grip and performance many riders opt to use bar tape for even better handling. While it may sound quite simple to apply handlebar tape on a bike, there is a little science to it. By using these wrapping tips you'll become one of the best tapers on paper.

The first thing to be aware of is what kind of bar tape fits your needs. One style is a cork tape that has a grippy surface, is a little thinner, and has a nice classic feel. A second tape is gel tape that is synthetic and has good stretchability for tight, easy, wrapping. The gel cancels out a lot of road vibration and eases stress on your arms and hands. There is also a microtex tape that is very thing but has a more soft and leathery feel. It does take some skill to wrap with the microtek but it is a very nice option. Finally a bar gel can be purchased to stick right on your handlebars that creates a 1/4" barrier on your bar that can then be taped to really cancel vibration.

How to Wrap a Handlebar

A bike stand really helps with the efficiency of wrapping your bars

The main tools you need for handlebar wrapping are a good pair of scissors, some electrical tape, and a stand if possible. The first step is to get your bar nice and clean. Use the electrical tape to keep the cables secured where they need to be. Now grab your preferred tape type and if it has a logo unravel it the entire way so you can start on the correct end. Start at the end of the bar and go clockwise around. Get a good firm grip on the tape as that's the key for maximum looks and feel. It's important to let the tape hang over about 1/2" so that you can tuck the tape in and subsequently seal the plug. Wrap the tape around giving yourself a uniform overlap on each roll.

Wrap a handlebar

Getting a solid start is the key to a good handlebar wrap job

Make sure to check out part 2 of how to wrap your handlebars.

DIY Shimano Rear Derailleur Adjustment

Company: 

Rear derailleurs for the most part are relatively maintenance free except for lubing and cleaning regularly. One minor fix you may have to perform on a regular basis is an adjustment for when the chain becomes loose or performance is affected. This tutorial will give you the step by step process for a Shimano rear derailleur adjustment.

Shimano rear derailleur installation


The parts that need to be adjusted are the upper limit, lower limit, cable tension, barrel and b-tension. The first thing that needs to be done is to pedal so that the rear derailleur fits into the small cog. Then tighten the barrel adjuster all the way in so there's adequate room for adjustment. For a starting point we'll adjust the upper limit. Turning the screw in moves the Shimano derailleur inwards whereas spinning the screw out moves the piece in the opposite adjustment. The ideal location is a position that puts the upper pulley right underneath the small cog and just barely outboard.

Shimano rear derailleur installation

Tightening the screw to adjust position


Loosen the cable anchor and pull the cable tight before tightening the anchor back in. With the bike upside down you should turn the pedals and go through the shifting cycle. If the shifting is sticky or off balance you'll need to tighten up the barrel adjuster to make each gear hit cleanly. You'll need to play around a little bit to fine tune where the pulley lines up.

To adjust the lower limit shift the derailleur into the largest pod. There's a small screw that needs to be adjusted so that it's impossible for the Shimano derailleur to overshift into the spokes. If the chain clicks when shifting in and out the screw needs to be adjusted out so that it goes in cleanly. The last step in adjusting the rear derailleur is to adjust the B-tension screw which changes the angle that the unit sits on. You want the piece to be as close as possible to the cassette so that the derailleur shifts quicker and the chain lasts longer.

Shimano rear derailleur installation

Adjusting the rear derailleur angle

Something you need to remember when adjusting a Shimano rear road derailleur is that it's largely a trial and error process. You'll need to establish starting points for the location and tweak them intermittently to get the most efficient shifting possible.

DIY Hollowtech II Crank Installation

The crank is the powerhouse that keeps your bicycle moving and from time to time the unit needs to be replaced or you might just want an upgrade. One such improvement can be made to your cycling prowess by installing the new Hollowtech II cranks from Shimano. These DIY tips will lead you to complete the process perfectly and effortlessly.

Hollowtech Cranks by Shimano

Hollowtech cranks

The drive side is installed first when putting on any new cranks. Start on the right hand side of the bike and put the spindle all the way through the opening in the frame. Once the right side is completely in you switch to the other side of the bike and attach the left hand piece. A small bolt goes in on the left hand side and is tightened with a 5mm Allen wrench. Don't tighten the bolt completely just yet though.

Hollowtech cranks bicycle installation

The spindle side is inserted first

Bearings are installed next with a preload tool that's often used when installing a headset. The cap fits on the bearing and can be hand tightened as much as possible. Once the bearings are in place you can go back and tighten the bolts with the 5mm tool. The bolt doesn't need to be insanely tight but once you are comfortable with them the Hollowtech cranks are installed and you're ready for the road.

Hollowtech Cranks installation

The preload tool is needed for bearing installation