DIY Set Derailleur Limits

Company: 

It's good to push things to the limit when you're rock climbing or running a 5K but the derailleur on your bike should stay well within it's set range. The upper and lower limits of your derailleur dictate the minimum and maximum of your gears and make sure the chain doesn't fall off your cartridge. There comes a time either after a bicycle overhaul, after a tough spill, or after just months and months of riding that the limits will need to be reset. Climb the rock of setting derailleur limits with these steps.

Set derailleur limits

The rear derailleur

Get Low

To set the lower limit first locate the two screws on the derailleur and tighten the bottom (or screw marked with an "L") as tight as it can go. Next pedal slowly and shift the gears into the lowest possible, usually the second largest ring on the cassette. Next wind out the cartridge and loosen the "l" screw until the chain slips into the largest ring without clicking or slipping. Once the chain goes in you've successfully set the rear low limit.

setting a rear derailleur limit

The rear low derailleur screw

Set Rear High Limit

In much of a similar way as the low limit was set, tighten the top screw on the derailleur all the way to start setting the high limit. Once tightened pedal and shift so the chain moves its way towards the end of the cassette, the smallest rung. Loosen the screw again until the chain pops into the last run without any issues or hiccups. If the chain refuses to slip in it may be necessary to adjust the black oval clip known as the barrel adjuster.

Set Clearance

 Once you've set the high and low limits, it's time to set enough clearance so that your system can shift without any issues. There is a long screw sticking up that can be turned clockwise to open the gap and counter-clockwise to decrease it.

setting the limts on a derailleur

Finally set the clearance

Setting the derailleur limits is often the first step in indexing your bike's gears and performing other chain or cartridge maintenance. Once you've mastered this step fine-tuning your bike's shifting becomes a downhill process.

Fix Hybrid / Mountain Bike V-Brakes That Are Rubbing

Company: 

It seems like an obvious statement but rubbing on a bike is never good, unless of course you're in a race and rubbing the contestant next to you to get an edge. For the most part the only rub encountered is the chafing on our own undercarriage and quite frequently the brake pads. When brake pads rub on the fork of the bike it not only makes an annoying sound and wears down one pad faster, it creates a jerking motion that can make the bike much harder to navigate. The sooner we fix this mountain bike v-brake rub, the more enjoyable the ride becomes.

fix v-brake that rubs

A rubbing brake is a nuisance and a money pit, not to mention a safety issue

Step One: Loosen the Tire

To perform the process of elimination we must first make sure that the brake is causing the rub, and not a tire that is off centered or out of true. Release the skewer near the bottom of the front fork and make sure the tire is balanced and center. Now tighten the tire back up and see if the rubbing issues remain. If they do it's time to adjust the brakes themselves.

Fixing rubbing v-brake on mountain bike

Sometimes it's not the brakes at all causing the issue and instead an out of alignment tire

Adjust the Brake Centering

If the tire is centered but you're still experiencing a rub, you must adjust the brakes. Near the bottom of the front brakes are two little screws. You can center the brakes by tightening the screw on the non-rubbing side a half-turn while loosening the opposite one the same amount. Try the brakes and if there is still rub it may take some adjusting back and forth until the v-brakes align nicely.

mountain bike or hybrid bike rubbing brakes

It may take some finagling to get the brakes back aligned but it's well worth the time

It's important to monitor your v-brake every so often and possibly even keep a small screwdriver in your ride-along toolkit so you can adjust while out on a ride. Save the rub for the pork at your next barbecue.

How to Fix a Bent Rear Derailleur

Company: 

Peter wants to know: my bike fell over on the drive side and bent my derailleur hanger. Do you have any tips on how to straighten it back out?

Having a spare derailleur hanger on hand is always a good idea and it's something that I make a point to purchase with every new bike. With that said, even with a new hanger, they're rarely in perfect alignment.

Quick release skewer tension can often pull a derailleur hanger out of alignment once the wheel is mounted in the frame. The only way to really dial in derailleur hanger alignment is with the hanger alignment tool. Using your wheel as a guide, you can see exactly where you are in the alignment process. Checking the alignment at the top, bottom, and back of the wheel, you can get it perfect every time, but this dedicated tool is expensive.

The Expensive Hanger Adjustment Tool

Another less accurate option is to use a crescent wrench to straighten the bent hanger. The problem with the crescent wrench is that you just need to be careful that you tighten the wrench down tight on the hanger, and make sure that the jaws of the wrench extend past the mounting hole for the derailleur. If the bolt for the derailleur mount gets bent, you won't be able to thread your tderailleur back into the hanger. To check your work, eyeball the alignment first and then thread your derailleur back into the hanger and use the policing cage as a guide that you can compare to the cogs above it. If everything lines up visually, you're probably close enough that your derailleur will start shifting well again.

Get at the Derailleur with an Adjustable

Use a View from the Back to Gauge

Whatever you do, don't grab on to your derailleur and pull on it to straighten out the derailleur hanger. This often leads to bending the derailleur itself, and while it may look in allignment in the 11 tooth cog, when shifted into a larger cog, it'll be out of alignment. So don't do it.

Hands Only Can Be Dangerous and Cause More Harm

How to Cut and Wrap Bull Horn Handlebars for a Bike

I've had my fixie for about three years now if you've watched any of the other videos, but now what I want to do is I'm going to turn these handle bars into bull horns and I'm going to wrap them up with some tape wrap that I bought. 

First step is going to be super simple I think. I'm just going to take out the handlebars and use a pipe cutter to cut them into the bull horn shape. Like I said, I'm just going to unscrew here and I'm going to take these handlebars all the way out so I can cut them. Alright, so I've taken the handlebar off the bike and what I'm going do is I'm going to attach this pipe cutter here. I've measured out where I want the bull horn to start and I'm going to take this pipe cutter. If you've never used a pipe cutter before it's super simple, all you got to do is tighten up and then you move in a circular pattern around whatever you're trying to cut, and as you go around, with almost every turn, you want to tighten up a little bit more. So the first cut is done. Okay I made this cut, so all I am going do is use this piece to measure against the other handlebar how much I want to cut off. Alright so it's cut and we got pretty solid bull horns.

Use the Cut Piece to Measure Other Side

So now that we've got our bar all situated in everything, it's got to go back in now before anything else, because once you've already put the tape on it there's no way you're going to get it back into the slot. I've already put one of the bar ends in because I wanted to make sure that it fits, which it doesn't fit very well to be honest with you, but you know make do with what you got. Alright, so I'm going to put the other bar end in and the goal is to get the bar ends in first.

We got our bar ends in, we're just going to take the tape and we're gonna start at the top, and we're going to wrap up around the top of the bar end. Even though the bar end is sticking out a little bit, I'm going to wrap up almost to the lip of it so that we can get enough to stick in it. You want to wrap from the bar end down. You want to get the middle of the tape on the edge above where the last wrap is. So I'm going to cut my bar tape, it came with a little bit of electrical tape, so we're just going to take that electrical tape and start right at the bottom here. Alright so that's one down. So I'm just going to get my electrical tape, place it, and wrap it as close to the edge as possible.

Secure Bar Tape with Electrical Tape

Now that we've got this all done, we're just going to push our thumb nail around the edge of this bar end. It works pretty well to move the heel of your hand in a circle to push the bar end down, and make sure all the edges are in there. Pretty easy to do, just takes some time, now you have some bull horns and you are ready to ride.

How to Install a Bike Seat on 3 Different Seat Posts

Company: 

I'm going to show you how to install and adjust a saddle on three of the most basic type of seat posts.

This is the first one, it requires 6 mm allen key. All you're going to do is loosen up that bolt. Sometimes with this particular type, we need to loosen it a little bit more than you think. If I were just to adjust it, then I just want to get it so that it will move, so that you're disengaging the little teeth in here. Sometimes it can jam so you have to give it a little bit of a push. Once that's free you can adjusted the nose up, down, forward, and out. Alright so if I were to completely replace this saddle, I'm just going to swing that top piece, so that I can take the saddle off. Simply put the new one on and tighten it up. I get it so that it's just kind of firm-ish and then when it's on the ground, I can sort of micro adjust it. When you're trying a new saddle, a good place to start is with it completely level and it right in the middle of the rails here, so equidistant from the two ends. Sometimes it will only go a little bit with the nose up or a little bit with the nose down. Sometimes you can't get it quite level so you have to kind of play around with it. Alright, so that's one type.

Swing Top Piece to Take Off Saddle

another type uses a 5 mm allen key. You just loosen that and the whole thing just swivels, so you can slide it forward and back, you can put the nose up or down.

Second Type of Seat Post

Another really common type, uses a 4mm allen key here and here. So if you want the nose down you tighten this. If you want the nose up, then you tighten that. In order to tighten one, you've got to loosen out the other one first. So if I wanted the nose up a little bit, I would loosen off the front and then that would allow me to tighten the back and the nose will swivel up. When you tighten it up, it should be with this type especially, it should be really snug. You can strip these if you really wrench on them, so you don't want to do that, but just make sure it's its getting firm. 

Third Type of Seat Post

Use 4mm Allen Key with Third Type of Seat Post

How to Install Fenders on a Bike

I'm here to show you how to install fenders on your bike. It's actually a pretty easy process, you only need a couple tools: 15 mm wrench, 10 mm wrench, 5 mm allen wrench, and 3 mm allen wrench. Make sure when you open the package that you have all the parts.

You'll need to remove the back axle, us your 15 mm wrench to do that: lefty loosey, righty tighty. After you loosen up the back axle, you'll have to take the chain off. The easiest way to do that is lift the chain on top of the front sprocket and gradually turn the wheel. It will naturally just fall off and you can peel it off the back sprocket as well. After you've released the chain, just pull the tire off. It may get stuck a little bit on the brake caliper, but it won't damage it if you just pull.

Now we'll need to remove the back brake caliper with my 5 mm allen wrench, it's pretty simple, you just turn a little bit. Now you have to take your fender and just gradually slide it into place. The first part you need to do is the bottom bracket and then the side supports. If there's paint on your frame, there can be paint on the inside of the wall. Be cautious about that and make sure not to strip the bolts.

Attaching Fender Side Supports

Next you want to put the brake caliper back on. Because there is a fender support, you'll want to remove one of the washers from the brake caliper. Just slide the caliper over & easy, over the fender and a slide it on through. It's a simple process, if I can do it, trust me, you can probably do this as well.

We basically have our fender in place now, but we need to put in the rear tire. Make sure to take the chain and have it on the outside of the sprocket when pressing your tire up.  

After you've installed your tire, put your chain on. Now we have to tighten the chain up by pulling back the axle in the drop out. Make sure that it's aligned nice and centered in the brake caliper and down the back part of the frame.

Put Wheel Back On After Installing Fender

Now we can make some micro adjustments on the back of the fender to adjust the height and the depth that it has against the back tire. Get your 10 mm wrench and you can just manually move them up and down. You'll want to make sure that the back tire is straight in line and that you do not have any rubbing with the fender.

The front tire is virtually the same process. It's a lot easier then the back fender which is why we showed you the back fender first. When reinstalling the front tire, make sure the axle is fully seated in the dropout. 

There you have it ladies and gentlemen, how to install fenders on your bike. You will probably have to do some minor tweaks and modifications. Not all fenders fit bike frames perfectly, so just keep that in mind. 

DIY Remove a Fixed Gear Cog at Home without Special Tools

Today, I'll be showing you guys how to remove your fixed gear cog, but I will show you how to remove it without any special tools. Only tools you'll need is a screwdriver or some sort of pointy pic and a hammer. So we have a lockring, which is the silver thing and an actual cog, which has the teeth. So what you're going to want to do is remove the locking first. For the lockring you would need a special tool, about 20 bucks, and for this the cog you need a chain whip, about 15-20 bucks, so in total I'm saving you about 30 bucks.

The locking is counter threaded. That means left is tight and right is loose. To loosen it up, you want to go to the right. You want to put the screwdriver in the groove, as you can see the lockring has some grooves. We're going to hit it right, to loosen it. This is loose, but some are really hard to take off. You want to hit hard enough to loosen them.  Once the lockring is off, you're left off with the cog. You're left with the cog.  This one is normal threaded so right is tight and left is loose. So you are going to spin it to the left. You want to take your screwdriver, which works best, and put it not on the tip of the tooth but lower in the groove, so you don't chip your tooth. Loosen it up by hitting the screwdriver hard with the hammer. Many people say this doesn't work because you can't get it tight enough, but I have had no problems, and even if you can't get it very tight, pedalling forward with the lockring on will help tighten the cog. 

Put Screwdriver in Lockring Groove

As you can see, to put it back on there are two grooves. On the freewheel side, there is only one groove. The two grooves are for the lockring and the cog. Once you are done, changing the gear ratio or cleaning, to put it back on it is the same kind of thing. Put the cog on first and tighten it with your handed. Then use the screwdriver and hammer to tighten it really good. Hit it as hard as possible. Then put on the lockring, which keeps the cog from moving. To tighten the lockring, thread it on the opposite direction, left is tight, and use the screwdriver and hammer to tighten it up again. 

Tighten by Hitting Cog in Opposite Direction


Wash Your Bike at Home Like a Pro

Company: 

It's probably the most iconic sequence in cycling cinematography, the opening scene from the 1977 documentary "A Sunday in Hell" about Paris-Roubaix. It shows a mechanic washing a team bike, and that's a scene that you're going to see repeated dozens of times over at any team hotel after a professional bike race, today thirty-five years later, for several important reasons. First of course, they need keep the bikes looking good for the team sponsors, but they also need to make sure that the bikes work as well as possible, and a clean bike is always going to work better, and it's also going to last a lot longer. Because that grit tends to wear away bike components, but most importantly cleaning a bike lets you get a really close look at and inspect it and spot any problem areas that might cause you trouble down the road. So for that reason I encourage you to wash your bike at least once a week just to keep an eye on things, make sure nothings going to fail on you by surprise.

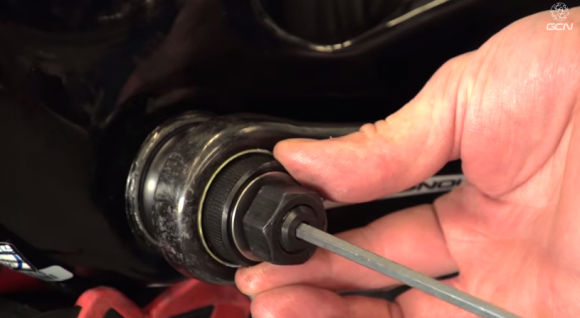
To clean your bike, you're going to need a few basic tools. The obvious ones are: a bucket with soapy water. I'd like to use warm water, but I just use dish soap, nothing fancy, and of course, a hose, so you can rinse stuff off. Now to actually clean your bike, you'll need a couple of sponges, a nice soft bristle brush that can get into the nooks and crannies, a harder brush for getting up the chain and things like that and, it's kind of handy to have one of these brushes that gets in between cogs and things like that, and you're going to want some degreaser (this is orange peels citrus degreaser made by Pedro's, good stuff it won't damage the frame's paint and you've got the bearing seals that's really important) and something to put the degreaser in, just cut off an old water bottle, and something to apply it, some old paintbrush, and of course a couple of towels and rags are really handy to have as well. A couple luxury items: I guess this is a chain holder, this keeps the chain turning smoothly without scratching the frame paint, and the most expensive item is a repair stand. This is a park fork mount stand. I highly recommend it because it lifts the bike off the ground so you're not bending over all the time, which is better for your back and also lets you get things without too much difficulty. It just makes cleaning a lot quicker and more convenient.
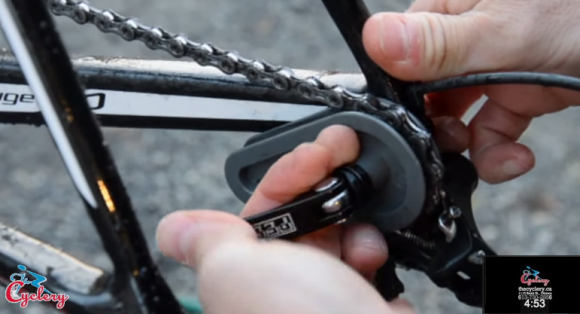
Chain Holder

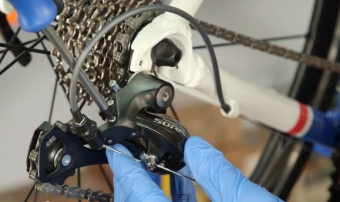
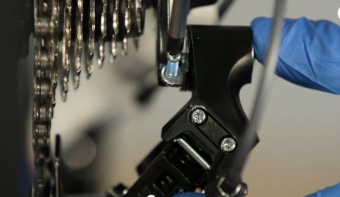
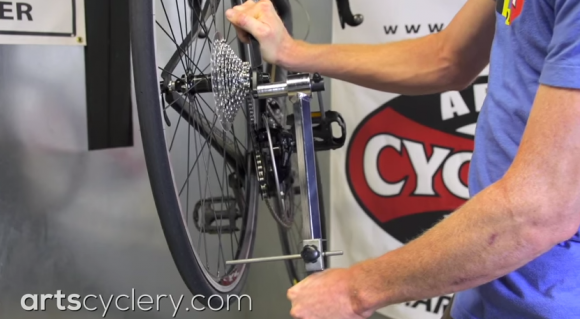
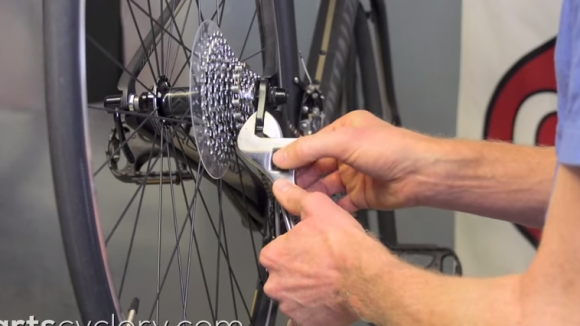
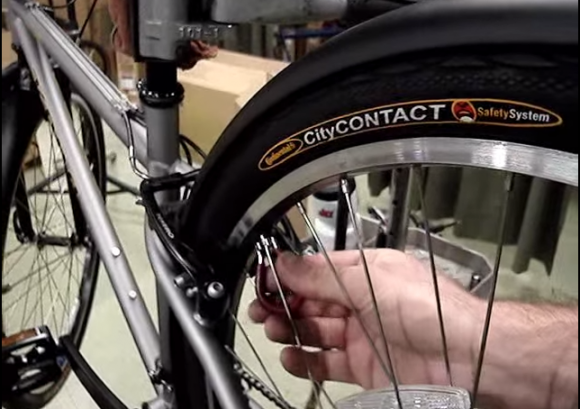
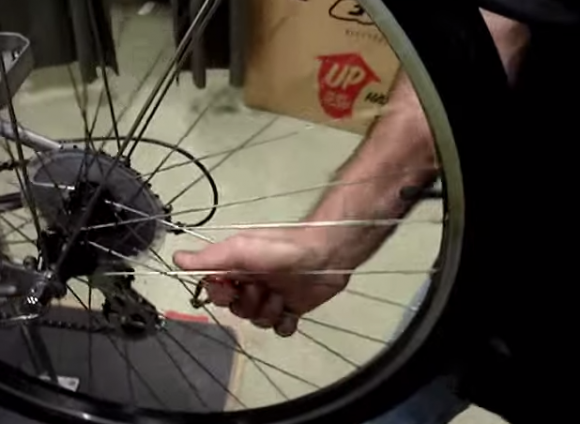
Here, I'm using my cyclocross bike to demonstrate. As you can see it's covered in grit and mud. When a bike is this dirty, the first thing you should do is use the hose to rinse off most of the dirt so it's not there to scratch the frame as you wipe it down with a hose later. Next, I mount the frame in the stand. Mount both wheels on and install the chain holder. This isn't essential, but it does make cleaning the bike easier, and keeps the chain from scratching the paint. Now I pour a little degreaser into the cutoff water bottle. It's really convenient to put this in the seat tube water bottle cage so it doesn't get knocked over while you're working on the bike. Then I use the paint brush to apply the degreaser to the chain, the chainrings, and the derailleurs. The parts should be dry before you apply the degreaser, and it's important to let it soak in for a few minutes. You should also put the degreaser on the cassette. Try to lean the wheel so the cassette is facing downwards so the degreaser doesn't drip on the tire or onto the hub bearings. Using the stiff brush I then scrub the parts with soapy water. It really helps oily residue. Don't forget to scrub the casette. Now it's time to clean the rest of the bike. With the sponge and soapy water, I start with the highest point of the bike and work my way down. Make sure to clean the bike from both sides and don't forget to get in behind the fork and under the bottom bracket. Use the soft bristle brush to get into the more intricate parts. I also like to run the chain through a soapy sponge. If I also use a soft bristle brush to clean the rims and the tires so it will be easy to cheack for cuts later on. Clean the hubs between the spokes to with a soapy sponge.

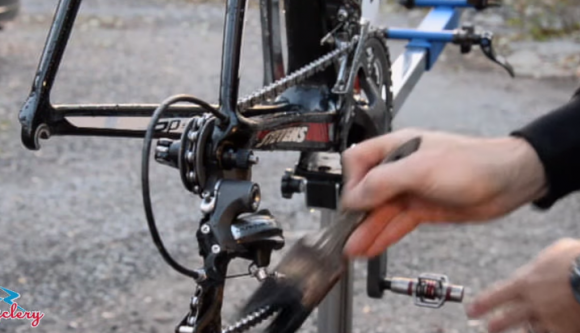
Apply Degreaser with a Brush

Scrub with Brush

When it's time to rinse the bike, start from the top down again. Aim the hose downwards. Avoid spraying directly into any of the bearings. You'll find that they last a lot longer if you avoid doing that. 

To finish off, I use an old towel to wipe the saddle, handlebars, and the frame down, so they all dry a bit quicker. I also try to dry the chain off, so it doesn't get any chance of rust. Then it's time to put the wheels back on the bike, and let it sit for a while. Here you can see just how clean the bike gets using this simple method. Now you can give it a once over and look for any problems. All you need to do is lube the chain and maybe the polish and sand some other vital parts that start to get sticky after a while and check that the gears work and you're off to the races for the cycling.

DIY How to True a Wheel on Bike with No Truing Stand

Company: 

Today, we’re going to show you how to true a wheel right off your bicycle. This isn’t what is normally done at the shop, but if you’re at home or out on the trail you can touch up your wheel and get it rideable again by using your brakes as a wheel truing stand. I’m going to take small turns on each spoke to find out where it’s rubbing. When you find the area, tighten the drive side a little bit and loosen the non-drive side.

Tighten with Spoke Wrench

Slowly work your way around the bike doing this to areas where the wheel rubs on the brakes. If you don’t have a bike stand, you can always do this same technique with the bike upside down. Notice that I overshoot on the spoke nipples, so the whole spoke body doesn’t stay twisted. So I keep spinning it and it gets better and better. If you work just in one area, you tend to over tension the spokes, so try and work through the whole wheel. At the same time, I’ll go through and put extra tension on the spokes.

Put Extra Tension on Spokes

Just grab a pair and work around. That will help the spokes to settle in more. After that, I’ll go around the wheel and touch it up again. Using the clearance between the rim wall and the brake pad as a way to measure. It’s a good idea to carry a spoke wrench while out on a ride because you can do this fix pretty easily. It can be difficult to get the wheel perfect with this method, but it isn’t difficult to get the bike rideable, and this can save you if you are far away from home.

Install Campagnolo Over Torque (BB30) Bottom Bracket and Cranks

Company: 

In this video, we're going to show you how to fit a Campagnolo over torque bottom bracket and change set. The over torque bottom bracket is a standard BB 30 press fit. To do this job, you'll need a bearing press with Campagnolo over torque adapters, Campagnolo over torque bottom bracket tool, a number of allen keys, and an adjustable or 24 millimeter spanner. You'll also need some grease for general assembly.

Start by putting the retaining clips into the frame. It should be obvious when these have clicked into place. Once the clips are in place, it's time to put the bearings in. The bearings need to be parallel when they go into the frame so that they are not damaged by the bearing press. Position your bearings carefully by hand and check that they are straight. Put the over torque adapters on to your bearing press and make sure the discs are directly in line with the bearings. Start using the bearing press to ensure that the bearings are not going in at an angle. One bearing may go in to place first, but the other one should soon follow.

bearing press

Put Bearings into Place with Bearing Press

With the bearings in place, it's time to put the cracks on. Make sure that you grease the seal and then push the cranks through the bottom bracket. Put the seal and spacer on the left hand side of the axle, making sure to also grease the seal on this side. Before you put the left crank on, put the expanding sleeve on the axle. This sleeve has 3 teeth, and they should all be facing outwards.

sleeve with 3 teeth

Put Sleeve with 3 Teeth on Cranks

With the sleeve in place, put the non drive side crank arm on, and make sure that it is correctly lined up. Put the lock ring on with the first part of the Campagnolo over torque bottom bracket tool. Use a 5 mm allen key to attach the tool to the bottom bracket axle, Then use to an adjustable or 24 mm spanner to push the crank onto the axle.

lock ring

Put Lock Ring on with Bottom Bracket Tool

Like us, you might reach a point where the tool won't go any further, but there's still some play in the bottom bracket. At this stage, remove the over torque bottom bracket tool, and use the adjustable sleeve on the non-drive side to take up any remaining play. To do this, spin the adjustable sleeve around the axle until it has taken up all the slack, and then use a 1.5 mm allen key to tighten this up. It's always worth checking your work, so test for any play on the bike stand and on the ground.