Best Top of the Line Bike Wheelsets

Riders will often consider new wheels when it comes time to spending some serious cash. Here are 5 wheelsets beloved by both pros and ambitious amateurs:

5- For a true, all-around wheelset, look no further than the Zipp 303. Zipp's air-flow enhancing, golf ball dimple texturing, and wide profile firecrest design keep the aero dynamic obsessives happy.

4- Mavic has been in the wheel game a long time, so the top of the line Cosmic Carbone Ultimate wheelset is hard to overlook. With full carbon spokes and an overall mass of 1185 grams this wheelset will keep weight watchers satisfied.

3- Developed in collaboration with Formula One design guru Simon Smarts, the Smart Enve System boasts some serious aero chops. Interestingly the front and rear wheels have different rim depths, which is said to improve aerodynamics and stability. They also have specially textured braking surfaces.

2- Features such as a choice of bearing and rim depths make the trusted Campagnolo Bora Ultra Series a great choice.

1- Although we haven't seen them in the world tour for some years, german carbon specialists 'lightweight' make some of the most exotic and desirable wheels on the planet. Many pros say if they could only ride one wheelset for the rest of their lives, it would be lightweights as the right quality and stiffness is unparalleled.

Best Cheap Mountain Bike Disc Brakes

Company: 

Mountain bike brakes are extremely expensive, commonly costing 300+ for a full set of rotors, levers and calipers. But, you don't have to break the bank to get an amazing set of brakes.

The Magura MT2 and MT4 brakes are amazing brakes for your money. Specialized also just specced the brand new Magura MTS brakes that have a MT4 handle with the MT6 calipers. Another budget friendly mountain bike brake is the Shimano SLX. They are lightweight, amazingly durable and incredibly consistent.

How to Fix a Flat Tire with a Bike Patch Kit

 Patching a bike’s tire inner tube is much easier and faster than it sounds.

Step 1: Remove the flat tube from the tire
Remove the flat inner tube from the tire.

Remove Punctured Tube

Step 2: Attach tube to a pump
Attach the inner tube to a bike pump.

Step 3: Pump up the tube
Pump up the tire until it’s full of air.

Step 4: Listen for the escaping air
Listen for the hiss of air escaping from the tube. Bring it close to your ear to help.

Tip
Using a bowl of water, run the air-filled tube through the water. Look for a stream of bubbles emanating from the tube. That’s where your hole is.

Step 5: Let air out of tube
Cover the hole with a finger, detach the pump, and let all the air out of the tube by pressing down on the valve stem.

Step 6: Lightly sand the area around the leak
With your sandpaper, lightly sand an area around the leak larger than your patch.

Step 7: Wipe the leak area clean
Wipe clean with your hand or optional towel.

Step 8: Cover the sanded area with glue
Cover the sanded area with glue.

Cover Punctured Area with Adhesive

Step 9: Let the glue dry
Let glue dry for 5 minutes.

Step 10: Put the patch over the leak
Separate the patch from its backing and place directly onto the tube, pressing it firmly into the glue.

Tip
A good rule of thumb is to replace a tube after you’ve patched it three times.

Step 11: Remove the cellophane cover
Remove any cellophane cover over the patch and you’re ready to go.

Remove Cellophane from Installed Patch

Did You Know?
Bike patches are typically more durable than the tube itself.

Emergency Bike Spoke Replacement with FiberFix Kit

The FiberFix is a kevlar chord used to fix a broken spoke in an emergency situation. Breaking a spoke is a rare occurrence, but it can happen while you are out on the road, so it would be a good idea to carry one of these emergency fix kits especially if you are going on a longer ride or a tour. The kit includes a spoke wrench, kevlar spoke itself with a little cam adjustment on top, and a spare spoke nipple.

The first thing when you break a spoke is to remove the broken spoke. This will require you to take off the tire and tube. When it is removed, leave the spoke nipple in there. If it’s gone, use the extra from the kit. Then take the kevlar spoke, and screw the cam piece side into the nipple. Just a couple turns. Run the kevlar spoke down to the spoke hole in the hub where the broken spoke came out of. Lace it through that hole and bring the extra back up to the cam piece.

Screw Cam Piece Into Spoke Nipple

Bring the kevlar line back up, over the top roller, between the two rollers, and back through the bottom of the J piece. Once you weave the chord through the cam piece, tighten the cam piece a few more times by screwing it into the spoke nipple. Then take the spoke wrench and use it to prevent the spoke nipple from turning, while you tighten the cam piece. This is essentially twisting the two strands of the kevlar chord, tightening it, and pulling your rim back into alignment. Continue to tighten it until the rim is straight enough that you can ride it again to the nearest bike store or home. Wrap the excess chord and tie it off securely.

Weave Kevlar Spoke to Secure

It can be a good idea to carry two of these emergency fix kits since one broken spoke can often make other spokes break easier than normal by putting added stress on adjacent spokes.

DIY How to Quickly Repair Rapid Fire Trigger Bike Shifters

Company: 

If you’re rapid fire trigger shifter is having trouble catching or shifting properly, there is an easy way to get the shifter working properly again.

There first thing to do is rotate the brake lever, which involves loosening the clamp holding the shifter to the handlebars. This will give you better access to areas of the shifter.

Rotate Shifter for Easy Accessibility

You will need to have access to the hole that leads into the shifter. This area can often get clogged up with grease, thereby making it stuck and unable to shift properly. Use WD-40 and spray this into the hole to break up all the grease, old dirt, and oil. Get a lot of it in there, and then begin to work the gear shifter, turning the cranks to allow you to cover the whole range of your gears. The WD-40 should get things working again, but only for the time being. WD-40 isn’t a lubricant, it is a solvent, so it will only work temporarily as a lubricant.

Spray WD-40 Inside of Shifter

Now, with the grease broken up from the WD-40, use an actual lubricant and spray this liberally in the same hole, again working the gears through. Now clean off as much excess dirt and grease as you can, move the shifter lever back to its original position, and it is good to go.

How to Adjust a Shimano Nexus Internal 3 Speed Hub

Company: 

Today, we’re going to work on internal multi speed hubs. This is the Shimano shifter. It is the Nexus model, which is written on the body. Another way to tell that this is Shimano is that the cable chord goes straight into the adjustment knob, which goes straight into the body of the shifter.

Now, the first thing you want to do is go up to the shifter on the handlebar and put it into second gear, the middle gear. You need two tools: an open end 10 mm wrench and you may also need a pair of pliers.

Tighten Lock Nut with 10 mm Wrench

The first thing you do is loosen the lock nut right up against the body of the shifter. Loosen that and it allows the adjustment knob to be free. Sometimes you will need a wrench to move it. You will see there are two lines in the window of the shifter and there is a piece inside that has a little yellow indicator. You want to line that yellow between the two lines with the adjustment knob. When you get the yellow right between the two lines, go ahead and put the lock nut right up against the body of the shifter, and tighten it with the 10 mm wrench, so that adjustment stays nice and firm.

Adjusted Shifter Top View

Now you’re done. Take it for a ride and make sure it shifts properly.

How to Remove Rust from Your Bike

Today, I’ll be showing you my method to get rid of rust.

I’m going to be using this as an example It is a 24 inch wheel from an old vintage bike. If you just look, you can see the rust. It’s not too bad, but it should be clean. For this you will need some steel wire wool (you can also use aluminum foil with a touch of water) and some car polish.

Wheel Rims Can Become Easily Covered in Rust

Once you have selected the rusted spot you are planning to work on, you are join got take the steel wool and start rubbing over the spot. As you rub, you will start to see the rust go away.

Once you have rubbed the rust off of the spot you are working on, take the polish and pour just a little bit on the wool. Not too much. Then go back to the spot and do the same as before. The more you do it, the cleaner it will look. After rubbing the wool with the polish, leave it to sit for about ten minutes, the use the steel wool without the polish to rub it down again and get rid of the remaining rust. Then take a rag to rub the area clean.

Rub Off the Rust with Steel Wool and Polish

This same method can be used all over the bike. However, any steel parts or painted areas will need to be repainted after removing the wool to protect the area from future rust.

How to Pack Your Bicycle in a Bike Box for Travel

The Bike Tube Hint: Don’t rush off and buy a professional bike box or bike bag. First head over to your local bike shop and ask if they have any leftover boxes from when bikes were shipped to their store. These work just as well, and they’re free!

-------

In this video, I’m going to show you how to pack a bike into a bike box.

There are some essential tools you’ll need for this job: a pump, some allen keys, a pedal spanner, padding, dropout protectors, and tape.

Pedals: The way I think about removing pedals is to go against the way that you turn the cranks. The easiest way to achieve this is to hold the back brake to prevent the bike from moving. Then, gently put your foot on the arm of the spanner wrench and apply pressure. If you’re using a pedal spanner be careful to avoid the chainrings on the drive side.

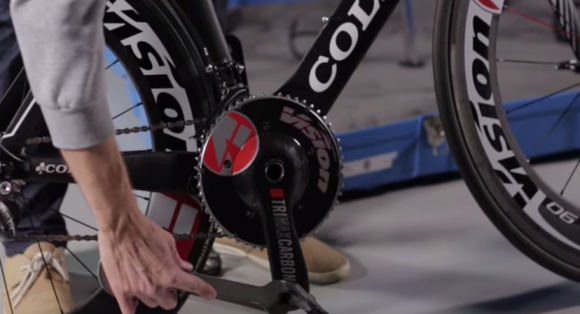
Watch Out for Chainring When Removing Pedals

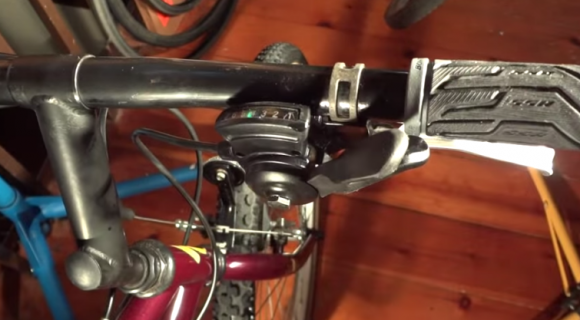
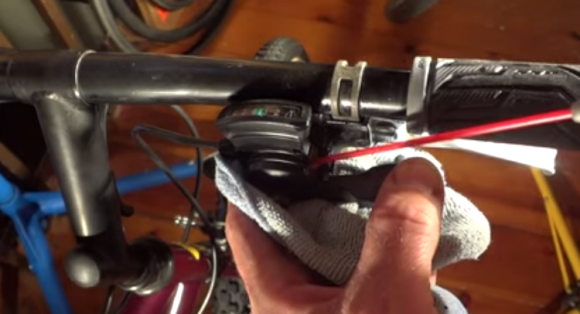
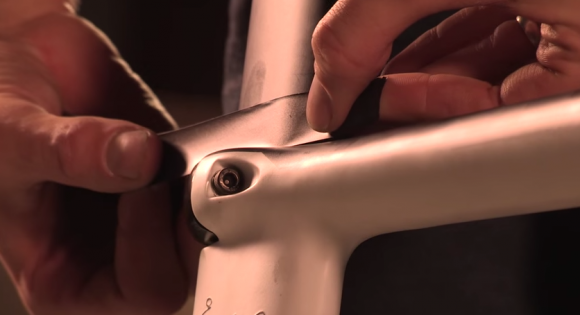
Remove stem and handlebars: Start by removing the top cap from the stem. Loosen the bolts on either side then gently put the stem upwards from the fork’s steerer tube so that the handlebars are hanging by the cables. Remember to put the cap back on once you have done this so you don’t lose it. Same with the bolts from the stem.

Remove the seat: Before you remove the saddle mark the position with a piece of tape. Line the tape with the edge of the frame, loosen the bolts in the saddle clamp, and remove the saddle. Remember to replace the bolts in the saddle clamp to not lose them.

Mark Seat Height with Tape

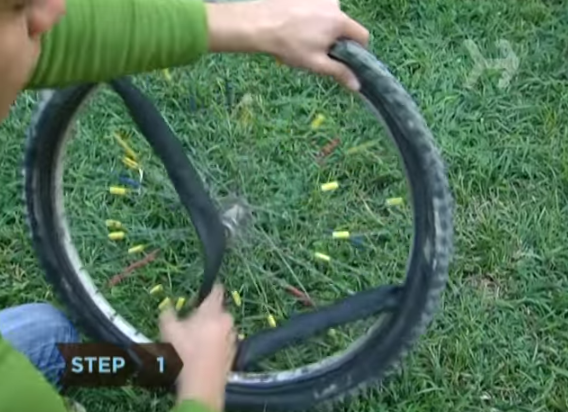
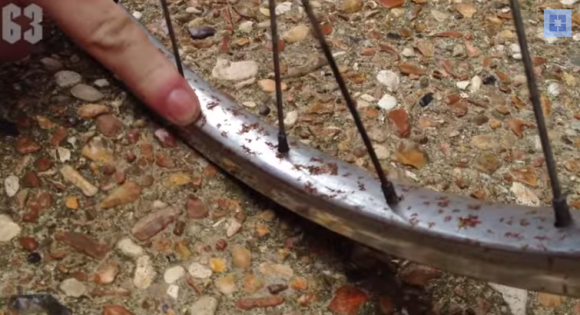
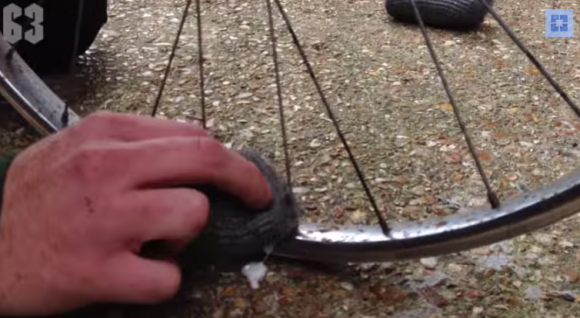
Remove the wheels: This is easiest when the chain is on the smallest gear on the rear cassette, and the small ring on the front crankset. Open the brake calipers and the quick release on the wheel you are removing. Do the same with the front wheel of the bike. Before you put your wheels into the box, remember to deflate them.

Remove the rear derailleur: some people like to move their rear derailleur for safety reasons, and with some bike boxes you have to. Do this with an allen key turning anti-clockwise.

Padding is important if you don’t have a hard case. Remember to strap the frame into position once it is in the box so it doesn’t move about in transit.

Dos and Don’ts: Never put gas canisters into the bike box or containers of pressurized air. If you have electronic gears, you will also need to take the battery pack out of them.