How to Install a Star Nut in a Bicycle Fork

Company: 

I'm going to show you how to install a star nut into your bicycle fork.
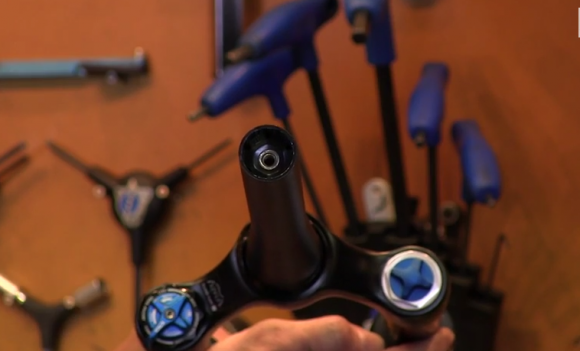
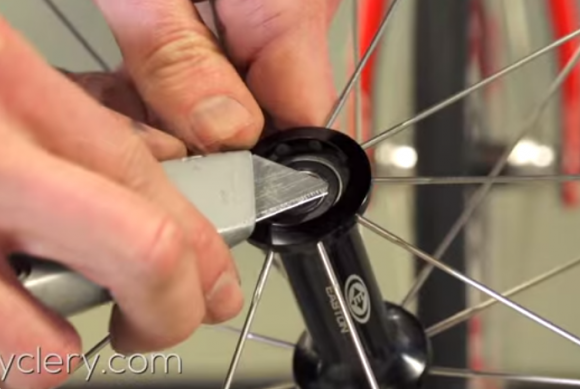
star nut in form

Star Nut in Fork

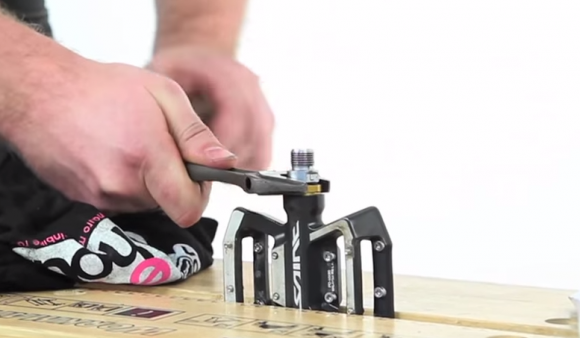
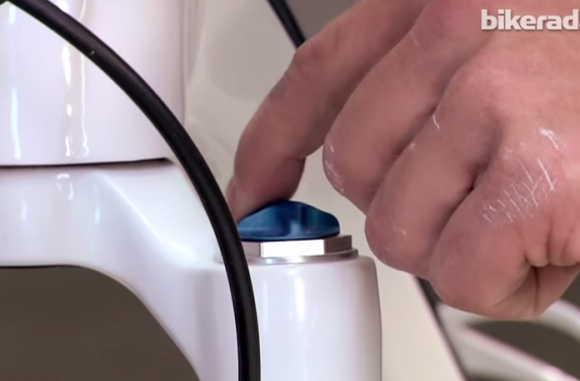
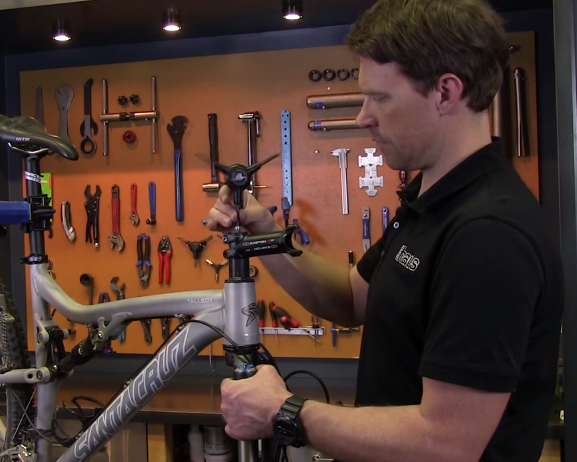
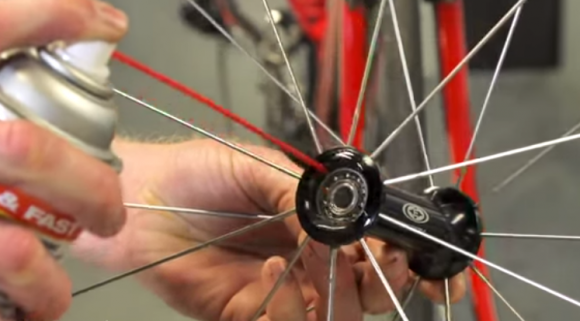
In order to install the star nut straight into the steer tube of the fork, you need a tool. This particular one is for 1 1/8 inch steer tube and it attaches to the star nut, which is going to go into the fork. This allows you to thread the star nut on to the bottom, set it on to the fork, and then it will hold it straight while you hit it with a hammer.

tool to set star nut

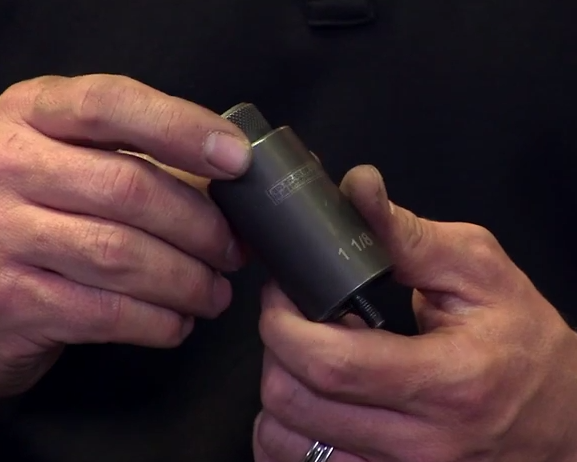
Tool Used to Set Star Nut

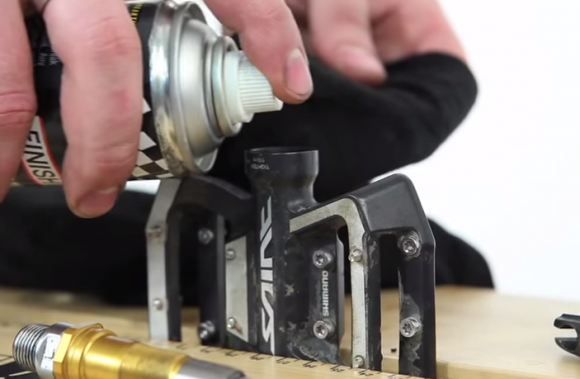
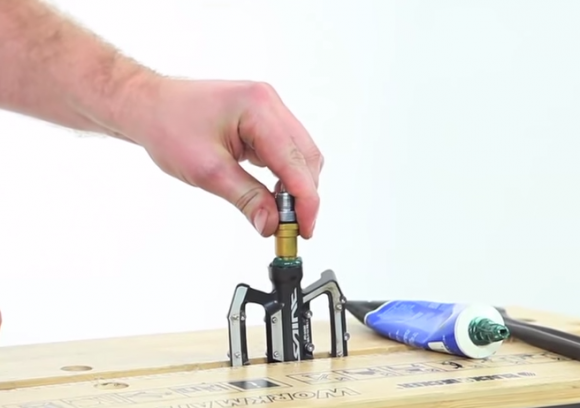
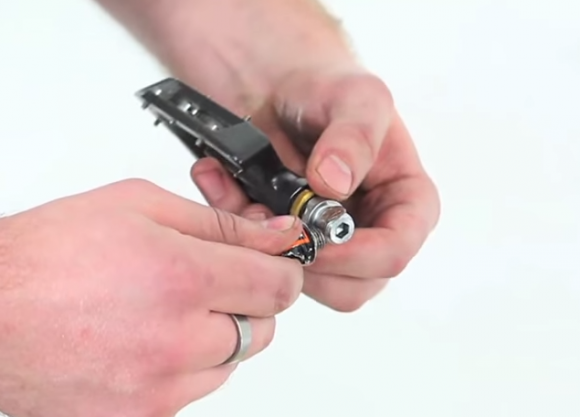
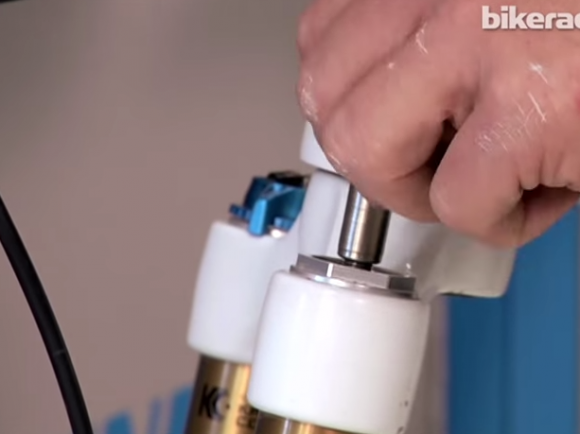
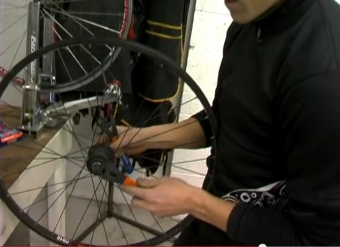
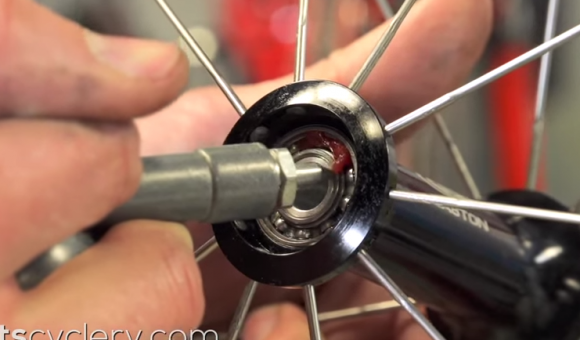
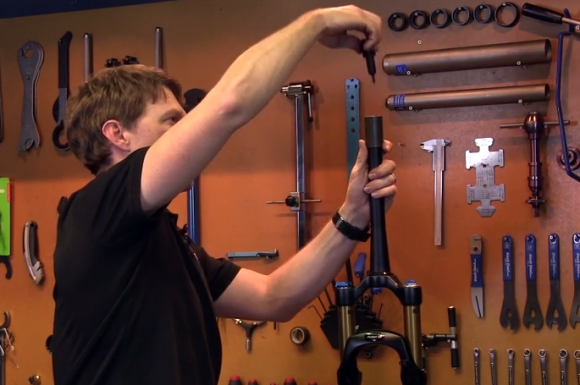
The first thing is to thread the star nut on to the bottom of the installation tool. Make sure it threads on all the way and then this goes right on top of the fork. Now it's already set to set it at the right depth and also to the the size of the steer tube. It's going to go on here, and then this coller sets right over the top. Once you're done hitting it all the way in, you'll hear the tone change when it starts to make contact with the steer tube. You can take the top part of the tool and unscrew it from the star nut that is now inside the steer tube. The top comes off. Your star nut is now installed.

remove tool from fork

Unscrew Tool from Set Star Nut

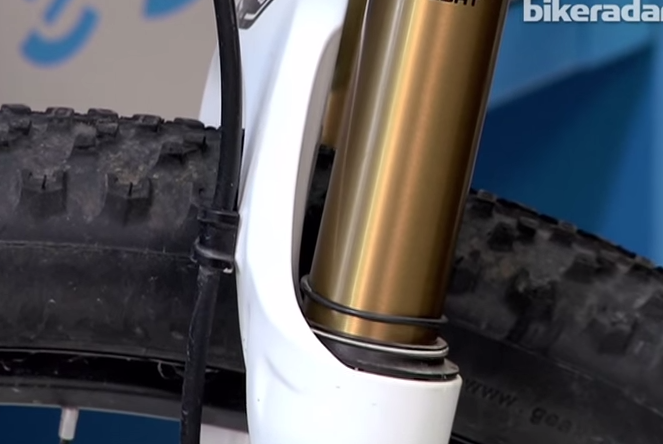
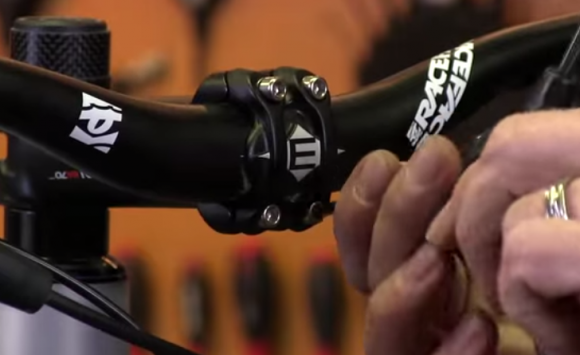
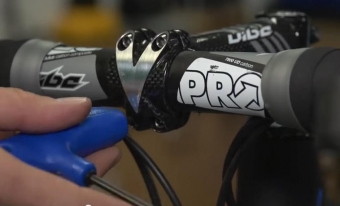
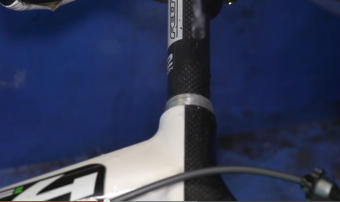
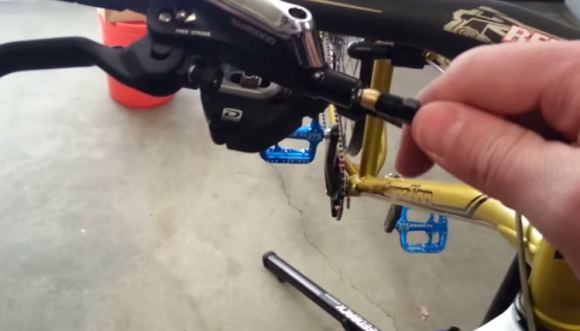
So now once the star nut is installed, you can reassemble the fork into the bicycle with the headset, and having the star nut properly installed will allow the bearings of the headset to fit tight together, the stem to fit on top, and everything to compress and give you smooth steering. That's how you install a star nut in a bicycle fork.

Maintenance for Shimano Saint Pedals

Company: 

Today, I’m going to show you how to look after your Shimano Saint pedals. You don’t need many tools and you just need a bit of grease, so there’s no reason not to get your hands dirty. Shimano pedal bearings are excellent quality. They don’t need a lot of looking after, but a bit of preventative maintenance is always a good idea. Older pedals use a tool to remove the collar, which removes the cartridge, which contains the bearings. We don’t need that anymore. All of the new pedals use spanner flats. The right pedal has a left hand thread. The left hand pedal just uses a regular thread. Crack the cartridge open, once it is undone you can remove the cartridge.

loosen pedal

Loosen Pedal

We just need to give it a good clean. You probably don’t need any degreaser for this. If it is really dirty give it a bit of a spray, but if you do make sure it is thoroughly dry before you reassemble it. A bit of degreaser inside the pedal body, and then find something to poke, like a rag, down inside just to give it a good clean and get rid of any dirt or grease.

apply degreaser to inside of pedal

Apply Degreaser to Inside of Pedal

Once it is clean, we just need to add some quality grease. We are quarter filling the pedal body. Then, when we screw the cartridge into place, the old grease will get pushed out through the cartridge and it gets replaced with the new, fresh grease. Finish the last bit off with the spanner. Shimano recommends a tightening torque on these Saint pedals of 10 newton meters. It’s important they’re tight otherwise the pedal bodies will drop off. Next up, you just need to clean the excess grease off. 

push grease out with cartridge

Push Grease Out with Cartridge

Shimano uses a great pin system. The pins load from the back rather then the top, so in the instance where the pin has been sheered off by impact we haven’t lost the means to remove it. Just unscrew them from the back. If there’s any mud compacted in the head of the pin then that needs to be removed. The pins have washers on them, which enables you to change the height of the pin. Before we replace the pin, just add a tiny drop of Loctite just to make sure we don’t lose it. Screw it in and the pin is replaced. You can change the height of pins by removing or added washers. What most riders aim to do is have taller pins around the edge, shorter ones in the middle, to give a concave feel. The one we just added, if we would like it to protrude a little more, simply remove the washer, and refit.

Before you fit any pedal to your bike, it’s really important that we apply some kind of anti-seize to the threads. Make sure the threads are clean that you are applying it to.

Apply anti-seize to pedal threads

Apply Anti Seize to Pedal Threads

This means when you try and remove your pedals at a later date, they won’t seize in and it will help prevent creaks as well. When you refit the pedals to your bike, remember that the left pedal has a left hand thread, and both pedals will tighten towards the front of the bike. Now you’re ready to hop on your bike and hit the trails!

How to Set Up Mountain Bike Suspension Fork

Suspension on mountain bikes is a really important area, and with most suspension forks and rear shocks being air sprung, knowing exactly how to get the air into your fork and how much air should be in your fork is important to understand. The first thing to do is understand how the air goes in. Generally speaking, you'll have an air cap which unscrews and you'll have an air pump usually with a dial.

air cap

Unscrew Air Cap

You need to know exactly how much air is going in, so you have a dial marked with psi. Screw the pump down on to the valve. That will show you how much air there is in the fork.

screw air pump on to valve

Screw Air Pump on to Valve

You can then start to put some air into your fork. How much air varies depending on how heavy you are, the type of riding you will be doing, and whether or not it's a fork or a rear shock. You can see that even adding that little bit of air in there caused the fork to extend. It's important that you have the fork with enough air in it that you're not losing travel because the fork is not opening out correctly.

fork extends when adding air

Use the O-ring to Measure How Much the Fork Extends

Traditionally, we have recommended people set forks up using a sag measurement, which involves pushing the o-ring to the bottom of the extension, having the rider sit on the bike, then get off of the bike. This will have caused the fork to drop down through its travel a tiny bit, and leave somewhere between a quarter and a third of the travel depending on suspension preference. Rather than trying to have people run rigid sag percentages, we're trying to look at how much of the available travel you're actually using. We want people to use the total travel they've got. There's no point in having it then only using a percentage of it on a given ride. It's a good idea to take the shock pump out with you. Don't be in a hurry to rigidly follow the pressure settings advised by the manufacturer, but be looking at how much travel you are using. If you're bottoming out your fork or the rear shock, every ride, over and over again, you know you're not running enough air. If you're consistently returning home with your o-ring only halfway up the stanchion, then you realize you could probably do with a little less air to maximize the amount of travel available to you. Again, it's down to how much feel you want.

With regards to tuning, most suspension forks come with some kind of adjustment be that just rebound or compression or both. Compression control is for how fast your fork compresses when it contacts an object. The rebound controls how fast your fork re-extends back to its static length after that object has been hit. Balancing out the two so both are comfortable for you is what you are looking for. Therefore, it is a good idea to make one adjustment at a time and then go ride your bike and get a feel for the affect that adjustment has made. Then make singular adjustments, one at a time, until you get closer and closer to what you consider the perfect ride. For more information about tuning your fork check out a local bike shop or the website of the manufacturer.

Adjust A Bike Hub DIY

Company: 

We've shown you how to replace an entire hub assembly that goes bad in your bicycle tire but there may come a time when little adjustment is all that's needed. One common mantra among bicycle toilers is "don't replace what first you can repair...or at least try to." Follow these tips to see if you can rebuild it, you have the technology - or the hub has seen its last good run.

Prep Steps

The first thing to do when adjusting a hub is to remove the two dust caps that are designed to keep dirt and road debris out of the hub assembly. If these covers don't exist on your bicycle, that's probably the main cause of your issues. Once the caps are removed you'll need to locate two special flat wrenches called cone wrenches, a 15mm one and 17mm one. Apply the 15mm wrench to the inside nut and the 17mm wrench to the outside nut and twist each counter-clockwise to loosen the assembly.

adjusting a bike hub

Special flat wrenches are needed to get the hub assembly loose

Find The Happy Medium

The hubs become lobsided for whatever reason but now that the connection is loosened they can be readjusted. Place each of the wrenches on a different side of the wheel and adjust the right and left sides until the assembly is level and just a hair loose so it rotates with ease. This may take some time to master and you might find yourself taking the bike all the way back apart once you've put it together once or twice or seven times but your labor costs are much less than a replacement hub.

bike hub adjustment

You may have to try and try again to get the hub centered just right but ridding a lobsided ride is worth it.

Put the tire back on the bike, reattach the brake cables and test out your DIY mastery...preferably at slow speeds at first.

How to Remove a Bike Stem

Company: 

I'm going to show you how to remove the stem from your bicycle. First thing you want to do is to make sure that your wheel has been removed so that when you disassemble the top cap and the spacers above the stem here, the fork does not fall out of the frame. Next step is undo the faceplate using the three-way wrench.

undo faceplate

Use Allen Wrench to Undo Faceplate

In this case, the bolts are four-millimeter hex or five-millimeter hex, and the three-way ranch has both for those at our fingertips. Now that I've loosened the pinch bolts on the steer tube, I can remove the top cap and once this is fully unscrewed, set down the tool, remove the top cap, and the stem is ready to come off.

remove top cap

Remove Top Cap

Once the stems removed, you can then remove the fork or the headset bearings for repair or replacement. I'm John Benson from Bicycle House and that is how you remove the stem from a bicycle.

Bicycle Wheel Cartridge Bearing Maintenance

Ian wants to know: the bearings in my Roval wheel feel rough when I spin them around. How do I replace the bearings or overhaul my hub?

The quick way to overhaul cartridge bearings is to work on them while they are in the hub. Start by removing either the axle or axle end caps to expose the bearings. On the rear hub, you will need to remove the freehub body as well. Use a knife to pry up the seal on the cartridge bearing.

remove cartridge bearing seal

Use a Knife to Remove Cartridge Bearing Seal

Use a rag to mop up as much of the grease as possible by turning the bearing or the wheel as you wipe down the bearings, then spray the bearing with degreaser to loosen up the remaining grease. Repeat the process as many times as needed to get all the gunk out.

spray with degreaser

Spray the Bearing with Degreaser to Clean

A quick spurt of WD-40 will get the water and the degreaser out of the bearing. Then use a rag to remove as much of the WD-40 as you can. Now repack the bearing with high quality, uncontaminated grease. If you live in a wet area pack a lot of grease to protect your bearings. For everyone else, a light coat will reduce bearing drag, while still offering proper lubrication.

repack with grease

Repack Clean Bearing with Grease

When it comes time to replace the bearings every hubs a little different. For hubs like this one from Easton, the axle has internal shoulders that require one bearing in the axle to be removed at the same time. To do this tap on the end of the axle with a soft faced hammer to push the assembly out of the hub. You can get by using a punch to remove the bearing, but if you aren't careful this can damage your hub. You also risk the possibility of punching out just the inner bearing race and leaving the outer race still inside the hub. For bearings that are removed independent of the axle, a bearing puller, like this one from Enduro, is the right tool for the job. To use the bearing puller insert the collet end into the bearing and expand the collet. 

bearing puller collet end

Insert Collet End of Bearing Puller into the Bearing

Thread in the slide hammer and then use it to pull out the bearing. To install the bearings correctly, use a drift that is made to press on the outer race of the bearing, or both the inner and outer race of the bearing. If your drift only presses on the inner race of the bearing, it can damage the bearing upon installation. Your drift should be driven by a threaded press rather than pounded in with a hammer for best results. While you can make your own threaded press with an old skewer or threaded axle, a press that is made to fit the inner diameter of your drift will keep the bearing going in straight, thereby avoiding damage to the bearing and hub. Reassemble the axle and caps, and free hub body, and you're all done.

DIY Change a Mountainbike Handlebar Stem

Company: 

For many consumers, once they buy their new bike they'll never think twice about the handlebar stem as it generally doesn't cause the rider any problems. There are times though when a bad spill will bend the stem or a person might just want to swap out for a longer or shorter model. Your ride can be more of a convenience with these tips on how to swap out your bike handlebar stems.

Set Up the Bike

The job of changing out the handlebar stems works best on a bike stand. If you have one set up your bike and first remove the front tire. Next take out the four bolts that connect the handlebar to the stem. It works better to remove each of the bolts just a little at a time to prevent any unneeded stress on them. Next the top cap is removed with a 5mm Allen wrench generally. Take out the bolt and the cap and set them somewhere safe before finally removing the two stem bolts that represent the last remnant of your old handlebar stem.

replacing a bike stem

Removing each bolt a little at a time will give you best results

Replacing the Stem

Take the old stem off and replace it with the new one. If your new handlebar stem is not as tall as the old one, you'll need to purchase an adapter to get it to the correct height. Next replace the top cap and bolt before applying some grip paste to the inside of the new stem that contacts the handlebars. Applying anti-seize paste to each of the 4 bolts is also a wise idea. The next step is to get the handlebars back in place and tighten the stem bolts one at a time. You'll need a torque wrench to tighten these to the proper levels before finally putting the front tire back on. Once the bike is back on the ground get the wheels and handlebars in line before making the final tightening run on all the bolts.

how to replace a bike stem

grip putty and anti-seizing compound represent an extra line of defense

Whether it's for style or functionality, replacing a bike handlebar stem is an easy job.

bike stem replacement

It's best to save all the final tightening for when the bike is back on the ground and you can check for play

DIY Fixing a Stuck Seat Post

As far as DIY bike replacements go, changing out a bike seat is pretty simple. You simply loosen up the nut keeping the seat on and pull it out for a more comfortable model. Unfortunately if it's been years since your seat has been removed or if you've never taken the bike out of storage for the better part of a decade the seat post might give you some issues when you try to replace it. A stuck seat post puts a wrench in your plans but it isn't a deal breaker if you follow these tips to get it removed.

First, Try Lube

If you're lucky a seized seat post will come free after a good dousing with a lubricant like WD-40. Sometimes the post just needs a little kick start to get moving but more often than not this is more of a pipe dream. Another step you can try is to pour boiling water down the seat post opening in an effort to expand the metal sheath and allow the seat to slide out. More often than not you'll have to try the boiling water method a multitude of times before it (hopefully) works. Another effort you can take is to apply a chill zone product to the seat post to cool the metal to try and get it to contract.

fixing a stuck bike post

Hopefully the boiling process will get your seat post out of hot water

Elbow Grease

The process of expanding and contracting the contacting metal of a stuck seat post will get you halfway there but the final removal is likely going to require some elbow grease. Work the seat back and forth with some effort to finally get it unseized. Once you've sweated through your t-shirt but have finally gotten the seat free, you don't want to emulate this workout again so apply a product called an anti-seize paste to the post to form a barrier that prevents getting stuck in the future.

getting a bike seat unstuck

The anti-seizing paste will make this tutorial a one-watcher

How To Patch A Bike Tube

We've shown you how to replace the tube in your bicycle tire, but there also comes a time when you might want to just patch up the hole. Generally bike tubes aren't the most expensive pieces on your cycle but there may come a time when a patch is suffice.

Grab Your Tools

Ideally you'll be able to ride the bike with the flat tire back to your house when an emergency arises. If you're going to pack a patch kit and pump with you on your ride you might as well bring a spare tube. Either way the job of fixing a tube requires a patch kit, a pump, a tire lever, and possibly a bowl of water.

Fixing a punctured bike tube

Punctured tubes definitely have you feeling kind of flat

Remove the Tire and Find the Puncture

Use your tire lever to take the bike tube off the rim and out of the wheel. If it is completely flat use the bike tube to pump it up. Next place the punctured bike tube that is now blown up with air into the bowl of water and look for any bubbles that emanate. Bubbles signify a sign of a puncture and you'll need to mark this area off as the spot to fix.

Fixing a flat bike tube

Finally finding the hole in your tube is cause for a little bubbly

Fix the Hole

Once you've found the hole, it's time to fix it. Take a small piece of sandpaper that comes with the repair kit and wipe down the area around where the patch will go. Next take the included glue and cover the area around the hole pretty religiously. Next apply the patch and let it set for a few minutes. Finally install the tube back in the bike and pump it up to the recommended levels.

Patching a bicycle tube

Make sure the patch is on securely to prevent air from sneaking out

Of course fixing a bike tube on the run requires all these tools. If you do find yourself in an emergency out on the road with only nature as your ally, you can pack the inside of your tire with leaves as a MacGyver approved method of at least riding back into town. Either that or you can ride a wheelie the entire way home or take the preferred method and call somebody for a ride.

Cut and Resize Shimano Disc Brake Hose

Today, we are going to be cutting the hose. As you can see I installed this hose and it's huge. You can do this off the bike or on the bike, however you like. I do it on, because I can see exactly how long I need, so I'll show you the steps. First, you've got to pull off this little cap and there's going to be a screw.

Brake cap

Pull Off Cap on Brake

I can't do it one handed, so I'll take it off and show you what's under that and what we need to do to cut this, measure it, get the length you need. Okay, so now it just pulls off. Slide that off, you see this screw, we're going to undo this and then I'll show you what's under that. Now, this is obviously full of brake fluid, so brake fluid probably will go everywhere. If you want, you can drain it. We're doing this from home, so brake fluid is going to leak out. I just put a rag over it so the rag catches it. Rinse out the rag, throw it in the washing machine, it's easy, then you bleed the brakes after. To bleed it after make sure you've got some Shimano brake mineral oil. 

You might have some better luck than I did, but when I undid that, this thing was a beast to come out, so here's this screw. It was all in there, that came out, unscrewed that. You can see now that thing just didn't want to come out. Got my pink rag there to catch the mineral oil, so this olive we will have to install that later.

Olive

Olive on Brake Hose

You should hopefully have a new set. It either comes with it or go to buy a set direct, a couple bucks. I'll show you how to put that back on, but we're gonna cut it out to where you want so you want to measure it to how you want it. Measure to exactly where you want and then you're going to cut it with some cutters. Cut it where we want it, reinstall our parts, and put that back on and we'll resume at that point. The cable has been cut, now put the new olive piece back on. So what I have is these nice little pieces. You're gonna take this, you need to hammer it in. These are nice because you can just put them like so and you know clamp it down, give you something to hold onto when you put this in there. So I'm gonna do that right now, sorry that's a little out of focus, get that done and we will resume. So now, you can remove this, kept that all clean for me, that's on, slide this stuff up, there's the olive, just pushed it all the way to the end there.

hose with new parts

Reinsert Hose with New Parts

Now we're gonna get my wrench, an eight-millimeter, tighten this thing. Remember it was snug when you undid yours, so I'm gonna get this thing pretty snug, and then push this back on and then we're going to bleed the brakes. That will be a new video so that's how you do it, easy as that.