Today, I’m going to show you how to look after your Shimano Saint pedals. You don’t need many tools and you just need a bit of grease, so there’s no reason not to get your hands dirty. Shimano pedal bearings are excellent quality. They don’t need a lot of looking after, but a bit of preventative maintenance is always a good idea. Older pedals use a tool to remove the collar, which removes the cartridge, which contains the bearings. We don’t need that anymore. All of the new pedals use spanner flats. The right pedal has a left hand thread. The left hand pedal just uses a regular thread. Crack the cartridge open, once it is undone you can remove the cartridge.
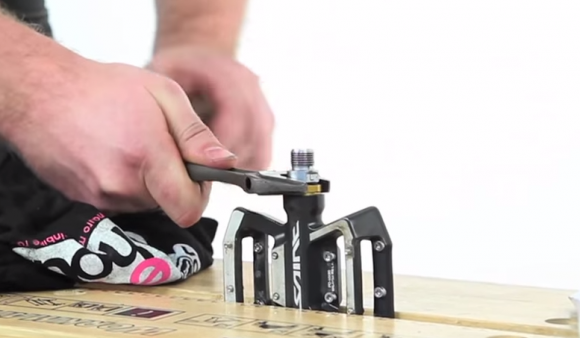
Loosen Pedal
We just need to give it a good clean. You probably don’t need any degreaser for this. If it is really dirty give it a bit of a spray, but if you do make sure it is thoroughly dry before you reassemble it. A bit of degreaser inside the pedal body, and then find something to poke, like a rag, down inside just to give it a good clean and get rid of any dirt or grease.
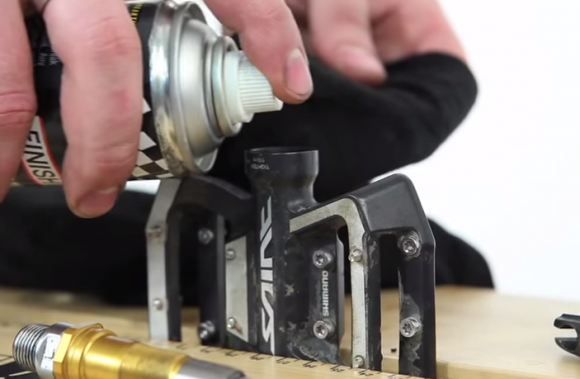
Apply Degreaser to Inside of Pedal
Once it is clean, we just need to add some quality grease. We are quarter filling the pedal body. Then, when we screw the cartridge into place, the old grease will get pushed out through the cartridge and it gets replaced with the new, fresh grease. Finish the last bit off with the spanner. Shimano recommends a tightening torque on these Saint pedals of 10 newton meters. It’s important they’re tight otherwise the pedal bodies will drop off. Next up, you just need to clean the excess grease off.
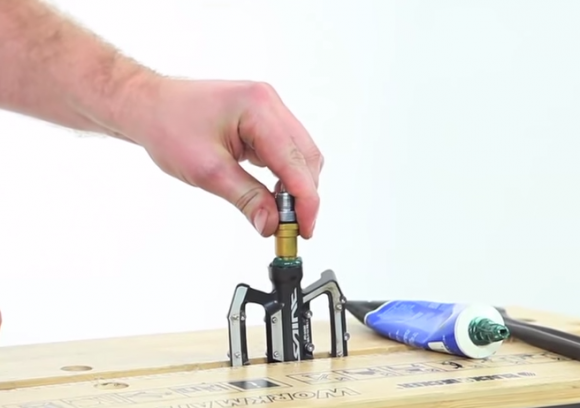
Push Grease Out with Cartridge
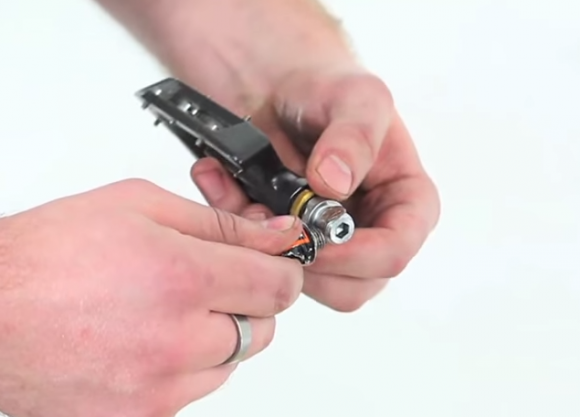
Shimano uses a great pin system. The pins load from the back rather then the top, so in the instance where the pin has been sheered off by impact we haven’t lost the means to remove it. Just unscrew them from the back. If there’s any mud compacted in the head of the pin then that needs to be removed. The pins have washers on them, which enables you to change the height of the pin. Before we replace the pin, just add a tiny drop of Loctite just to make sure we don’t lose it. Screw it in and the pin is replaced. You can change the height of pins by removing or added washers. What most riders aim to do is have taller pins around the edge, shorter ones in the middle, to give a concave feel. The one we just added, if we would like it to protrude a little more, simply remove the washer, and refit.
Before you fit any pedal to your bike, it’s really important that we apply some kind of anti-seize to the threads. Make sure the threads are clean that you are applying it to.
Apply Anti Seize to Pedal Threads
This means when you try and remove your pedals at a later date, they won’t seize in and it will help prevent creaks as well. When you refit the pedals to your bike, remember that the left pedal has a left hand thread, and both pedals will tighten towards the front of the bike. Now you’re ready to hop on your bike and hit the trails!