DIY How to Tighten Loose Water Bottle Bosses/Rive-nuts

“I have an old CAAD 6 road frame and the lower water bottle boss on the down tube has come loose. Do you have any tips to fix it?”

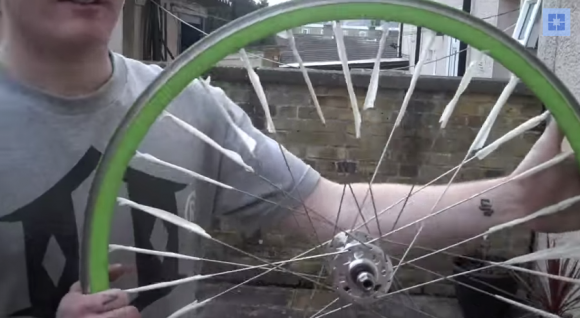
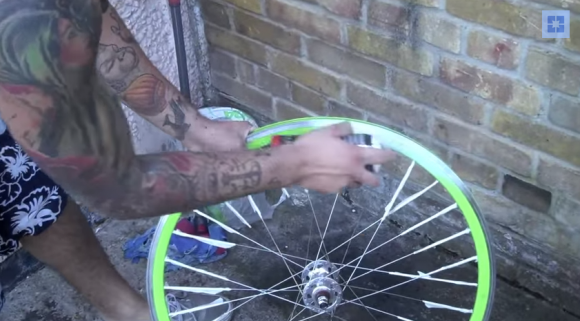
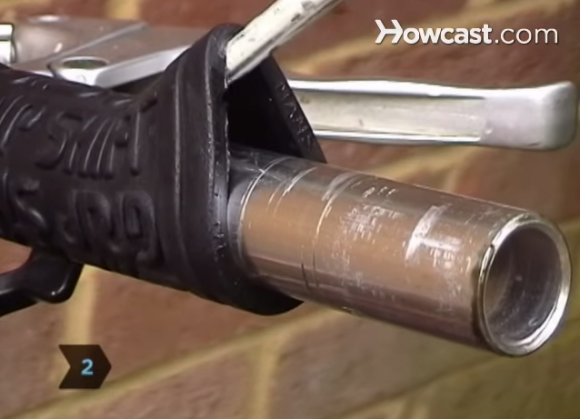
Water bottle bosses are also known as rive-nuts, and they are a combination of a rivet and a nut. They tend to come loose when water bottles contact the head of the water bottle cage bolt when returning the bottle to the cage. This problem can be partially prevented by using button head water bottle bolts that sit lower in the cage to avoid impacts.

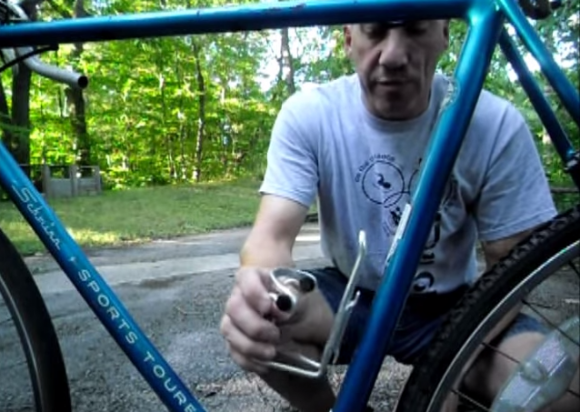
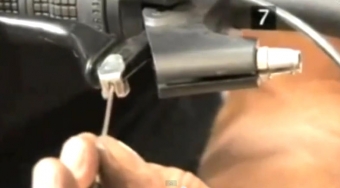
Since it’s too late for a preventative solution in this case, I have a little trick that you can use at home to tighten down that rive-nut. The tools you’ll need for the job consist of a long m5 bolt (preferable a socket head, and allen wrench, an m6 nut, and a 10mm open end wrench.

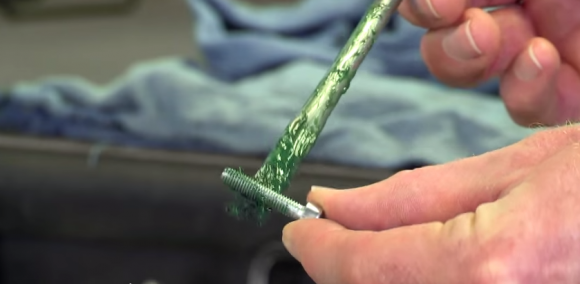
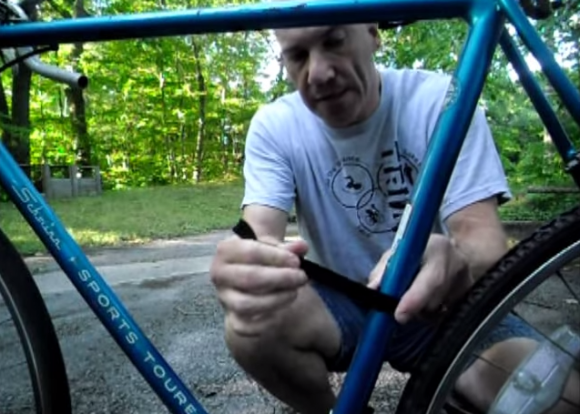
Put a Ton of Grease on the Bolt

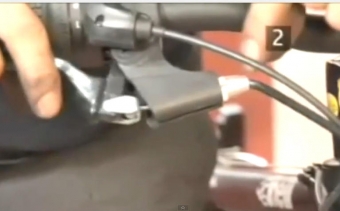
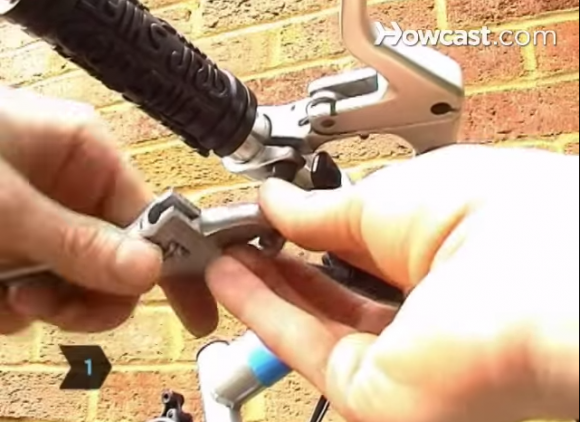
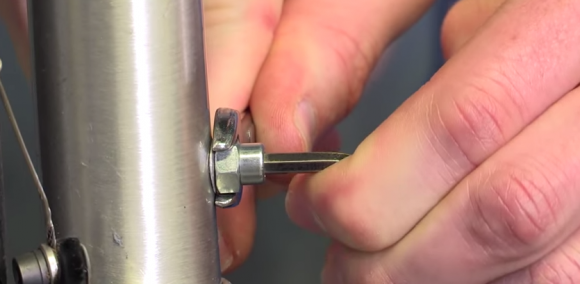
Grease the bolt liberally so it will thread into the rive-nut with as little resistance as possible. Slide the oversized m6 nut over the m5 bolt, and then thread the assembly into the rive-nut until it is finger tight. Use the 10mm open end wrench to hold the nut in place as you tighten the bolt. The nut will press down on the top of the loose rive-nut as the bolt tightens, and the lower side of the rive-nut is crushed on to the inner wall of the tube. You will feel the rive-nut clamp down as you tighten the bolt. Just be careful not to over tighten the bolt and strip out the rive-nut.

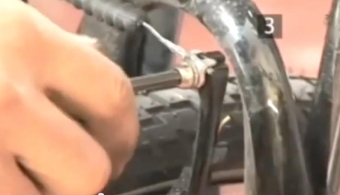
To check your work, move back the bolt and wiggle it to see if the rive-nut moves in the frame. If this doesn’t work take your bike to a shop and have that rive-nut drilled out and replaced with a dedicated tool.

DIY How to Spray Paint Your Bicycle Wheel Rims

Today, I’m going to show you how to paint your rims. You’ll need a roll of masking tape, a 15mm socket set, and a plastic tire lever.

Step 1, take the 15mm socket set and take off your wheels. Now move the rest of your bike into a safe location so no spray paint will get on your bike.

Step 2, undo your bicycle valve and release the air from your tire tube until it is completely deflated. Do this for the other wheel as well.

Step 3, use your tire lever to take your tire off.

Step 4, take the tire and inner tubes off. Put the wheels off to the side, and keep the tires in a safe place.

Step 5, tape up the spokes using the masking tape. All the masking tape is carefully wrapped around each spoke up to the rim. Now it’s time for the spray paint.

Protect Your Spokes from Paint with Masking Tape

Step 6, use long strokes with the spray can to cover the rim with paint. Do this to both sides of both rims.

Paint the Rims

Step 7, after putting a few coats of paint on the rims, leave them to dry.

Step 8, once dry, peel off all the masking tape on your rim spokes.

Step 9, install your inner tube and tire, and your wheel is good to go.

Step 10, ride that sexy looking bike around town.

DIY Mount a Bottle Cage on a Frame with No Mounting Screws or Braze-Ons

Company: 

I’m going to show you how to mount a bottle cage on a bike that doesn’t have mounts or doesn’t have mounts where you want to put the bottle cage. You want to get a bottle cage that has little tabs up at the top and on the bottom of the back side because we’re going to use those to mount the cage. Get a bottle about the size that you want to use and figure out about where you want it to be placed. 

Find Your Ideal Location

When you figure out where you want the bottle mounted, pull off a piece of electrical tape about 10 inches long, and wrap the tape around the frame about where the top tab is going to be sitting. We don’t want the tabs or the clamps that we will use to scratch the paint on the frame. Wrap the tape around the frame 3 or 4 times. Then pull off another piece, about 10 inches, and wrap it around the frame where the bottom tab will sit. 

Wrap Electrical Tape Around Frame

Now, I’ve got these hose clamps which are slightly bigger then the seat tube of the frame is going to be. Put the first clamp on the frame and tighten it a bit to get it started. Not all the way. Then go ahead and put the second one on and close it most of the way. 

Tighten Clamps Around Tabs

Take the bottle cage, get it in the position where you want it to be, put the tabs against the tape, the clamps into place, and begin tightening the bottom clamp first. Don’t tighten it all the way, but enough to hold the cage in place. Get the cage into the exact position you want and begin to tighten the top clamp. Once you are sure the cage is in the right position, tighten both clamps as tight as needed to stop the cage from moving. Be aware of the frame material when deciding how tight the clamps will be. 

How to Set Up a Fox Rear Shock on a Bike

Company: 

Today we're going to walk through the basic steps to get you set up with the Fox RP 23 rear shock. The following few steps are essential so that you can get the best performance from the rear suspension on your new bike. 

The first step is to set up your rear suspension with the correct amount of sag. You'll need to measure the length of the shaft so that you'll know the total stroke length of the shock. Make sure that the pro pedal lever is in the open position, away from the air valve. 

Open Postion on Lever

There are a few differences between the old RP 23 and this newer RP 23 with adaptive logic pro pedal. The key element for the setup is that you realize that the black dial needs to be adjusted so that the 0 lines up with the blue lever and that the blue lever is flipped away from the air valve. This way, the rear shock is as lightly damp as possible and the rear suspension can sag accurately while you fine tune your air adjustments. 

To start, push the rubber o-ring against the lip of the air can seal and with riding gear on, mount the bike and settle into a normal riding position with your hands on the bars. It's not necessary to bounce up and down to get your sag position and then try to dismount as smoothly as possible without bouncing. The o ring will have recorded your sag position and you can measure it from the o-ring to the lip of the air seal. This measurement should be about 25 to 30 percent of the total stroke length. Of course this depends a bit on the suspension design and personal preferences. You can add or remove air with a shock pump and follow the steps again until you get your sag setting within that 25 to 30 percent range. 

Measure Movement of O Ring to Get Sag

Measure Movement of O Ring to Find Sag

Once you get your sag adjusted, you can adjust the rebound damping. Look for the red knob underneath the pro pedal lever. It adjusts the rate at which the shock returns to full length after compression. Turn it clockwise for slow rebound or counterclockwise for faster rebound. The rebound adjustment should be set to personal feel and riding style, but a good rule of thumb is to have the rebound as fast as possible without your suspension kicking back. Try riding off a curb as you fine-tune the rebound. Your rear suspension should absorb the drop easily without feeling bouncy afterwards. 

Adjust Rebound Damping with Knob

The pro pedal lever can be switched on the fly to reduce suspension movement. With adaptive logic pro pedal, the firm setting is called climb mode and it's a bit firmer than the number three setting on the older RP 23 shock. Use this when you attack a steep climb or on fast sections of trail when you must hammer down. The numbers on the black dial only affect the shock's performance when the lever is flipped away from the air valve. In this position, you have three available settings. As we said before, 0 is opened with no low-speed compression damping and is best for descending so you have the most active level of travel for comfort and control. Number one and number two have increasing levels of low-speed compression damping to offer a progressive level of pedal platform if you prefer a slightly stiffer shock. The various settings on the Fox RP 23 can be adjusted to suit personal preference, riding style, and different types of terrain. 

DIY Remove Bike Braze Ons and Bosses from Bike Frame

This is a video on how to remove various bosses and mounts on a road bike frame. This is an old road bike from the 70s, and I thought I’d make a video on how to easily remove this stuff if you are converting your bike to a fixed gear and don’t want any brakes or derailleur mounts, just want to make your bike as clean as possible. It helps the look of the bike when you’re all finished, and it can be done fairly simply with only a couple tools. You can always use more industrial tools for the project, but a couple of common tools will do the trick. I actually think you can do a better job with common tools, since you will have more control and won’t have to dig into the frame. 

The tools I use for this are a hacksaw, a metal file, and some fine grit sandpaper if you have it. I’m using emery paper, it comes in a roll. You’ll start with the hack saw first. When using the hacksaw, try not to get too close to the frame, you’ll want to leave a bit of meat that you can file off when you’re done cutting. 

Keep the Hacksaw Slightly Above the Frame

You can see after cutting that we’re not done yet, there’s some left, and we’ll take care of that with the file. Using the file can take some time so be patient. When you are filing, you don’t want to dig the corner of the file into any nearby metal. Keep the file nice and flat, though you can move it to fit the profile of the frame tube. If you’re not comfortable with that, you can get some masking tape and place it on either side, so if you hit the tape you’ll feel it and it will prevent you from damaging the surrounding steel. 

Keep the File Straight

Keep the File Straight to Stop from Digging into the Frame

Now you can see the difference between the braze on material and the steel. The braze on files very fast, so as you get close to the steel, slow down a little bit. You will know you are done filing once all the paint around the braze on has is removed, otherwise you will have a high point on the frame. 

Smooth It Out with Sandpaper

Once the filing portion is done, you can still feel that the frame is a bit rough, almost like a grain in the steel that you created. At this point, you can use sandpaper or emery cloth to smooth out the course area on the frame. You can typically feel with your hand when the sandpaper isn’t working anymore, and then you are done!

Finished Product

Finished Product is Smooth as Butter

How to Remove Decals from a Surly Bike

Here is an example of how to get Surly graphics off of the frames. 

Surly uses traditional wet decals but doesn’t clear coat over them, so this method works perfectly. It should also work with any bikes that use similar decals. 

For this project, you just need some gorilla tape. If you don’t have gorilla tape, traditional duct tape should also work, however Gorilla tape is stickier.  

Make Sure the Tape Fully Covers the Decal, Grip It, and Rip It

Take a strip, stick it right over the graphics, rub it down on the sticker, and peel it off. That’s it! Now you have a fresh looking bike that is a step closer to being ready for painting or decoration.

Voila!


How to Replace Internally Routed Cables on a Bike

Do you have any tips on how to replace internally routed cables? I always dread changing mine.

Nearly every mechanic has cursed the widespread adoption of internally routed cables for the extra time and hassle that it creates every time that you want to replace a cable, but there are ways to reduce this hassle to a minimum.

Today I’ll show a few different basic ways that apply to all frames with internally routed cables. The most important thing to remember is to avoid rushing into it. Oftentimes, once you remove the inner wire or the cable housing, you’ve lost your opportunity for a smooth installation, so stop and think ahead before you start. Make sure you have all of the right tool sand parts you need to get the job done right. That includes good lighting and also a small flashlight to look inside of the frame if you have to.

The most commonly used part for performing an installation is thin tubing that you can slide over your old cable. Cut the tubing to a length that will extend the full distance of the internal portion of the cable’s length, plus a few extra inches at each end. Once this tubing is installed, tape it down to the frame so it doesn’t pull out. Remove the old cable and slide the new cable through the tubing. If you don’t have some of this tubing, you can salvage it from old derailleur housing. Just cut the end of the housing length wise and use pliers to rip the wire out of the housing. The inner sheath is what you need.

Tape Down the Cable

In the cases where you’ve pulled the cable out of the frame before first chasing it with the tubing, you’ll need a different solution. My go to is to use a hook tool, which I make out of an old spoke. Use a flashlight and the hook tool to pull the cable out of the frame and you’re all done.

Fish the Wire out of the Frame with a Hook Tool

How to Mount a GoPro Camera on Your Bicycle Frame

The GoPro cameras that typically mount on a person's head and capture their every moment throughout the day are all the rage lately. People tape themselves from their own point of view doing everything from the mundane like filing their taxes to the exotic like...well we won't go there. A great opportunity well beyond the scope of a POV video of a person doing their laundry is to mount the camera on your bicycle. What better way to rewind and see exactly why you wiped out than reliving from a bird's eye view over again. It's best to mount a GoPro camera on your bike immediately lest you encounter that group of Sasquatch playing hackey-sack again and your friends still won't believe you.

GoPro bicycle mount

A GoPro Camera is a great way to recapture a great ride...or a bad one

Attach the Mount to the Handlebars

The GoPro mount kit should fit on your bicycle snugly. Simply unscrew the locking part at the bottom of the mount and wrap it around the handlebar stem near the middle of the bike. Tighten the screw and install the 3-way pivot arm into the top of the mount by tightening the screw that lies in the middle. Next insert the camera into the top of the mount and insert the key through the holes, tightening it so the GoPro is secure.

You can flip the camera around so that it is either facing you or the terrain ahead and also experiment with attaching the camera on the seat post pointing both forwards and backward to capture different angles of your ride.

Replacing Bike Brake Cables How To

Company: 

Most bicyclers are quite familiar with changing their brake pads as they're one of the first things that start to go after excessive riding. Over the course of a life though, having to swap out the brake cables can be either hit or miss. The inside of the cables can attract dirt and residue or the cables can get clipped and need replacing. Either way the project is one that can be undertaken in relatively little time and one which also helps get the user more familiar with the workings of their cycle.

replace brake cables

You might luck out and never have to change the cables or it could be a multiple-time job. You never know

Take Apart the Old Brake Cable

The first thing you need to do when replacing a brake cable is to get rid of the old one. There is a pinch bolt located near the brake pad that can be unscrewed to free up the cable from one end. The other end that needs to be removed is near the brake hand lever. There's usually a screw or an adjuster on the outside of the lever that can be unscrewed so the cable can be pulled out. Once both of these devices are free, pull out the old cable and set it aside.

changing out bike brake cables

Taking apart the old cables is the easy part. In fact it happens on accident during some rides.

Installing New Cable

Using the old piece of cable that was just removed, lay the new piece of tubing down next to it to get the length and snip the new tube. Place a ferule on the end of the tube and slide a piece of cable through the hole. Leave enough cable sticking out on both ends of the tube so that it can be tightened to both the brake pad and the hand lever. Now reconnect the brake including all the pieces that were removed from the old piece, typically at least consisting of a black rubber casing that separates the brakes and protects dirt from seeping into the cable connection.

Swapping brake cables

If you remember how the old cables came out it will make putting the new one in that much easier

Finally tighten all the screws and do the final checks. Make sure the brakes touch and do any final tightening that may be needed. Finally cut the excess cable and tape the ends up if desired. You should now have successfully changed the brake cables in your back in about 1/8 of the time it would have taken to swap out an automobile's brakes...and for a fraction of the price as well.

How to Remove Bike Handlebar Grips

How to Remove Bike Handlebar Grips.

Remove your handlebar grips in just a few minutes with these tips. You will need flathead screwdriver, spray lubricant, rubbing alcohol, and an air compressor. A utility knife is optional.

Step 1. Remove the handlebar plugs first. Then loosen the brake and shift levers and slide them toward the middle of the bar. If you are not going to reuse the grip, cut it off with a utility knife.

Move Shift and Brake Levers Out of the Way

Step 2. Slide the screwdriver between the end of the grip and the handlebar and lift up the grip. Then squirt a liberal amount of spray lubricant or rubbing alcohol into the space between.

Use a Screwdriver to Free Space Under Grip

Step 3. Wiggle and pull the grip out and away from the handlebar. Use an air compressor under the grip if you're unable to get it off.

Wiggle It Off

Step 4. Install your new grips. Slide them over the handlebars the same way you slid the old ones off.