There's a very small accessory on most bikes that is often overlooked but can be very important - the kickstand. Us cyclers often don't realize how handy the little pieces are until we have one that's wobbly or non-existent. A bicycle without a kickstand could cause scratching and damage to the frame or worse could slide off what it's leaning against and have the Pee Wee Herman domino effect to a nice lineup of fellow cycler's steeds. Even if you don't always use a kickstand, they're handy to have just in case and can be installed in an instant.
Find the Position
When installing the kickstand the most important thing to aim for is clearance both ways, when it is up and down. Set the bottom part of the kickstand in an approximate area on the frame where you think it should go and engage and disengage it. You want to make sure the kickstand will be away from the tire when up but still be firmly enough on the ground to support the bike at a somewhat upright angle.
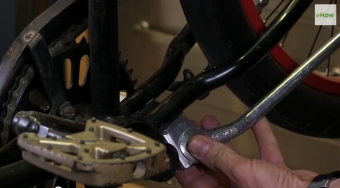
The frame slot for a kickstand is open to accomodate the various sized products on the market
Tighten Up the Kickstand
Once the bottom portion of the kickstand is in place, install the top unit with the bolt attached. Thread the bolt tight with your fingers then grab a boxend wrench (typically 14mm) to finish the job. You'll want the kickstand good and tight because they're used frequently and many types with strong force from the actual kicking action.
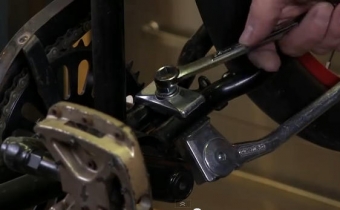
Once the stand is in place you can tighten it up securely
Your first kickstand installation might be a touch and go process but the good thing about learning this bike trade is that once you've done one, you can do them all.